
Mini Mummy Pizzas are about to become your new Halloween obsession! You know that feeling when you’re scrambling for last-minute party appetizers that actually look impressive? I’ve been there countless times, standing in my kitchen at 6 PM wondering how to create something memorable without spending hours on prep.
Hey there! I’m Emeli from FoodFansy, and as someone who’s navigated the chaos of hosting everything from kids’ Halloween parties to adult costume gatherings, I’ve learned that the best party foods are simple, fun, and absolutely delicious. These Mini Mummy Pizzas deliver on all three fronts they’re ready in just 15 minutes, require only four ingredients, and they’ll have your guests snapping photos before they even take a bite.
My love affair with creative appetizers started during my culinary training, where I learned that presentation is just as important as flavor. But it was actually my niece’s Halloween party that inspired this particular recipe. She wanted something “spooky but yummy,” and after experimenting with various approaches, these adorable mummy faces became an instant hit.
In this post, I’ll walk you through everything you need to know: why this recipe works so brilliantly, how to choose the perfect ingredients, step-by-step instructions with pro tips, creative variations to suit any crowd, and answers to the most common questions I get about these little Halloween gems.
Why This Mini Mummy Pizza Recipe Works
These Mini Mummy Pizzas hit the sweet spot of convenience, creativity, and crowd-pleasing flavor that every home cook dreams of. Here’s what makes them absolutely perfect:
• Uses everyday ingredients you likely already have – English muffins, pizza sauce, string cheese, and olives are pantry and fridge staples • Ready in under 15 minutes from start to finish – perfect for busy weeknights or when guests arrive earlier than expected
• Kid-friendly assembly that doubles as entertainment – children love helping create the “bandage” effect with the cheese strips • Naturally portion-controlled – each English muffin half is the perfect appetizer size • Impressive visual impact with minimal effort – guests will think you spent way more time on these than you actually did
Choosing the Right Ingredients for Mini Mummy Pizzas
The beauty of Mini Mummy Pizzas lies in their simplicity, but selecting quality ingredients makes all the difference in the final result.
Best Base Options for This Recipe
English muffins are my top choice because their nooks and crannies hold the sauce perfectly, and they toast to an ideal crispy-chewy texture. The slightly rough surface helps the cheese strips adhere better, creating more realistic “bandage” wrapping. Look for whole wheat or sourdough varieties for extra flavor depth.
Buying Tips for Perfect Results
When shopping for string cheese, choose the type that pulls apart easily into long, thin strips avoid the waxy varieties that don’t separate well. For olives, opt for medium-sized black olives that are already sliced; they should be uniform in size for consistent “eyes.” Your pizza sauce should be on the thicker side to prevent sogginess.
Smart Substitutions
Can’t find English muffins? Bagel halves work wonderfully, though you might need slightly more cheese. No string cheese? Mozzarella sticks can be carefully separated, or you can slice regular mozzarella into thin strips (though it won’t have quite the same stretchy effect). For dairy-free versions, try plant-based mozzarella shreds arranged in strip patterns.
Ingredients & Prep for Mini Mummy Pizzas
Essential Base Preparation
Start with 2 English muffins, split in half to create 4 pizza bases. Lightly toasting them beforehand isn’t just optional it’s my secret weapon for preventing soggy bottoms. Just 1-2 minutes in the toaster gives you that perfect foundation that holds up to the sauce and cheese.
The Mummy Wrapping Magic
The star of this show is string cheese, and here’s where technique matters. Pull your 2-3 string cheese sticks apart slowly and deliberately you want long, irregular strips that look like ancient bandages. Don’t worry about perfection; mummies should look a bit disheveled! Save the shorter pieces; they’re perfect for smaller details.
Flavor Foundation
Use ¼ cup of your favorite pizza sauce, but here’s a pro tip from my restaurant days: add a pinch of Italian seasoning or garlic powder to store-bought sauce for that homemade taste. The sauce should be thick enough to spread without running off the muffin edges.
Step-by-Step Cooking Instructions for Mini Mummy Pizzas
Pre-Cooking Prep for Mini Mummy Pizzas
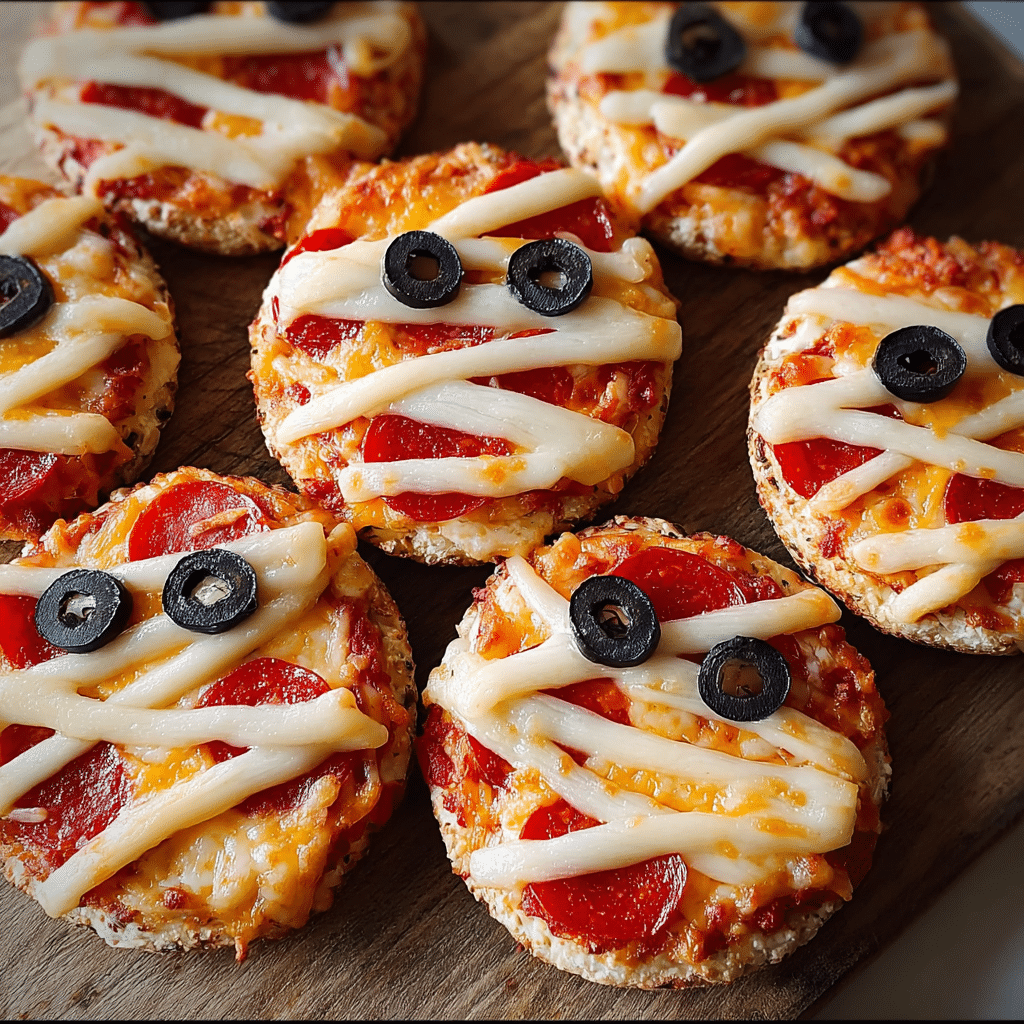
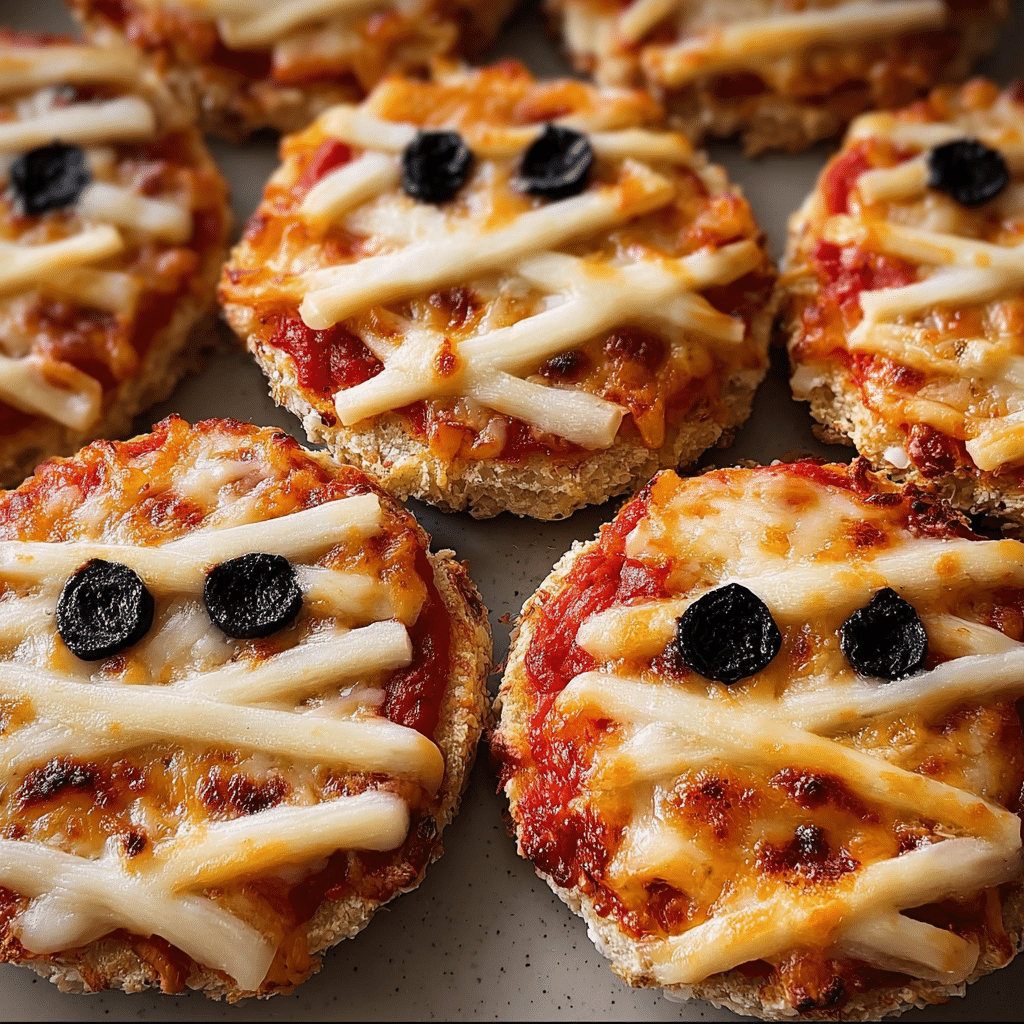
Preheat your oven to 220°C/430°F (200°C fan-forced). Split your English muffins in half and give them a light toast this takes just 1-2 minutes and prevents soggy pizza bottoms. While they’re toasting, pull apart your string cheese into long, irregular strips. Think ancient, weathered bandages rather than perfect ribbons.
Assembly Method for Mini Mummy Pizzas
Spread each muffin half with about 1 tablespoon of pizza sauce, leaving a small gap near the top where the “face” will be. Now comes the fun part: drape your cheese strips across the sauce in a crisscross pattern, leaving gaps between strips to mimic wrapped bandages. Make sure to leave that eye area uncovered this is crucial for the mummy effect.
Baking Process for Mini Mummy Pizzas
Place your assembled pizzas on a baking sheet and bake for 5-8 minutes, just until the cheese melts and starts to get slightly golden. Keep a close eye on them overcooked cheese can become tough and lose its stretchy, bandage-like appearance.
Final Touches for Mini Mummy Pizzas
Remove from oven and immediately place two olive slices in the uncovered gap for the eyes. The residual heat will warm the olives slightly, and they’ll settle perfectly into their “eye socket” positions. Let them cool for 2-3 minutes before serving the cheese will be molten hot!
Pro Tips for Perfect Mini Mummy Pizzas
Avoiding Common Mishaps with Mini Mummy Pizzas
The biggest mistake I see is overloading with sauce, which makes the muffins soggy and the cheese slide around. Use a light hand you want just enough sauce to add flavor without overwhelming the base. Also, don’t skip the pre-toasting step; those extra 2 minutes make the difference between crispy and soggy bottoms.
Essential Tool Recommendations
A small offset spatula makes spreading sauce evenly a breeze, while kitchen shears are perfect for trimming cheese strips to the right length. I always keep a clean kitchen towel nearby for wiping fingers between cheese-pulling sessions trust me, your hands will thank you.
Storage & Make-Ahead Magic
These are best served fresh, but you can prep the bases up to 4 hours ahead just cover with plastic wrap and refrigerate. For parties, I often set up an assembly station where guests can make their own mummies. It’s interactive entertainment that doubles as appetizer prep!
Flavor Variations for Mini Mummy Pizzas
Spicy Halloween Twist
Add a few drops of hot sauce to your pizza sauce, or sprinkle red pepper flakes under the cheese for a “bloody mummy” effect. For kids, try a tiny drizzle of sriracha mayo instead it adds heat without overwhelming young palates.
Dietary-Friendly Options
For gluten-free versions, use gluten-free English muffins or even large portobello mushroom caps as bases. Vegan mummies work beautifully with plant-based mozzarella shreds arranged in strips, though they won’t pull apart quite like string cheese.
Global Flavor Adventures
Try pesto instead of pizza sauce for an Italian twist, or use salsa and pepper jack cheese for Mexican mummies. My personal favorite is using garlic-herb cream cheese as the base it creates an incredibly rich, savory foundation that pairs beautifully with the mild mozzarella.
| Variation | Base Sauce | Cheese Option | Special Addition |
|---|---|---|---|
| Classic | Pizza sauce | String cheese | Black olives |
| Spicy | Hot pizza sauce | Pepper jack strips | Red pepper flakes |
| Pesto Italian | Basil pesto | Fresh mozzarella strips | Cherry tomato halves |
| Mexican | Salsa | Monterey jack strips | Jalapeño slices |
| Garlic Herb | Garlic-herb cream cheese | String cheese | Fresh herbs |
| BBQ | BBQ sauce | Smoked mozzarella | Caramelized onions |
Serving Suggestions for Mini Mummy Pizzas
Arrange your Mini Mummy Pizzas on a dark platter or black slate board for maximum spooky impact the contrast makes the “bandages” pop dramatically. Garnish the platter with fresh herbs like rosemary sprigs (they look like creepy branches) or scatter some cherry tomatoes around for “blood drops.”
For beverages, these pair surprisingly well with light, crisp drinks that don’t compete with the rich cheese. Try serving alongside sparkling apple cider, light beer, or even a crisp white wine like Pinot Grigio for adult gatherings. For kids’ parties, orange-colored drinks in spooky cups complete the Halloween theme perfectly.
Consider serving these as part of a larger Halloween spread with other finger foods like “spider” deviled eggs, “dirt” brownies, or a seasonal salad to balance the richness.
FAQs About Mini Mummy Pizzas
Can I make Mini Mummy Pizzas ahead of time? You can prep the components several hours in advance, but I don’t recommend fully assembling them more than 30 minutes before baking. The moisture from the sauce can make the muffins soggy if they sit too long.
What if my string cheese won’t pull apart properly? Make sure your cheese is at room temperature cold cheese breaks rather than pulls. If you’re still having trouble, try a different brand or slice mozzarella into thin strips as an alternative.
Are Mini Mummy Pizzas safe for young children? Absolutely! They’re actually perfect for kids since they’re bite-sized and made with familiar flavors. Just make sure to let them cool adequately melted cheese retains heat longer than you’d expect.
Can I freeze these for later? While possible, I don’t recommend it. The texture of both the English muffins and cheese changes significantly after freezing. These are so quick to make that fresh preparation is always best.
Help! My mummies look more like abstract art than faces. Don’t worry imperfect is perfect when it comes to mummies! The key is leaving clear space for the olive eyes. Even wonky cheese placement looks authentically “ancient bandage” to guests.
Conclusion
There you have it your complete guide to creating Mini Mummy Pizzas that’ll be the talk of any Halloween gathering! These little gems prove that the most impressive party foods are often the simplest ones, combining everyday ingredients in creative ways that surprise and delight.
Fire up your oven tonight and give these a tryI guarantee they’ll become your go-to Halloween appetizer. The best part? They’re so fun to make that even the pickiest eaters will want to help in the kitchen.
Join the thousands of home cooks who’ve already fallen in love with these spooky bites! Share your mummy creations with me on social media, and don’t forget to check out my [Spooky Spinach and Artichoke Dip] and [Halloween Sugar Cookies] for more party-perfect treats that’ll complete your frightfully delicious spread.
If you enjoyed this recipe, be sure to share it with your friends or save it for later! I’d love to see your unique twist feel free to post your photos on Pinterest!
Happy haunting, and happy cooking!
-Emeli
Print
Mini Mummy Pizzas
- Total Time: 15minutes
- Yield: 4 mini pizzas
Description
These adorable mini mummy pizzas are a fun and healthy Halloween snack that takes just 15 minutes to make! With only 4 ingredients, they’re perfect for Halloween parties and kids love helping make them.
Ingredients
2 English muffins split in half (4 pieces total)
¼ cup pizza sauce
2-3 string cheese sticks
8 olive slices for the eyes
Instructions
Preheat your oven to 220°C/430°F/200°C fan-forced.
Slice the English muffins in half and lightly toast them. This is optional but helps give better flavor.
Spread the cut side of the muffins with pizza sauce.
Pull apart your string cheese to form long cheese strips.
Lay the cheese across the pizza sauce to form the mummy wrappings and pinch off the overhang, leaving a gap at the top for the eyes.
Place two olive slices in the gap for the mummy eyes.
Cook in the oven for 5 to 10 minutes or until the cheese is melted.
Put onto a plate and enjoy! Mind your fingers – the cheese will be hot!
- Prep Time: 10minutes
- Cook Time: 5minutes
- Category: Dinner
- Cuisine: American
Nutrition
- Calories: 185 kcal
- Sugar: 3g
- Sodium: 450mg
- Fat: 6g
- Saturated Fat: 3g
- Carbohydrates: 25g
- Fiber: 2g
- Protein: 10g
- Cholesterol: 15mg
Keywords: Mini Mummy Pizzas