
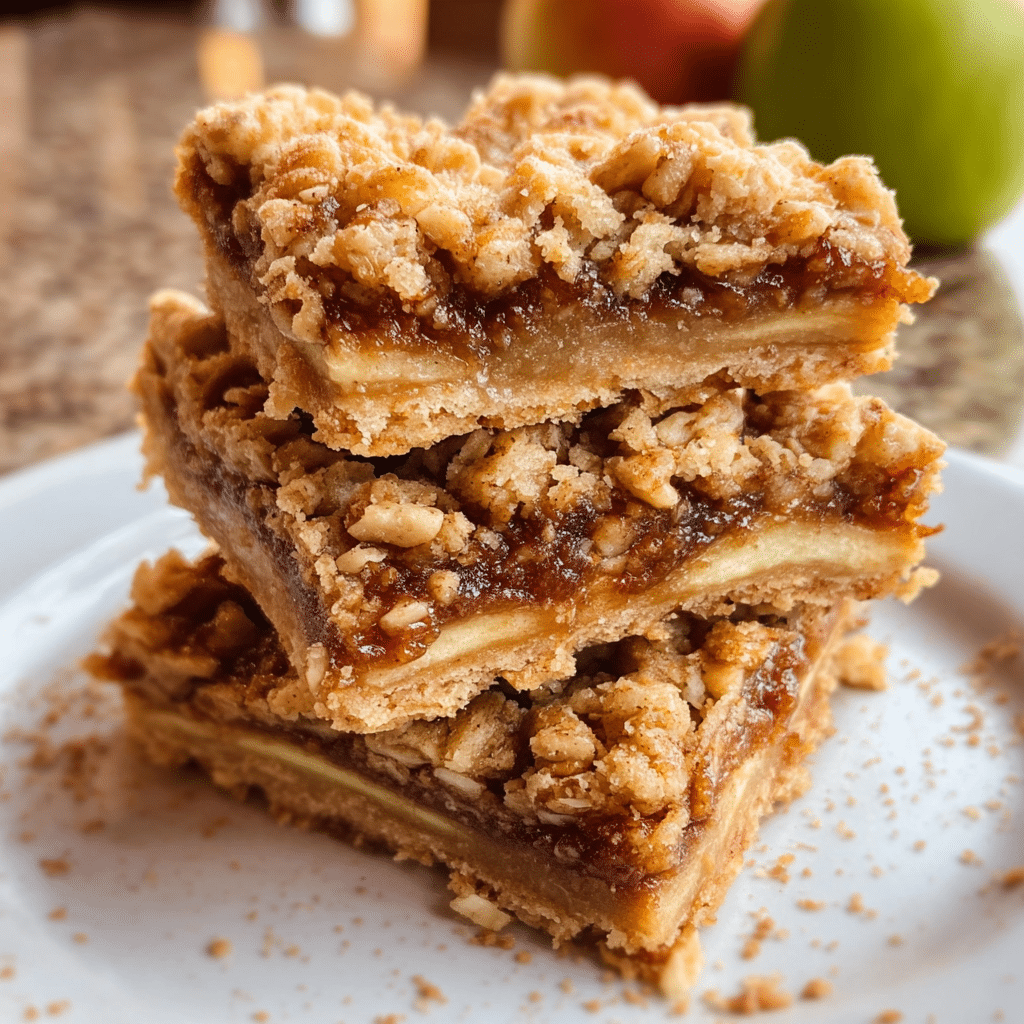
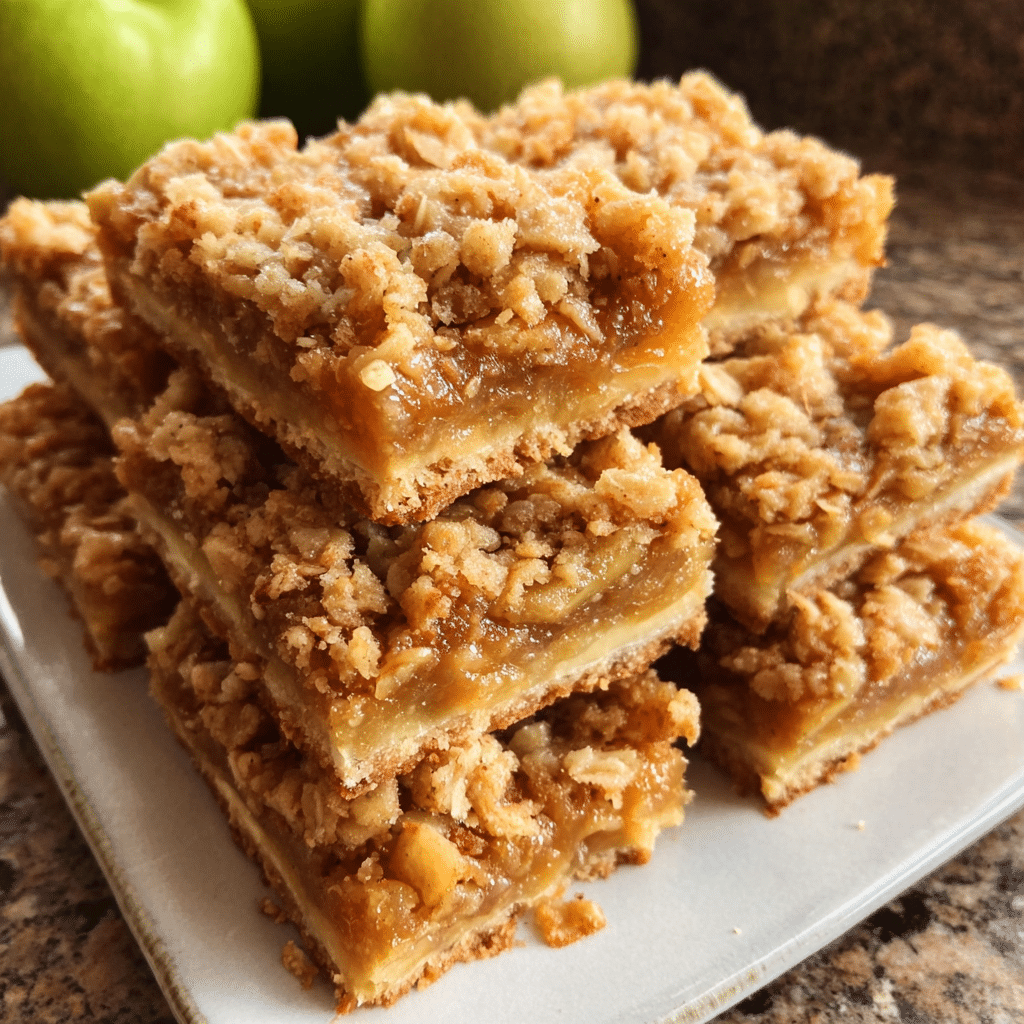
Apple Crisp Bars might just be the answer to your dessert dilemmas. Tired of apple pies that leak all over your oven or crumbles that turn mushy by day two? I hear you and I’ve been there.
I’m Emeli, and at FoodFansy, I’ve spent years perfecting recipes that bring joy without the stress. This Apple Crisp Bars recipe was born one autumn afternoon when I was craving the warmth of apple crisp but needed something portable for a potluck. After testing batch after batch (my neighbors were thrilled), I landed on these perfectly golden, buttery bars that slice beautifully and taste like fall wrapped in a hug.
What makes this recipe special? These bars deliver all the cozy flavors of traditional apple crisp tender cinnamon-spiced apples nestled between crispy oat layers but in a convenient, slice-and-serve form. No scooping, no mess, just pure autumnal bliss.
In this guide, you’ll discover why this Apple Crisp Bars recipe works every time, how to choose the best apples for baking, ingredient prep secrets, step-by-step instructions with pro tips, creative flavor variations, and answers to your most common questions. Let’s get baking.
Why This Apple Crisp Bars Recipe Works
These Apple Crisp Bars have become a FoodFansy favorite for good reason. They check every box for the busy home baker who doesn’t want to sacrifice flavor for convenience.
- Uses affordable, everyday ingredients – No exotic items or specialty store trips required. Oats, butter, brown sugar, and apples are all you need for dessert magic.
- Prep in under 20 minutes – From start to oven, this recipe respects your time. The filling comes together in minutes, and the crust-topping mixture does double duty.
- Perfect for any occasion – Whether it’s a casual weeknight treat, holiday gathering, bake sale contribution, or afternoon tea, these bars fit seamlessly into your plans.
- Stays fresh for days – Unlike traditional apple crisp that gets soggy, these bars maintain their texture beautifully when stored properly, making them ideal for meal prep or gift-giving.
- Portable and crowd-friendly – Cut into neat squares that travel well and require no plates or utensils just napkins and happy faces.
Choosing the Right Apples for Apple Crisp Bars
The secret to exceptional Apple Crisp Bars starts at the produce section. Not all apples are created equal when it comes to baking, and your choice directly impacts texture and flavor.
Best Apple Varieties for This Recipe
For Apple Crisp Bars that hold their shape and deliver balanced sweetness, I recommend firm, tart-to-sweet varieties:
- Granny Smith – The gold standard for baking. Their tartness cuts through the sweet topping and they hold their texture beautifully without turning to mush.
- Honeycrisp – Naturally sweet with a satisfying crunch that softens perfectly during baking. These add a lovely complexity to the filling.
- Braeburn – A balanced option with both sweet and tart notes, plus they maintain structure when baked.
- Pink Lady (Cripps Pink) – Slightly tangy with a firm texture that stands up to heat.
Pro tip: I love using a combination of two varieties typically Granny Smith for tartness and Honeycrisp for sweetness. This creates dimensional flavor that keeps people guessing your secret.
Buying Tips for the Best Apples
When shopping for your Apple Crisp Bars, keep these guidelines in mind:
- Look for firm apples – Give each apple a gentle squeeze. It should feel solid with no soft spots or wrinkles.
- Check the skin – Bright, smooth skin indicates freshness. Avoid apples with bruises or punctures.
- Size matters – Medium to large apples are ideal. You’ll need about 3 large apples (or 4-5 medium) to yield the right amount of sliced filling.
- Smell test – Fresh apples have a subtle, sweet aroma. If there’s no scent, they may be old or overripe.
- Ask your grocer – Don’t hesitate to ask produce staff which varieties just arrived or which they recommend for baking. They often have insider knowledge.
Apple Substitutions for Your Bars
Can’t find your preferred variety? These work wonderfully too:
- Swap Granny Smith for Cortland or Northern Spy – Both are classic baking apples with similar tart profiles.
- Replace Honeycrisp with Fuji or Gala – You’ll get more sweetness, so consider reducing the brown sugar in the filling by 1 tablespoon.
- Avoid Red Delicious and McIntosh – These become mushy when baked and lack the structural integrity needed for bar recipes.
Ingredients & Prep for Apple Crisp Bars
Success with Apple Crisp Bars comes down to proper preparation. Let’s break down each component so you’re set up for baking perfection.
Apple Prep Essentials
The filling is the heart of your bars, and how you prepare your apples makes all the difference:
- Peel thoroughly – Use a vegetable peeler or paring knife to remove all skin. The peel can become tough and chewy when baked in bars.
- Slice thinly and evenly – Aim for slices about ⅛-inch thick. Consistent thickness ensures even cooking. I use a mandoline slicer for speed and uniformity, but a sharp knife works perfectly.
- Toss in lemon juice immediately – This prevents oxidation (browning) and adds a subtle brightness that enhances the apple flavor. Use about 1 tablespoon of fresh lemon juice for every 3 large apples.
Time-saver: You can prep apples up to 4 hours ahead. Keep them in a bowl with lemon juice, covered with plastic wrap in the refrigerator.
Crust & Crisp Layer Ingredients
This magical mixture pulls double duty it forms both the sturdy base crust and the crumbly, golden topping:
- 1 cup all-purpose flour – Provides structure to hold the bars together when sliced.
- 1 cup old-fashioned oats – Creates that signature crispy texture. Don’t substitute quick oats; they’ll turn mushy.
- ¾ cup brown sugar – Adds molasses-rich sweetness and helps achieve caramelization.
- ½ cup unsalted butter, melted – The binding agent that brings everything together. Make sure it’s fully melted but not hot.
- 1 teaspoon cinnamon – Warm spice that complements apples perfectly.
- Pinch of salt – Enhances all the other flavors and balances the sweetness.
Mixing tip: Combine these ingredients in a large bowl using a fork or your clean hands until the mixture resembles coarse crumbs. You want it clumpy, not smooth.
Apple Filling Components
Keep your filling simple but flavorful:
- 3 large apples, peeled and sliced – Your prepared fruit from the section above.
- 2 tablespoons brown sugar – Just enough sweetness without overwhelming the apple flavor.
- 1 teaspoon cinnamon – Doubles down on that cozy spice.
- 1 tablespoon cornstarch – The secret to a filling that’s not too runny. It thickens the apple juices as they release during baking.
Assembly: In a medium bowl, toss the prepared apple slices with brown sugar, cinnamon, and cornstarch until every slice is well-coated and glossy. The cornstarch should disappear completely into the mixture.
Step-by-Step Cooking Instructions for Apple Crisp Bars
Now that your ingredients are prepped, let’s build these beautiful bars layer by layer.
Pre-Baking Prep for Apple Crisp Bars
Setting up your workspace properly prevents sticking and ensures easy removal:
- Preheat your oven to 350°F (175°C) – This ensures even baking from the moment your pan goes in.
- Prepare your pan – Line an 8×8-inch baking pan with parchment paper, leaving some overhang on two sides. This creates handles for easy lifting once cooled.
- Optional spray – Lightly coat the parchment with non-stick spray for extra insurance, though it’s not strictly necessary.
Why parchment matters: It prevents sticking and allows you to lift the entire block of bars out for cleaner, more precise cutting.
Making the Crust and Topping for Apple Crisp Bars
This is where your bars take shape:
- Combine your dry mixture – In a large bowl, mix together the oats, flour, brown sugar, cinnamon, and salt. Stir with a fork to distribute evenly.
- Add melted butter – Pour the melted butter over the dry ingredients and mix thoroughly. The mixture should look like wet sand with some clumps that’s perfect.
- Divide the mixture – Measure out roughly two-thirds of the oat mixture (eyeballing is fine). Reserve the remaining one-third in the bowl.
- Press the crust – Transfer the larger portion to your prepared pan. Use the bottom of a measuring cup or your hands to firmly press it into an even layer across the entire bottom. Press hard a compact crust prevents crumbling later.
Firmness check: The crust should hold together when you press it. If it’s too crumbly, add a teaspoon more melted butter.
Adding the Filling for Apple Crisp Bars
Time to build those apple layers:
- Distribute apple mixture evenly – Pour your prepared apple filling over the pressed crust layer. Use a spatula or your hands to spread it into an even layer, reaching all corners.
- Sprinkle the topping – Take that reserved one-third of the oat mixture and sprinkle it evenly over the apples. Don’t press it down leave it loose and crumbly for maximum crispiness.
- Check for coverage – You should see some apple peeking through, but the topping should cover most of the surface.
Distribution tip: For picture-perfect bars, take an extra 30 seconds to ensure your topping reaches the edges. Bare corners lead to burnt apples.
Baking and Cooling Apple Crisp Bars
The home stretch patience is key here:
- Bake for 35-40 minutes – Place your pan on the center rack. You’re looking for a golden-brown topping with visible bubbling around the edges where the apple juices meet the crust.
- Check for doneness – The topping should be deeply golden (not pale) and the apple filling should be bubbling enthusiastically. If the top is browning too quickly but the filling isn’t bubbling, tent with foil and continue baking.
- Cool completely in the pan – This is crucial. Place the pan on a wire rack and let it cool for at least 2 hours, preferably 3-4. The filling needs time to set, or your bars will fall apart when cut.
- Lift and slice – Once fully cooled, use the parchment overhang to lift the entire block onto a cutting board. Use a sharp knife to cut into 9 or 16 squares, wiping the blade between cuts for clean edges.
Patience pays: I know it’s tempting to cut into warm bars, but waiting ensures neat slices instead of a crumbly mess.
Pro Tips for Perfect Apple Crisp Bars
After making countless batches, I’ve learned some tricks that elevate these bars from good to extraordinary.
Avoiding Soggy or Crumbly Bars
The texture balance is everything in Apple Crisp Bars:
- Don’t skip the cornstarch – This is your insurance against a soggy bottom. The cornstarch absorbs excess moisture from the apples as they bake.
- Press the bottom crust firmly – A loosely pressed crust will crumble when you try to cut bars. Really compact it.
- Let them cool completely – Cutting warm bars guarantees a mess. The filling must set fully.
- Use old-fashioned oats only – Quick oats or instant oats will turn mushy. The texture of old-fashioned oats is non-negotiable.
Troubleshooting: If your bars turn out soggy despite following instructions, your apples may have released more juice than expected. Next time, add an extra ½ tablespoon of cornstarch.
Tool Recommendations for Apple Crisp Bars
Having the right equipment makes this recipe even easier:
- 8×8-inch metal baking pan – Metal conducts heat better than glass, resulting in a crispier bottom crust. If using glass, add 5 minutes to baking time.
- Mandoline slicer – Makes quick work of evenly sliced apples. A Benriner or OXO model runs about twenty dollars and is worth every penny.
- Bench scraper or large chef’s knife – For clean, professional-looking cuts through cooled bars.
- Parchment paper – I buy pre-cut sheets sized for 8×8 pans. They make removal foolproof.
Storage & Reheating Apple Crisp Bars
Maximize freshness and convenience:
- Room temperature: Store in an airtight container for up to 3 days. The topping will soften slightly but remains delicious.
- Refrigerator: Bars keep for up to 5 days when covered. Let come to room temperature before serving, or warm briefly.
- Freezer: Wrap individual bars in plastic wrap, then place in a freezer bag. Freeze for up to 3 months. Thaw overnight in the refrigerator.
- Reheating: For that fresh-baked taste, warm bars in a 300°F oven for 10 minutes. This re-crisps the topping beautifully.
Gift-giving tip: These bars travel wonderfully. Wrap individually in cellophane bags with ribbon for homemade gifts that actually impress.
Flavor Variations for Apple Crisp Bars
Once you’ve mastered the basic recipe, it’s time to play. These variations keep the formula exciting.
Spiced-Up Apple Crisp Bars
Add warmth and complexity:
- Chai-Spiced Bars – Add ¼ teaspoon each of ground ginger, cardamom, and nutmeg to both the crust mixture and apple filling.
- Maple Pecan Twist – Replace ¼ cup of brown sugar with maple syrup and fold ½ cup chopped pecans into the topping mixture.
- Apple Pie Spice Boost – Use 2 teaspoons of apple pie spice blend in place of plain cinnamon for a more complex spice profile.
Dietary Adaptations for Apple Crisp Bars
Make these bars work for various dietary needs:
- Gluten-Free – Swap all-purpose flour for a 1:1 gluten-free baking blend and use certified gluten-free oats. Bob’s Red Mill makes reliable options.
- Vegan – Replace butter with coconut oil or vegan butter (Earth Balance works well). The texture will be slightly different but still delicious.
- Refined Sugar-Free – Use coconut sugar instead of brown sugar. The flavor will be earthier but equally sweet.
- Lower Sugar – Reduce the sugar in the filling to 1 tablespoon or omit entirely if using very sweet apples.
Global-Inspired Apple Crisp Bars
Bring international flair to this classic:
- French Apple Bars – Add 2 tablespoons of Calvados (apple brandy) to the filling and sprinkle with turbinado sugar before baking.
- Scandinavian Cardamom Bars – Replace cinnamon with ½ teaspoon ground cardamom and top with pearl sugar.
- German Streusel Style – Add ¼ cup of finely chopped almonds to the topping mixture and dust finished bars with powdered sugar.
Flavor Variation Comparison Table
| Variation | Key Addition | Flavor Profile | Best For |
|---|---|---|---|
| Classic | Cinnamon only | Warm, traditional | First-timers, potlucks |
| Chai-Spiced | Ginger, cardamom, nutmeg | Complex, aromatic | Fall gatherings, tea time |
| Maple Pecan | Maple syrup, pecans | Rich, nutty | Thanksgiving, special occasions |
| Salted Caramel | Caramel drizzle, sea salt | Sweet-salty | Dessert buffets, gifts |
| Gluten-Free | GF flour blend, GF oats | Identical to classic | Dietary restrictions |
| Vegan | Coconut oil, no butter | Slightly coconut-y | Plant-based diets |
| French Calvados | Apple brandy | Sophisticated, boozy | Adult dinner parties |
| Berry Blend | Mixed berries added | Tart, fruity | Summer variations, brunch |
Serving Suggestions for Apple Crisp Bars
Presentation and pairings elevate these bars from everyday treat to memorable experience.
Perfect Pairings for Apple Crisp Bars
These bars are delicious on their own but shine even brighter with thoughtful accompaniments:
- Vanilla ice cream or gelato – The classic pairing. Serve warm bars with a scoop melting on top.
- Salted caramel sauce – Drizzle over each bar for decadent sweetness with a savory edge.
- Whipped cream or whipped coconut cream – Light and airy, perfect for balancing the dense, buttery bars.
- Greek yogurt – For breakfast or brunch, a dollop of tangy yogurt creates a more virtuous-feeling treat.
- Hot cider or spiced tea – Autumn beverages that echo the warm spices in the bars.
- Sharp cheddar cheese – Try the classic Vermont combination of apple dessert with a slice of aged cheddar. Trust me on this.
Occasion-Based Serving Ideas
Casual weeknight: Cut into large squares and serve with a glass of cold milk.
Dinner party: Plate individual bars, add a quenelle of vanilla ice cream, drizzle with caramel, and garnish with a mint leaf.
Potluck or bake sale: Cut into 16 smaller squares for easy finger food. Arrange on a platter with parchment squares between layers.
Breakfast or brunch: Serve slightly warm with Greek yogurt and a cup of coffee.
Holiday gathering: Dust with powdered sugar and cinnamon, arrange on a festive platter, and serve alongside hot apple cider.
FAQs About Apple Crisp Bars
Let me answer the questions I receive most often about this recipe.
Can I use frozen apples for Apple Crisp Bars?
You can, but fresh is strongly preferred. Frozen apples release significantly more moisture during baking, which can result in soggy bars. If you must use frozen, thaw them completely, drain excess liquid, pat very dry with paper towels, and increase cornstarch to 2 tablespoons.
How do I know when my Apple Crisp Bars are done baking?
Look for three signs: the topping should be deeply golden brown (not pale), you should see vigorous bubbling around the edges where apple juices meet the pan, and when you insert a knife into the center, the apples should feel tender. If the top browns before the apples are tender, cover loosely with foil and continue baking.
Can I make Apple Crisp Bars ahead of time?
Absolutely in fact, they’re ideal for advance preparation. Bake them up to 2 days ahead, cool completely, cover tightly with plastic wrap, and store at room temperature. They actually slice more cleanly after sitting for a day. You can also freeze completely cooled bars for up to 3 months.
Why did my bars fall apart when I cut them?
The most common culprit is cutting them while still warm. The filling needs several hours to set properly. Other causes include not pressing the bottom crust firmly enough or using too much liquid in the filling. Make sure you’re using the cornstarch and allowing full cooling time.
Can I double this recipe for a 9×13 pan?
Yes! Simply double all ingredients and use a 9×13-inch pan. The baking time will remain approximately the same (maybe 5 minutes longer), but watch for the same doneness cues: golden topping and bubbling edges.
What’s the best way to reheat Apple Crisp Bars?
For individually stored bars, microwave for 15-20 seconds until just warm. For multiple bars, place on a baking sheet and warm in a 300°F oven for 8-10 minutes. The oven method re-crisps the topping better than the microwave.
Are Apple Crisp Bars safe during pregnancy?
Yes, this recipe is pregnancy-safe. All ingredients are cooked thoroughly, and there are no raw eggs, unpasteurized dairy, or other restricted ingredients. As always, consult with your healthcare provider about specific dietary concerns.
Can I reduce the sugar in Apple Crisp Bars?
You can reduce the sugar in the apple filling to 1 tablespoon or even omit it if using very sweet apples. I don’t recommend reducing the sugar in the crust/topping mixture below ½ cup, as it affects texture and browning. The brown sugar isn’t just for sweetness it contributes to structure and caramelization.
Conclusion
Apple Crisp Bars are more than just a dessert they’re an invitation to slow down, savor the season, and share something made with care. Whether you’re packing them in lunchboxes, bringing them to a gathering, or simply treating yourself to an afternoon pick-me-up, these bars deliver comfort in every bite.
If you enjoyed this recipe, be sure to share it with your friends or save it for later! I’d love to see your unique twist feel free to post your photos on Pinterest!
Print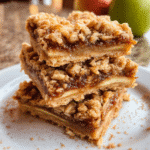
Apple Crisp Bars Recipe
- Total Time: 55 mins
- Yield: 9 bars 1x
- Diet: Vegetarian
Description
Apple Crisp Bars are buttery, sweet, and full of cinnamon-spiced apple flavor — a cozy dessert perfect for any season.
Ingredients
1 cup all-purpose flour
1 cup old-fashioned oats
3/4 cup brown sugar
1/2 cup melted butter
1 tsp cinnamon
3 large apples, peeled and sliced
2 tbsp brown sugar
1 tbsp cornstarch
1 tsp lemon juice
Pinch of salt
Instructions
1. Preheat oven to 350°F (175°C). Line an 8×8-inch pan with parchment paper.
2. Mix oats, flour, brown sugar, cinnamon, and butter. Press 2/3 of the mixture into the pan.
3. In a bowl, combine apples, sugar, cornstarch, lemon juice, and cinnamon.
4. Spread apple mixture over the crust, then sprinkle remaining oat mixture on top.
5. Bake for 35–40 minutes until golden and bubbly. Cool completely before slicing.
Notes
You can use pears or peaches instead of apples. Store in the fridge for up to 3 days or freeze for 2 months.
- Prep Time: 15 mins
- Cook Time: 40 mins
- Category: Dessert
- Method: Baking
- Cuisine: American
Nutrition
- Serving Size: 1 bar
- Calories: 210
- Sugar: 18g
- Sodium: 70mg
- Fat: 9g
- Saturated Fat: 5g
- Unsaturated Fat: 3g
- Trans Fat: 0g
- Carbohydrates: 30g
- Fiber: 2g
- Protein: 3g
- Cholesterol: 20mg
Keywords: Apple Crisp Bars, fall dessert, apple recipes