
Healthy Homemade Butterfingers changed everything for me one rainy Tuesday afternoon when my niece asked, “Aunt Emeli, why can’t candy be healthy?” I stood there in my kitchen, staring at a pile of processed candy wrappers, and realized she was absolutely right. Why couldn’t we recreate that iconic crispy, peanut buttery crunch we all love without the guilt?
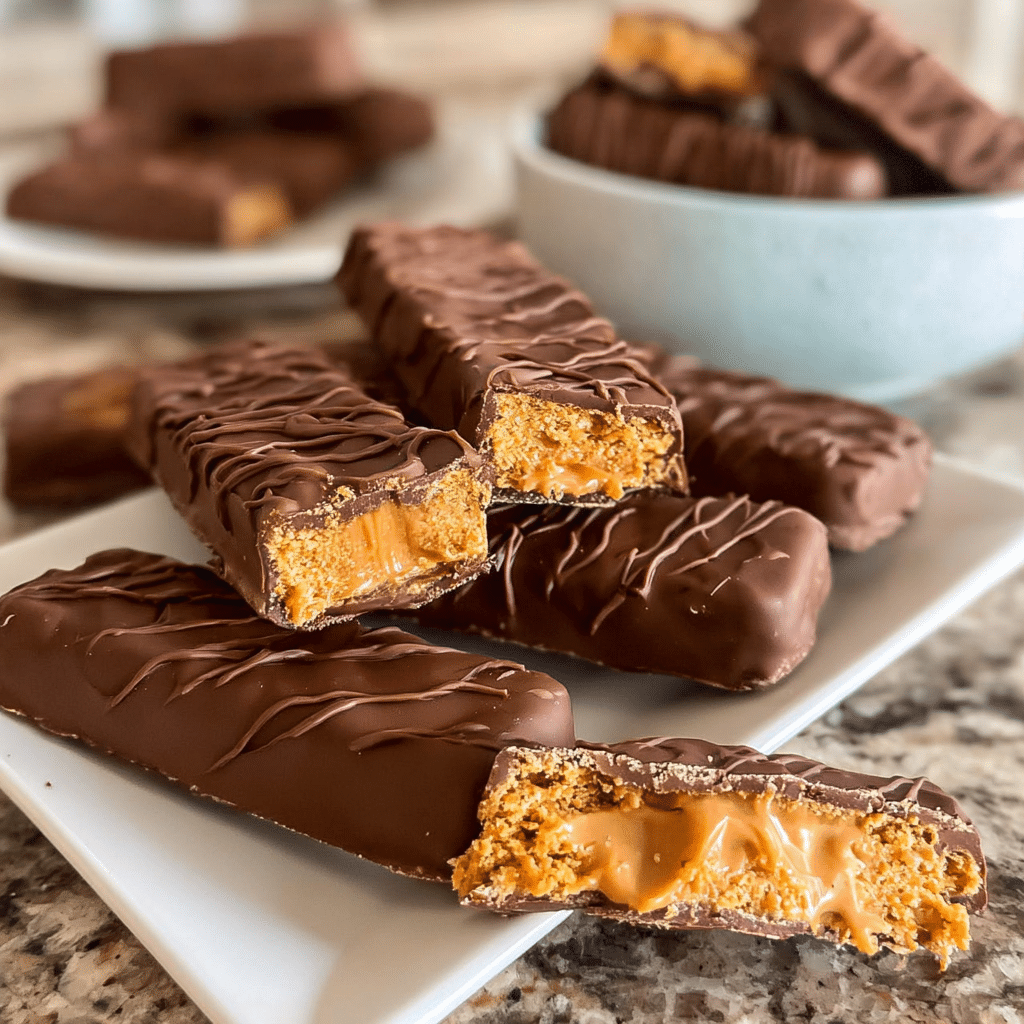
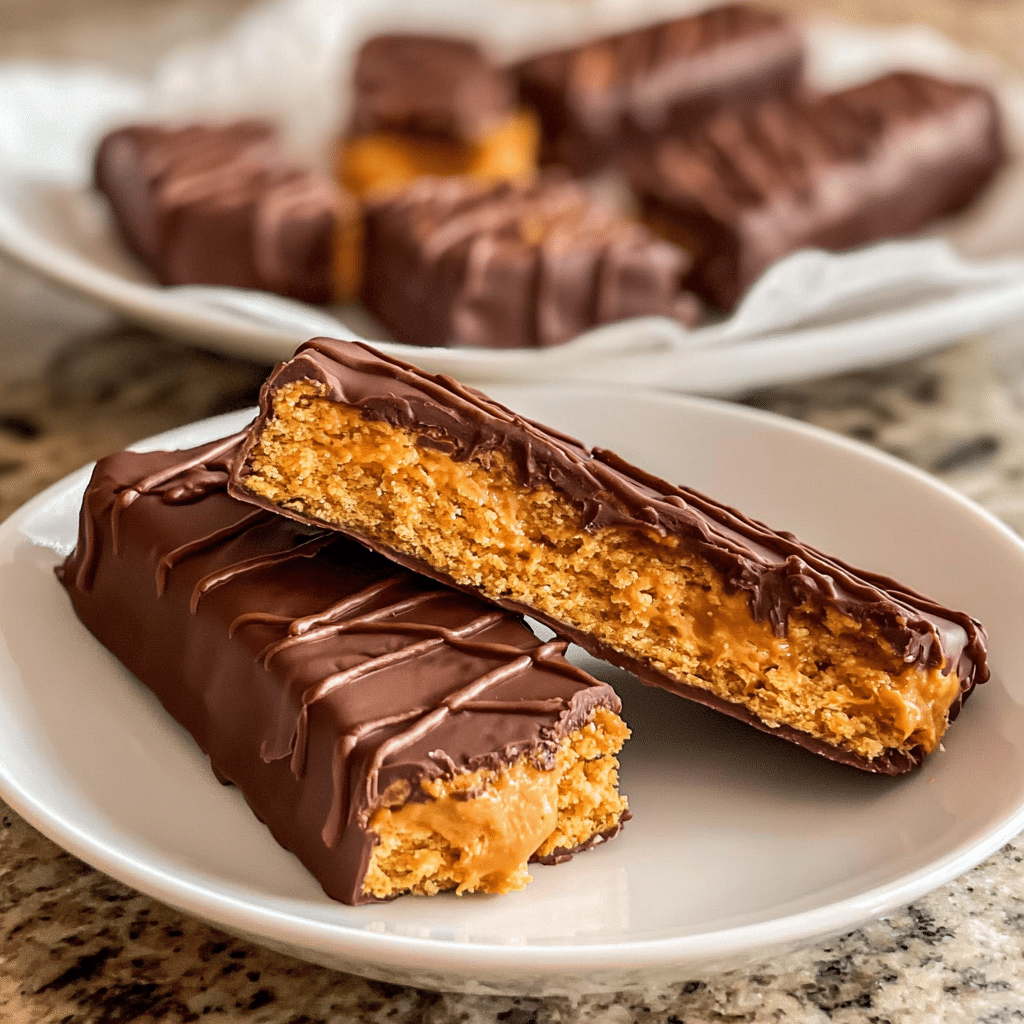
That question sent me on a delicious journey of experimentation. After dozens of batches (and plenty of taste-testing volunteers), I finally cracked the code. These Healthy Homemade Butterfingers deliver that same satisfying snap and nutty sweetness you crave, but with real ingredients you can actually pronounce. No corn syrup, no artificial flavors just pure, crunchy bliss wrapped in dark chocolate.
As someone who’s spent years developing recipes at FoodFansy, I’ve learned that the best treats don’t require compromise. You can have your candy bar and feel good about it too. In this guide, I’ll walk you through everything: choosing the right ingredients, mastering that signature crunch, troubleshooting common issues, and even fun flavor variations to keep things exciting.
Why This Healthy Homemade Butterfingers Recipe Works
These aren’t just healthier they’re genuinely delicious. Here’s what makes this recipe a keeper:
- Uses simple, clean ingredients – Natural peanut butter, honey or maple syrup, and cornflakes create that iconic texture without processed additives
- Ready in under 30 minutes – Most of that is just chilling time while you go about your day
- Perfect for meal prep and gifting – Make a batch on Sunday and enjoy all week, or wrap them up for thoughtful homemade gifts
- Customizable to dietary needs – Easily adapt for vegan, paleo, or low-sugar diets without sacrificing flavor
- Kid-approved and parent-loved – Finally, a treat that makes everyone at the table happy
Choosing the Right Ingredients for Healthy Homemade Butterfingers
The magic of this recipe lies in quality ingredients working in harmony. Let me break down what you need and why it matters.
Core Ingredients for Healthy Homemade Butterfingers
Natural Peanut Butter: This is your base, so choose wisely. Look for brands with just peanuts and salt no added oils or sugars. The natural oils help bind everything together while delivering authentic nutty flavor. Brands like Smucker’s Natural or Trader Joe’s work beautifully. If you’re grinding your own, even better!
Honey or Maple Syrup: These natural sweeteners do double duty they add sweetness and act as the glue that holds your bars together. Honey creates a slightly chewier texture, while maple syrup keeps things vegan and adds a subtle caramel note. Use pure maple syrup, not pancake syrup.
Crushed Cornflakes: This is the secret ingredient that creates that signature Butterfinger crunch. You want plain cornflakes without added sugar. Crush them by hand or in a bag with a rolling pin aim for chunky pieces, not fine crumbs. The texture variation is what makes each bite interesting.
Dark Chocolate Chips: Choose quality dark chocolate with at least 60% cacao. The bitterness balances the sweet center perfectly. Brands like Ghirardelli, Enjoy Life (for allergen-free), or Hu Kitchen (for paleo) all work wonderfully.
Coconut Oil: Just a tablespoon mixed with the chocolate creates a smooth, glossy coating that hardens beautifully and adds a subtle tropical note.
Buying Tips for Healthy Homemade Butterfingers
When shopping for ingredients, here’s what to look for:
- Check your peanut butter – Turn the jar upside down. Natural peanut butter should have a layer of oil on top. If it’s perfectly smooth with no separation, it likely contains stabilizers.
- Read cornflake labels carefully – Some brands sneak in high fructose corn syrup. Stick with simple ingredient lists.
- Test chocolate quality – Good dark chocolate should snap cleanly when broken and have a slight sheen. Dull, waxy chocolate won’t coat as nicely.
Substitutions for Healthy Homemade Butterfingers
Nut Butter Swaps: Almond butter, cashew butter, or sunflower seed butter (for nut-free) all work. Each brings its own flavor profile almond butter is mild and slightly sweet, cashew butter is creamy and rich, while sunflower seed butter has an earthy quality.
Cereal Alternatives: Rice crisps create a lighter, airier texture. Crushed pretzels add a salty twist. For grain-free, try crushed freeze-dried fruit or coconut flakes (though the texture will differ).
Chocolate Options: Milk chocolate for a sweeter treat, white chocolate for a unique twist, or sugar-free chocolate chips for low-carb diets.
Ingredients & Prep for Healthy Homemade Butterfingers
Let’s gather everything and get organized before we dive in.
Prep Essentials for Healthy Homemade Butterfingers
Setting Up Your Workspace:
- Line an 8×8-inch pan with parchment paper, leaving overhang on two sides this becomes your lifting handles later
- Measure out all ingredients before you start (mise en place makes everything smoother)
- Have a sturdy spatula ready for pressing the mixture firmly into the pan
Crushing the Cornflakes: Place cornflakes in a large zip-top bag and seal it, pressing out excess air. Use a rolling pin or the bottom of a measuring cup to crush them. You want mostly quarter-sized pieces with some smaller bits about 30 seconds of gentle crushing. Too fine and you lose that crunch; too coarse and the bars won’t hold together.
Pantry Staples for Healthy Homemade Butterfingers
Beyond the core ingredients, keep these on hand:
- Sea salt – A small pinch enhances the peanut butter flavor and balances sweetness
- Vanilla extract – Optional, but a half teaspoon adds warmth and depth
- Flaky sea salt – For sprinkling on top of the chocolate coating (game-changer!)
Step-by-Step Cooking Instructions for Healthy Homemade Butterfingers
Now for the fun part. This process is straightforward, but timing and technique make all the difference.
Pre-Cooking Prep for Healthy Homemade Butterfingers
Start by warming the peanut butter and honey (or maple syrup) in a medium saucepan over low heat. This step is crucial cold peanut butter won’t mix evenly with the cornflakes. Stir constantly with a wooden spoon or silicone spatula for about 2-3 minutes until the mixture is smooth, glossy, and slightly thinner in consistency. You’ll know it’s ready when it drips easily off your spoon. If using natural peanut butter that’s separated, make sure to stir it well before measuring.
Cooking Method for Healthy Homemade Butterfingers
Remove the pan from heat and immediately stir in the crushed cornflakes. Work quickly but gently you want to coat every piece without crushing them further. The mixture will seem loose at first, but keep folding it together. Within 30-45 seconds, it should come together into a cohesive, sticky mass.
Transfer the mixture to your prepared pan. Here’s a pro tip: lightly oil your hands or spray the back of a spatula with cooking spray, then press the mixture firmly and evenly into the pan. You want it compact loose packing leads to crumbly bars. Aim for an even thickness across the entire pan.
Place the pan in the refrigerator and chill for 15-20 minutes. This sets the base and makes cutting much cleaner.
Doneness Check for Healthy Homemade Butterfingers
After chilling, press the surface gently with your fingertip. The mixture should be firm to the touch but still have a slight give not rock hard or soft and sticky. If it leaves an indentation, give it another 5 minutes in the fridge. The right texture ensures clean cuts and bars that hold their shape during chocolate dipping.
Resting for Healthy Homemade Butterfingers
Once properly set, use the parchment paper overhang to lift the entire slab out of the pan. Place it on a cutting board and use a sharp knife to cut into bars. I like to make 12-16 bars depending on how generous I’m feeling. Wipe the knife between cuts for the cleanest edges.
Now for the chocolate coating: Combine dark chocolate chips and coconut oil in a microwave-safe bowl. Microwave in 30-second intervals, stirring between each, until completely melted and smooth (usually 1-2 minutes total). Alternatively, melt using a double boiler for more control.
Using a fork or dipping tool, submerge each bar in the chocolate, letting excess drip off. Place dipped bars on a parchment-lined baking sheet. If desired, sprinkle with flaky sea salt before the chocolate sets.
Chill the dipped bars for 10-15 minutes until the chocolate hardens completely. The coconut oil helps create that satisfying snap when you bite in.
Pro Tips for Perfect Healthy Homemade Butterfingers
After making these hundreds of times, here are my insider secrets.
Avoiding Common Mistakes with Healthy Homemade Butterfingers
Problem: Bars Fall Apart Solution: You likely didn’t press the mixture firmly enough or didn’t chill it long enough. The cornflakes need to be tightly bound by the peanut butter mixture. When in doubt, chill for an extra 10 minutes.
Problem: Chocolate Won’t Stick or Looks Streaky Solution: Make sure your bars are cold before dipping. If they’re even slightly warm, the chocolate will slide right off. Also, ensure your chocolate is completely melted with no lumps.
Problem: Too Sweet or Not Sweet Enough Solution: Adjust the honey/maple syrup by a tablespoon either way in your next batch. Start with less if you prefer barely-sweet treats; add more if you’ve got a serious sweet tooth.
Tool Recommendations for Healthy Homemade Butterfingers
While this recipe is minimalist-friendly, a few tools make life easier:
- Candy thermometer – Not necessary, but helpful if you want to ensure chocolate melts at the ideal temperature (around 110°F)
- Offset spatula – Perfect for pressing the mixture evenly into the pan
- Dipping fork or chocolate fork – Creates professional-looking coated bars with minimal chocolate waste
- Silicone molds – For making fun shapes instead of bars (great for kids)
Storage & Reheating for Healthy Homemade Butterfingers
Store these in an airtight container in the refrigerator for up to 2 weeks. Layer them between parchment paper to prevent sticking. They can also be frozen for up to 3 months just let them thaw at room temperature for 10 minutes before eating.
No reheating necessary (they’re perfect cold!), but if you prefer a slightly softer texture, let them sit at room temperature for 5-10 minutes before enjoying.
Flavor Variations for Healthy Homemade Butterfingers
Once you’ve mastered the basic recipe, the world is your oyster. Here are some of my favorite twists.
Chocolate Variations for Healthy Homemade Butterfingers
Double Chocolate Delight: Mix 2 tablespoons of cocoa powder into the peanut butter mixture before adding cornflakes. Coat with dark chocolate for an intense chocolate experience.
White Chocolate Dream: Use white chocolate chips for coating and add a teaspoon of vanilla extract to the base mixture. These taste like blonde Butterfingers.
Mint Chocolate Chip: Add 1/2 teaspoon peppermint extract to the peanut butter mixture and use dark chocolate coating. Sprinkle with crushed candy canes during the holidays.
Dietary Adaptations for Healthy Homemade Butterfingers
Vegan Version: Use maple syrup instead of honey and ensure your chocolate chips are dairy-free (most dark chocolate is naturally vegan, but check labels).
Paleo-Friendly: Swap cornflakes for crushed grain-free cereal or a mixture of chopped almonds and coconut flakes. Use paleo-approved chocolate.
Keto/Low-Carb: Replace honey with sugar-free maple syrup and use crushed pork rinds (I know it sounds wild, but they create amazing texture!) or a low-carb cereal. Use sugar-free chocolate chips.
Global-Inspired Flavors for Healthy Homemade Butterfingers
Matcha Green Tea: Mix 1 tablespoon of matcha powder into the white chocolate coating for a Japanese-inspired twist.
Tahini Halva Style: Replace half the peanut butter with tahini and add a pinch of cardamom to the mixture. Coat with dark chocolate and sprinkle with sesame seeds.
Mexican Chocolate: Add 1/2 teaspoon cinnamon and a pinch of cayenne pepper to the chocolate coating for a spicy-sweet kick inspired by Mexican hot chocolate.
| Variation | Key Ingredient Swap | Flavor Profile | Best For |
|---|---|---|---|
| Classic | None | Nutty, sweet, crunchy | Traditional candy lovers |
| Double Chocolate | +2 tbsp cocoa powder | Rich, intense chocolate | Chocoholics |
| Vegan | Maple syrup, dairy-free chocolate | Clean, slightly earthy | Plant-based eaters |
| Paleo | Grain-free cereal, paleo chocolate | Wholesome, nutty | Grain-free diets |
| Keto | Sugar-free syrup, pork rinds | Savory-sweet, low-carb | Low-carb lifestyles |
| Matcha White Chocolate | +1 tbsp matcha, white chocolate | Earthy, creamy, sophisticated | Adventurous eaters |
| Spicy Mexican | +Cinnamon & cayenne | Warm, spicy-sweet | Heat seekers |
Serving Suggestions for Healthy Homemade Butterfingers
These bars are incredibly versatile. Here’s how to enjoy them beyond just grabbing one from the fridge.
Pairing Ideas for Healthy Homemade Butterfingers
With Coffee or Tea: The slightly bitter notes in dark roast coffee or black tea complement the sweetness beautifully. Try pairing with:
- Espresso for an afternoon pick-me-up
- Chai tea for warm spice notes
- Herbal peppermint tea to cleanse the palate
Dessert Boards: Include these on a dessert charcuterie board alongside fresh berries, nuts, dried fruit, and cheese (yes, cheese!). The salty-sweet combination is divine.
Ice Cream Topping: Chop into small pieces and sprinkle over vanilla or chocolate ice cream. They stay crunchy even when cold and add amazing texture.
Lunchbox Treat: Pack one in school lunches or work lunches for a homemade snack that feels special. Kids love knowing exactly what’s in their treats.
Beverage Pairings for Healthy Homemade Butterfingers
Non-Alcoholic: Cold glass of almond milk, oat milk hot chocolate, or even a peanut butter smoothie creates a complete dessert experience.
FAQs About Healthy Homemade Butterfingers
Let me answer the questions I get asked most often.
Can I use processed peanut butter instead of natural? You can, but the texture will be slightly different. Processed peanut butter contains stabilizers that make the mixture stiffer. You may need to add an extra tablespoon of honey to help everything bind properly. Natural peanut butter gives you cleaner ingredients and better flavor.
How do I prevent the chocolate from cracking when I bite into the bars? This happens when the chocolate coating is too thick or the bars are too cold when eaten. Try a thinner chocolate coating and let bars sit at room temperature for 5 minutes before serving. Adding the coconut oil to the chocolate also helps keep it from becoming brittle.
Can these be made nut-free for school lunches? Absolutely! Substitute sunflower seed butter or soy nut butter for the peanut butter. The texture and flavor are remarkably similar. Just make sure all other ingredients are processed in nut-free facilities if dealing with severe allergies.
Why are my bars too soft or too crumbly? Too soft usually means not enough cornflakes or not enough chilling time. Too crumbly means too many cornflakes or the mixture wasn’t pressed firmly enough. The ratio of peanut butter mixture to cornflakes should coat the cereal evenly without being soupy.
Are these safe for pregnant women? Yes! All ingredients are pregnancy-safe when using pasteurized ingredients. If you’re concerned about raw honey (though the risk is minimal), simply use pasteurized honey or maple syrup. These are actually a great protein-rich snack for expecting mothers.
Can I double the recipe? Definitely! Use a 9×13-inch pan and increase all ingredients proportionally. You may need to add 5-10 minutes to the initial chilling time due to the increased volume.
How can I make these look more professional for gifting? Use silicone candy molds for uniform shapes, drizzle with contrasting chocolate (white on dark or vice versa), wrap individually in wax paper or cellophane, and add a handwritten label. Store in decorative tins or mason jars with ribbon.
Conclusion
There you have it Healthy Homemade Butterfingers that prove you don’t need a candy factory to create something truly special. These bars embody everything I love about cooking at FoodFansy: simple ingredients, bold flavors, and the joy of making something with your own hands.
If you enjoyed this recipe, be sure to share it with your friends or save it for later! I’d love to see your unique twist feel free to post your photos on Pinterest!
– Emeli
Print
Healthy Homemade Butterfingers | Guilt-Free Crunchy Candy Delight
- Total Time: 20 minutes
- Yield: 12 bars 1x
- Diet: Vegetarian
Description
Healthy Homemade Butterfingers – crunchy, chocolate-coated peanut butter bars made with natural ingredients for a guilt-free treat.
Ingredients
1 cup natural peanut butter
1/3 cup honey or maple syrup
2 cups crushed cornflakes
1 cup dark chocolate chips
1 tbsp coconut oil
Pinch of sea salt
Instructions
1. Line an 8×8-inch pan with parchment paper.
2. Warm peanut butter and honey together until smooth.
3. Stir in crushed cornflakes and salt; mix until coated.
4. Press mixture into pan and chill for 20 minutes.
5. Melt chocolate chips with coconut oil until smooth.
6. Dip or coat bars in chocolate; refrigerate until set.
7. Store in fridge up to 2 weeks or freeze for 3 months.
Notes
Tip: For a vegan version, use maple syrup and dairy-free chocolate.
You can add a sprinkle of crushed nuts on top for extra texture.
- Prep Time: 15 minutes
- Cook Time: 5 minutes
- Category: Dessert
- Method: No-Bake
- Cuisine: American
Nutrition
- Serving Size: 1 bar
- Calories: 210
- Sugar: 8g
- Sodium: 70mg
- Fat: 14g
- Saturated Fat: 5g
- Unsaturated Fat: 8g
- Trans Fat: 0g
- Carbohydrates: 18g
- Fiber: 2g
- Protein: 6g
- Cholesterol: 0mg
Keywords: Healthy Homemade Butterfingers, No-Bake Candy, Guilt-Free Dessert