
Cream cheese brownies have been my secret weapon for winning hearts in the kitchen ever since I discovered this recipe during my early days as a chef. Picture this: you’re craving something decadent, something that bridges the gap between a rich chocolate brownie and creamy cheesecake, but you don’t want to spend hours in the kitchen. That’s exactly where these cream cheese brownies come in.
Hey there! I’m Emeli from FoodFansy, and if there’s one dessert that never fails to impress at dinner parties, potlucks, or those moments when you simply need chocolate therapy, it’s these marbled beauties. After years of perfecting this recipe in professional kitchens and countless home experiments, I can promise you this: these cream cheese brownies deliver that perfect fudgy texture with a luxurious cream cheese swirl that melts in your mouth.
What makes this recipe special isn’t just the incredible flavor combination—it’s the simplicity. We’re talking about affordable pantry staples, a foolproof method that works every time, and results that look like they came from a high-end bakery. In this guide, I’ll walk you through everything from selecting the right ingredients to achieving that picture-perfect marbled effect, plus I’ll share pro tips I’ve learned along the way.
Why This Cream Cheese Brownies Recipe Works
These cream cheese brownies have become a FoodFansy favorite for three compelling reasons: they’re incredibly forgiving for beginners, use everyday ingredients you likely already have, and deliver bakery-quality results every single time.
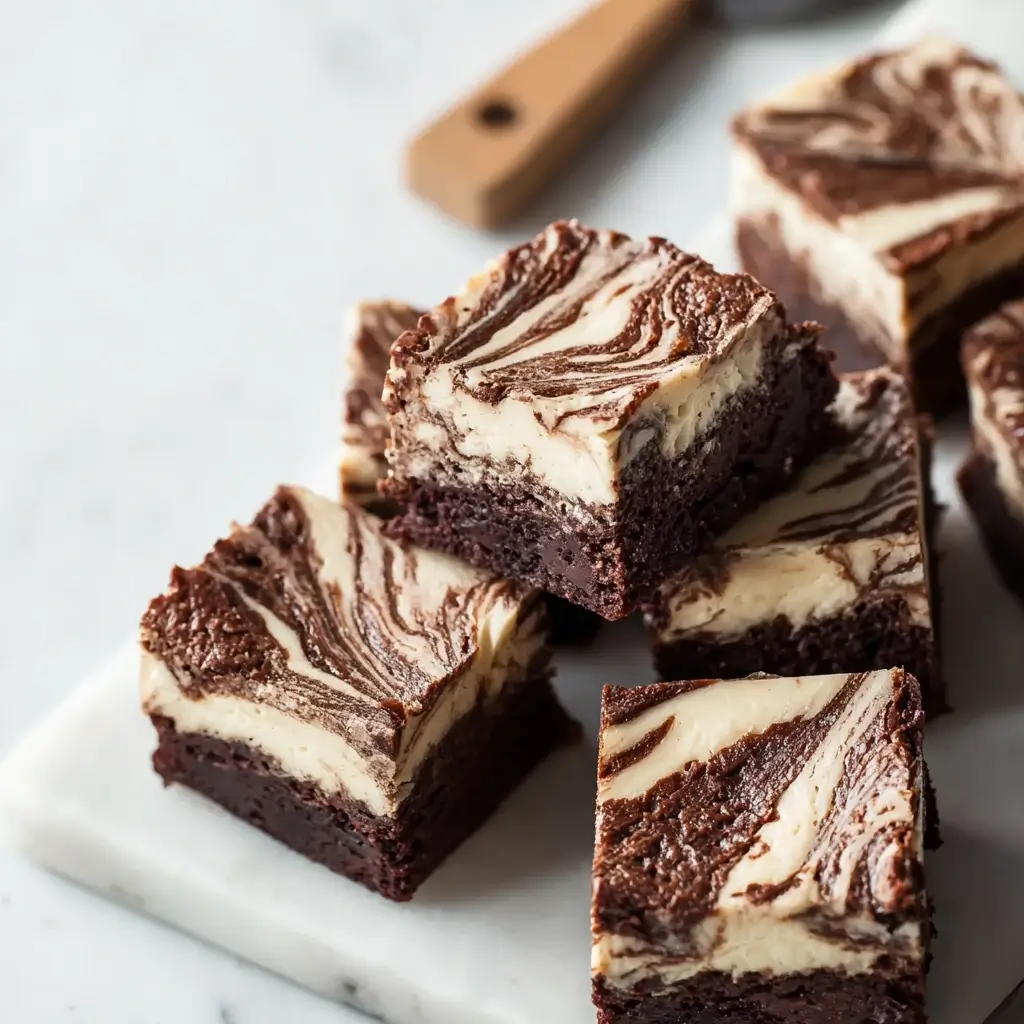
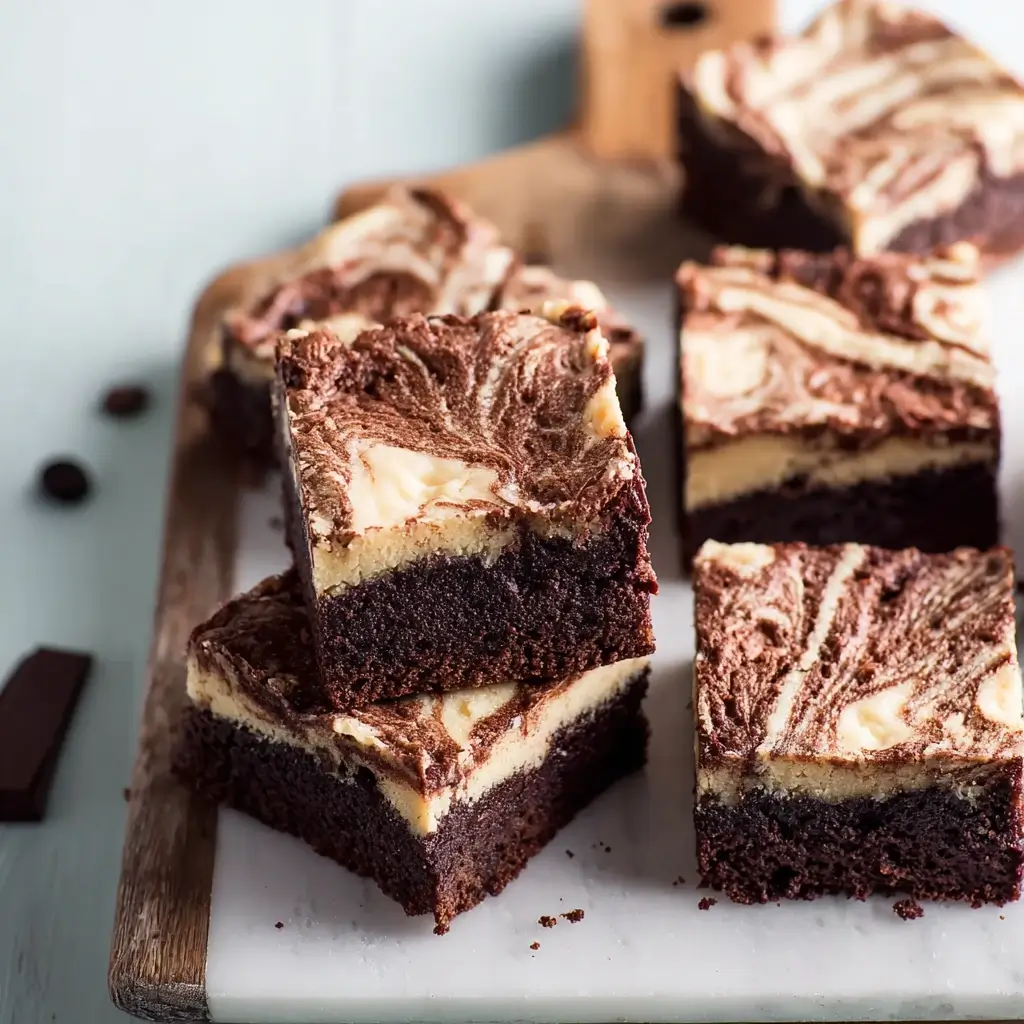
The magic lies in the technique. By layering half the chocolate batter, adding the cream cheese filling, then topping with the remaining batter and creating that signature marbled swirl, we get the best of both worlds—rich, fudgy brownies with pockets of tangy, creamy goodness. The cream cheese doesn’t just add flavor; it creates moisture that keeps these brownies tender for days.
What sets this recipe apart is its versatility. Whether you’re hosting a casual weekend gathering or need an impressive dessert for a special occasion, these brownies adapt beautifully. They’re equally delicious served warm with a scoop of vanilla ice cream or chilled from the refrigerator with a cup of coffee.
Choosing the Right Ingredients for Cream Cheese Brownies
Best Ingredients for This Recipe
The foundation of exceptional cream cheese brownies starts with quality ingredients, but you don’t need to break the bank. For the chocolate base, unsweetened cocoa powder provides that deep, rich flavor without the complexity of melting chocolate. I prefer Dutch-process cocoa when available, but regular unsweetened cocoa works beautifully too.
The cream cheese is where you shouldn’t compromise. Full-fat cream cheese creates that luxurious, tangy contrast we’re after. Avoid low-fat versions—they don’t have the richness or stability needed for the perfect swirl. Make sure it’s completely softened before mixing; this prevents lumps and ensures smooth integration.
Buying Tips
When shopping for ingredients, look for cream cheese that feels soft when gently pressed through the package—this indicates it’s fresh. For cocoa powder, check that it flows freely and hasn’t clumped, which can indicate moisture exposure. Fresh eggs make a difference too; they should feel substantial in your hand and have no cracks in the shell.
Substitutions
While this recipe is pretty forgiving, some substitutions work better than others. You can swap the all-purpose flour for a 1:1 gluten-free flour blend if needed. For a slightly different flavor profile, try using brown butter instead of regular melted butter—it adds a nutty depth that complements the cream cheese beautifully. Greek yogurt can substitute for cream cheese in a pinch, though the texture will be slightly less rich.
Ingredients & Prep for Cream Cheese Brownies
Brownie Base Essentials
The chocolate brownie base requires precise measurement but simple technique. Start by combining your dry ingredients—flour, baking powder, and salt—in a separate bowl. This ensures even distribution and prevents pockets of baking powder that can create uneven rising.
Melting the butter properly is crucial. Remove it from heat the moment it’s fully melted to prevent scorching, then immediately stir in the cocoa powder while the butter is still hot. This helps bloom the cocoa’s flavor and creates a smoother mixture.
Cream Cheese Filling Preparation
The cream cheese filling is where patience pays off. Room temperature cream cheese is non-negotiable—cold cream cheese will create lumps no matter how long you beat it. If you forgot to take it out early, cut it into cubes and microwave in 10-second intervals, turning between each interval.
Beat the cream cheese until completely smooth before gradually adding the sugar. This prevents grittiness and ensures the filling spreads evenly. The single egg and vanilla should be fully incorporated, creating a mixture that’s smooth and pourable but not thin.
Essential Tools
You’ll need a 9-inch square baking pan (metal conducts heat better than glass for brownies), mixing bowls, and a knife for creating the marbled effect. A rubber spatula helps fold ingredients without overmixing, and an offset spatula makes spreading the cream cheese layer easier.
Step-by-Step Cooking Instructions for Cream Cheese Brownies
Pre-Cooking Prep for Cream Cheese Brownies
Preheat your oven to 350°F and position the rack in the center. Grease your 9-inch square pan thoroughly—I like to use butter followed by a light dusting of cocoa powder instead of flour for extra chocolate flavor. This prevents sticking and makes removal easier.
Prepare both your brownie batter and cream cheese filling completely before you start layering. Having everything ready ensures smooth assembly and prevents the cream cheese from sitting too long, which can cause separation.
Cooking Method for Cream Cheese Brownies
Start by creating your chocolate base. After melting butter and stirring in cocoa, let it cool slightly before beating in eggs, sugar, and vanilla—too much heat can scramble the eggs. Fold in the dry ingredients just until combined; overmixing develops gluten and creates tough brownies.
Pour exactly half the brownie batter into your prepared pan and spread evenly using an offset spatula. This base layer should be level to ensure even baking. Carefully spread the cream cheese filling over this layer, leaving about a ½-inch border around the edges—the filling will spread slightly during baking.
Creating the Perfect Marbled Effect for Cream Cheese Brownies
Top with the remaining brownie batter, dropping spoonfuls evenly across the surface rather than trying to spread it all at once. Use a knife to create the signature marbled pattern by drawing it in a figure-8 motion through all layers. Don’t overdo it—6-8 swirls create beautiful marbling without muddying the contrast.
Doneness Check for Cream Cheese Brownies
Cover with foil and bake for 40-45 minutes. The foil prevents the top from browning too quickly while ensuring the center cooks through. Test doneness with a toothpick inserted into the brownie portion (not the cream cheese)—it should come out with just a few moist crumbs.
Resting Your Cream Cheese Brownies
This step is crucial: let the brownies cool completely in the pan before cutting. The cream cheese layer needs time to set, and cutting too early results in messy, gooey pieces. For the cleanest cuts, refrigerate for 2 hours before slicing.
Pro Tips for Perfect Cream Cheese Brownies
Avoiding Dense or Dry Brownies
The key to fudgy, moist brownies lies in not overbaking and not overmixing. Mix the brownie batter just until the flour disappears—you should still see a few streaks. Overbaking is the most common mistake; brownies continue cooking from residual heat even after removal from the oven.
Room temperature ingredients (except butter, which should be melted) combine more easily and create better texture. Cold eggs straight from the refrigerator can seize the chocolate mixture and create a dense final product.
Tool Recommendations for Cream Cheese Brownies
Invest in a good offset spatula—it makes spreading batters and fillings infinitely easier. A bench scraper helps create clean edges when cutting, and parchment paper with overhang makes removal foolproof. For perfect portions, use a ruler to mark cutting lines before slicing.
Digital kitchen scales ensure accuracy, especially for flour measurement. Too much flour creates dry, cakey brownies while too little makes them fall apart. Weighing ingredients eliminates guesswork.
Storage & Reheating for Cream Cheese Brownies
Store covered at room temperature for up to 3 days or refrigerated for up to a week. The refrigerated version has a different but equally delicious texture—more fudge-like and dense. For longer storage, wrap individual pieces in plastic wrap and freeze for up to 3 months.
To refresh day-old brownies, microwave individual pieces for 10-15 seconds. This softens them back to that just-baked texture without making them hot.
Flavor Variations for Cream Cheese Brownies
Spicy Twist
Add a pinch of cayenne pepper or chipotle powder to the brownie batter for a subtle heat that complements the chocolate beautifully. Mexican hot chocolate brownies with cream cheese create an sophisticated flavor profile that’s unexpected and delightful.
For those who love bold flavors, fold mini chocolate chips or chopped dark chocolate into the cream cheese layer for extra richness and texture contrast.
Keto and Paleo Variations
Substitute almond flour for all-purpose flour (use ¾ cup almond flour) and replace sugar with erythritol or monk fruit sweetener. The texture will be slightly denser but equally satisfying. For paleo versions, use coconut flour (reduce to ⅓ cup) and coconut sugar, though the flavor will have subtle coconut notes.
Global Flavors
Create Italian-inspired brownies by adding a teaspoon of espresso powder to the brownie batter and orange zest to the cream cheese layer. For a Middle Eastern twist, incorporate cardamom and rose water into the cream cheese filling—use sparingly as these flavors are potent.
Flavor Variation Guide:
| Flavor Profile | Brownie Addition | Cream Cheese Addition | Baking Notes |
|---|---|---|---|
| Mexican Spice | ¼ tsp cayenne, ½ tsp cinnamon | 1 tsp vanilla extract | Same temperature and time |
| Italian Mocha | 1 tsp espresso powder | Orange zest from 1 orange | May need extra 2-3 minutes |
| Middle Eastern | ¼ tsp cardamom | ½ tsp rose water | Watch for overbrowning |
| Peanut Butter | 2 tbsp peanut butter powder | 2 tbsp creamy peanut butter | Increase baking time by 5 minutes |
| Mint Chocolate | ½ tsp mint extract | Green food coloring (optional) | Same temperature and time |
Serving Suggestions for Cream Cheese Brownies
These cream cheese brownies shine on their own, but thoughtful pairings elevate them to restaurant-quality desserts. Serve warm brownies with vanilla bean ice cream and a drizzle of hot fudge for the ultimate indulgence. The temperature contrast between warm brownie and cold ice cream creates a memorable experience.
For elegant dinner parties, dust with powdered sugar and serve alongside fresh berries—the tartness of raspberries or strawberries balances the rich chocolate perfectly. A dollop of whipped cream lightens the dessert without overwhelming the flavors.
Coffee pairings work beautifully too. These brownies complement everything from espresso to cold brew, making them perfect for afternoon gatherings or book club meetings. For wine lovers, a glass of port or dessert wine enhances the chocolate notes while the cream cheese provides a nice contrast to the wine’s sweetness.
FAQs About Cream Cheese Brownies
Can I make these brownies ahead of time? Absolutely! These brownies actually improve after a day as the flavors meld together. Make them up to 2 days in advance and store covered at room temperature. For longer storage, refrigerate for up to a week.
My cream cheese layer sank into the brownie batter. What went wrong? This usually happens when the brownie batter is too thin or the cream cheese mixture is too thick. Ensure your brownie batter has cooled slightly before adding the cream cheese layer, and make sure the cream cheese filling is smooth and spreadable but not runny.
Can I double this recipe? Yes, but use a 9×13 inch pan instead of two smaller pans. The baking time will increase to 50-60 minutes. Check doneness with a toothpick as oven temperatures vary.
How do I get clean cuts? Use a sharp knife wiped clean between each cut, or run the knife under warm water and dry it between cuts. Chilled brownies cut more cleanly than room temperature ones.
Can I freeze the batter? It’s better to freeze the finished brownies rather than the batter. The cream cheese filling doesn’t freeze well unbaked, and the texture may suffer when thawed and baked.
Conclusion
These cream cheese brownies represent everything I love about baking—they’re approachable enough for beginners yet sophisticated enough to impress the most discerning dessert lovers. The combination of rich, fudgy chocolate with tangy, creamy swirls creates a dessert that’s both comforting and elegant.
What makes this recipe special isn’t just the incredible flavor—it’s the joy of sharing something homemade with the people you care about. Every time I make these brownies, I’m reminded why I fell in love with cooking in the first place. There’s something magical about transforming simple ingredients into something that brings smiles and creates memories.
Ready to create some kitchen magic? Fire up your oven and try these cream cheese brownies tonight! Join the thousands of home cooks who’ve made this recipe a family favorite. Once you experience that perfect balance of chocolate and cream cheese, you’ll understand why these brownies have earned their place as a FoodFansy signature recipe.
Don’t forget to share your results—I love seeing how these brownies turn out in kitchens around the world. Tag @foodfansy when you post your marbled masterpieces, and try our [Classic Chocolate Chip Cookies] or [Ultimate Fudge Recipe] next for more irresistible treats!
If you enjoyed this recipe, be sure to share it with your friends or save it for later!
I’d love to see your unique twist—feel free to post your photos on Pinterest!