
Hey there! I’m Emeli, and if you’ve ever pulled a tray of cookies from the oven only to find them flat, crumbly, or disappointingly bland, I feel you. For years, I chased the perfect thumbprint cookie one that was buttery, tender, and filled with just the right amount of indulgent chocolate-hazelnut goodness. After countless batches (and happy taste-testers), I finally cracked the code.
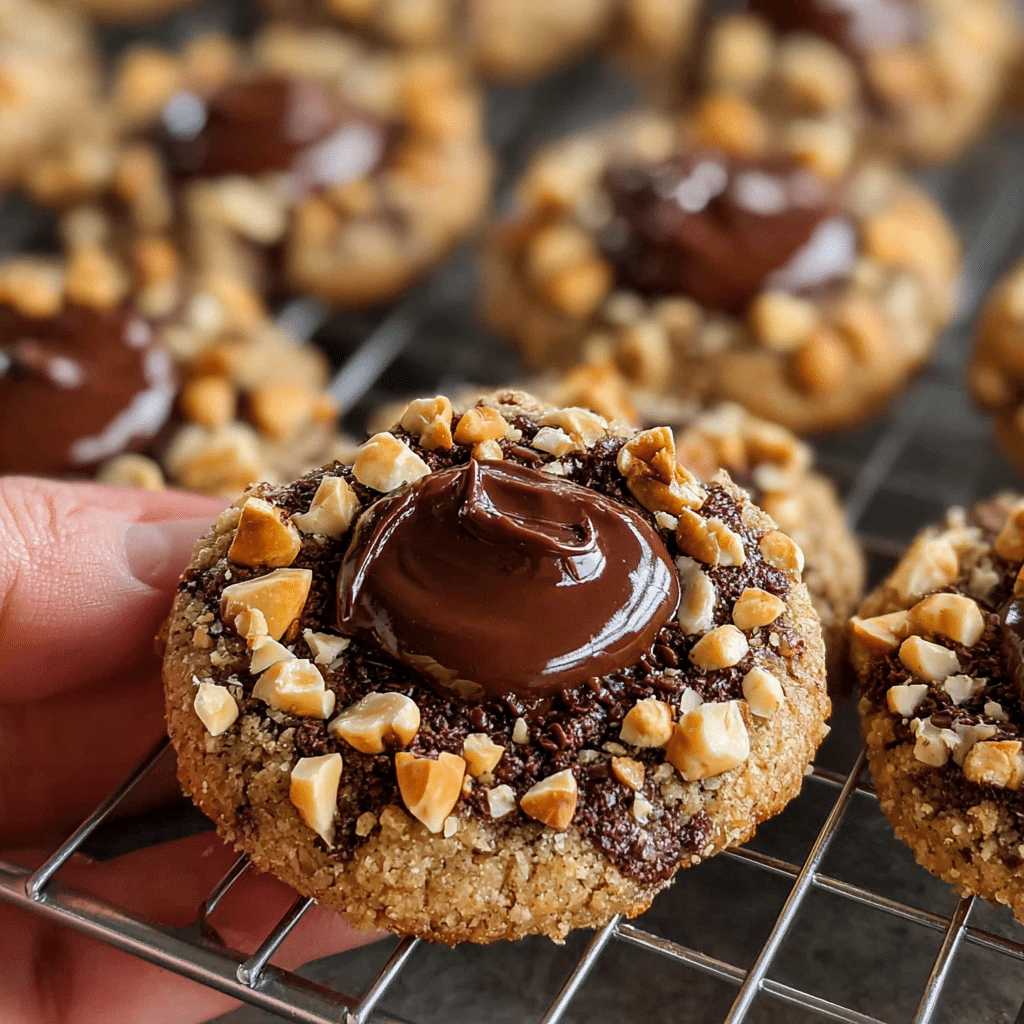
These Chocolate Hazelnut Thumbprint Cookies are everything a cookie should be: golden-edged, melt-in-your-mouth tender, and crowned with a pool of rich, nutty chocolate filling. Whether you’re baking for a holiday cookie swap, a cozy afternoon treat, or simply because you deserve something sweet, this recipe delivers every single time.
As someone who’s spent years perfecting simple, flavor-packed recipes in my kitchen at FoodFansy, I’ve learned that the best cookies don’t require fancy techniques just quality ingredients, a little patience, and a whole lot of love. In this guide, I’ll walk you through everything: choosing the right butter, avoiding common pitfalls, and even fun flavor twists to make these cookies your own.
Why This Chocolate Hazelnut Thumbprint Cookies Recipe Works
These cookies are the definition of effortless elegance. Here’s why they’ll become your new go-to:
- Uses pantry staples you already have – No specialty ingredients or last-minute grocery runs required. Butter, sugar, flour, and chocolate-hazelnut spread are all you need.
- Comes together in under 30 minutes – From mixing bowl to oven, this dough is quick, forgiving, and beginner-friendly.
- Perfect for any occasion – Elegant enough for gifting, simple enough for a Tuesday afternoon. These cookies work for holiday parties, potlucks, or just satisfying a sweet tooth.
- Customizable and crowd-pleasing – Swap the chocolate-hazelnut filling for jam, caramel, or even peanut butter to suit any taste or dietary preference.
The secret? A buttery, vanilla-scented dough that stays tender thanks to the perfect flour-to-fat ratio, paired with a luscious filling that bakes into every bite.
Choosing the Right Ingredients for Chocolate Hazelnut Thumbprint Cookies
The beauty of thumbprint cookies lies in their simplicity, but quality ingredients make all the difference.
Best Butter for This Recipe
Unsalted butter, softened to room temperature, is your foundation here. Why unsalted? It gives you full control over the salt level and lets the sweet, nutty flavors shine. Make sure your butter is truly softened not melted, not cold. It should leave a slight indent when pressed. This ensures a smooth, creamy dough that holds its shape during baking.
Buying Tips for Chocolate-Hazelnut Spread
Look for a high-quality chocolate-hazelnut spread with a rich, smooth texture. Brands like Nutella are classic, but feel free to explore artisan or organic options. Check the ingredient list real hazelnuts and cocoa should be near the top. Avoid overly sweet or waxy spreads; they won’t deliver that deep, nutty decadence these cookies deserve.
Substitutions
- Butter: Swap with European-style butter for extra richness, or use vegan butter for a dairy-free version.
- Chocolate-Hazelnut Spread: Try almond butter, cookie butter, jam, or even a spoonful of caramel for a fun twist.
- All-Purpose Flour: Use a 1:1 gluten-free flour blend if needed just know the texture may be slightly more delicate.
Ingredients & Prep for Chocolate Hazelnut Thumbprint Cookies
Let’s break down what you’ll need and how to prep like a pro.
Cookie Dough Essentials
- 1 cup unsalted butter, softened – The base of your buttery, tender cookies
- 2/3 cup sugar – Just enough sweetness without overpowering the filling
- 1 tsp vanilla extract – Adds warmth and depth
- 2 cups all-purpose flour – Provides structure and that classic cookie texture
- 1/4 tsp salt – Balances sweetness and enhances flavor
Chocolate-Hazelnut Filling
- 1/2 cup chocolate-hazelnut spread – The star of the show, bringing rich, nutty indulgence to every bite
Pantry Staples
- Powdered sugar for dusting (optional) – A snowy finishing touch that makes these cookies look bakery-worthy
Prep Tip
Chill your dough for 15–30 minutes before rolling. This step is a game-changer it makes the dough easier to handle, prevents excessive spreading, and helps the cookies hold their signature thumbprint shape. Trust me, a little patience here pays off in picture-perfect results.
Step-by-Step Cooking Instructions for Chocolate Hazelnut Thumbprint Cookies
Let’s get baking! Follow these steps for foolproof, bakery-quality cookies.
Pre-Cooking Prep for Chocolate Hazelnut Thumbprint Cookies
- Preheat your oven to 350°F (175°C). A properly heated oven ensures even baking and those gorgeous golden edges.
- Line a baking sheet with parchment paper. This prevents sticking and makes cleanup a breeze.
- Scoop dough into 1-inch balls. Use a cookie scoop for uniform size it’s not just for looks; evenly sized cookies bake at the same rate.
Forming the Thumbprints for Chocolate Hazelnut Thumbprint Cookies
Once your dough balls are on the baking sheet, it’s time to create those iconic indentations. Use your thumb or the back of a rounded spoon handle to gently press into the center of each ball. Don’t press all the way through you want a well deep enough to hold the filling but not so deep that the dough cracks or breaks.
Next, fill each indentation with about half a teaspoon of chocolate-hazelnut spread. Be generous, but don’t overfill the filling will spread slightly as it bakes. If you’re feeling fancy, you can pipe it in using a small piping bag or a zip-top bag with the corner snipped off.
Baking Method for Chocolate Hazelnut Thumbprint Cookies
Bake for 12–15 minutes, keeping a close eye on the edges. You’re looking for a light golden color around the edges while the centers remain soft and pale. The cookies will firm up as they cool, so resist the urge to overbake.
Let the cookies cool completely on the baking sheet before transferring them to a wire rack. Moving them too soon can cause them to break or lose their shape.
Doneness Check for Chocolate Hazelnut Thumbprint Cookies
Your cookies are done when the edges are lightly golden and the centers are still soft. They should feel just slightly firm to the touch but not hard. Remember, they’ll continue to set as they cool, so pulling them a minute early is better than a minute too late.
Resting for Chocolate Hazelnut Thumbprint Cookies
Allow cookies to cool for at least 10 minutes on the baking sheet. This resting time lets the filling set and the cookies firm up just enough to handle without crumbling. Once cooled, dust with powdered sugar if desired, and enjoy!
Pro Tips for Perfect Chocolate Hazelnut Thumbprint Cookies
Here’s how to take your cookies from good to absolutely unforgettable.
Avoiding Dry or Crumbly Chocolate Hazelnut Thumbprint Cookies
- Don’t overmix the dough. Once the flour is incorporated, stop mixing. Overworking the dough develops too much gluten, leading to tough, dry cookies.
- Measure flour correctly. Spoon flour into your measuring cup and level it off don’t pack it down. Too much flour is the number one culprit behind dry cookies.
- Watch the baking time closely. Even an extra minute or two can dry out these delicate cookies.
Tool Recommendations for Chocolate Hazelnut Thumbprint Cookies
- Cookie scoop – Ensures uniform size and professional-looking cookies
- Parchment paper or silicone baking mat – Prevents sticking and promotes even browning
- Small spoon or piping bag – Makes filling the thumbprints neat and easy
Storage & Reheating for Chocolate Hazelnut Thumbprint Cookies
Store in an airtight container at room temperature for up to 5 days, layering parchment paper between cookies to prevent sticking. For longer storage, freeze unfilled cookies for up to 3 months just thaw, fill, and serve. Avoid refrigerating, as it can dry them out.
Flavor Variations for Chocolate Hazelnut Thumbprint Cookies
Make these cookies your own with these fun twists.
Sweet & Fruity Twist
Fill with raspberry, strawberry, or apricot jam instead of chocolate-hazelnut spread for a bright, tangy contrast to the buttery cookie base. Dust with powdered sugar for a classic holiday look.
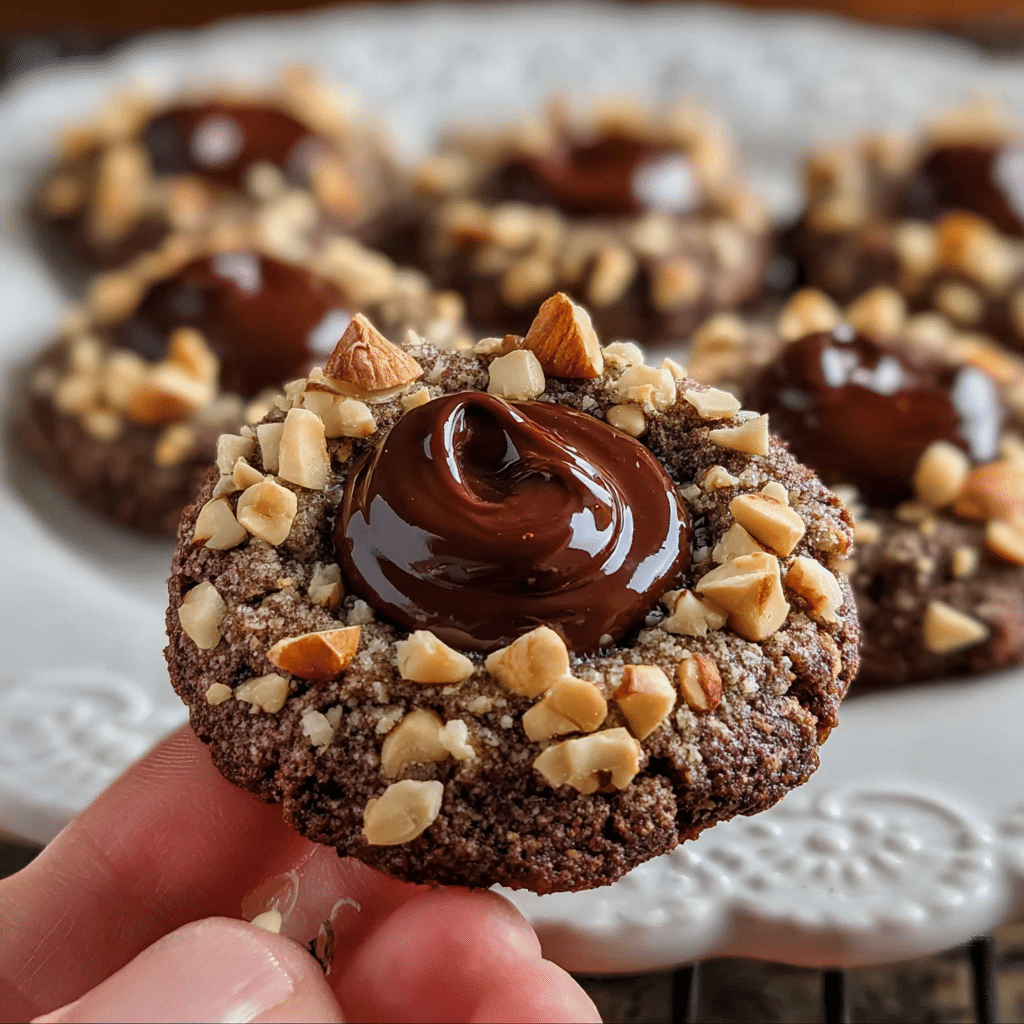
Nutty & Decadent
Use almond butter, cashew butter, or cookie butter in place of chocolate-hazelnut spread. Top with a sprinkle of chopped toasted nuts for extra crunch and flavor.
Global Flavors
- Matcha White Chocolate: Add 1 tablespoon of matcha powder to the dough and fill with melted white chocolate.
- Dulce de Leche: Fill thumbprints with dulce de leche for a Latin-inspired treat.
- Speculoos: Use cookie butter (Biscoff spread) and add a pinch of cinnamon to the dough for a European twist.
Flavor Variations Comparison Table
| Variation | Filling | Dough Addition | Best For |
|---|---|---|---|
| Classic Chocolate Hazelnut | Chocolate-hazelnut spread | None | Traditional, crowd-pleasing |
| Berry Bliss | Raspberry or strawberry jam | None | Lighter, fruity alternative |
| Nutty Indulgence | Almond or cashew butter | None | Nut lovers, protein boost |
| Matcha Magic | White chocolate | 1 tbsp matcha powder | Modern, Instagram-worthy |
| Dulce de Leche Dream | Dulce de leche | 1/2 tsp cinnamon | Rich, caramel lovers |
| Speculoos Spice | Cookie butter | 1/2 tsp cinnamon | Cozy, European-inspired |
Serving Suggestions for Chocolate Hazelnut Thumbprint Cookies
These cookies shine on their own, but here’s how to make them even more special.
Pair with beverages: Serve alongside a hot cup of coffee, chai latte, or hot chocolate for a cozy afternoon treat. For evening gatherings, they’re delightful with dessert wine, port, or even a hazelnut liqueur.
Create a cookie platter: Arrange these alongside other holiday favorites like gingerbread, sugar cookies, and shortbread for a stunning dessert spread.
Gift them beautifully: Layer in a decorative tin with parchment paper, tie with a ribbon, and you’ve got a heartfelt homemade gift that anyone would love to receive.
Serve with ice cream: Crumble a cookie over vanilla or hazelnut gelato for an elevated dessert that takes just seconds to assemble.
FAQs About Chocolate Hazelnut Thumbprint Cookies
Can I use frozen butter for this recipe?
No, the butter needs to be softened to room temperature for the dough to come together properly. Frozen or cold butter won’t cream well with the sugar, resulting in a dense, uneven texture.
How do I fix cookies that spread too much?
If your cookies spread too much, the dough was likely too warm. Next time, chill the dough for 15–30 minutes before baking, and make sure your butter is softened, not melted.
Can I make these cookies ahead of time?
Absolutely! You can prepare the dough, shape it into balls, and freeze them for up to 3 months. When ready to bake, press the thumbprints, fill, and bake from frozen just add 1–2 minutes to the baking time.
What if I don’t have chocolate-hazelnut spread?
No problem! Use jam, caramel, peanut butter, almond butter, or even melted chocolate. The beauty of thumbprint cookies is their versatility.
Are these cookies safe for people with nut allergies?
The chocolate-hazelnut spread contains hazelnuts, so they’re not suitable for those with nut allergies. However, you can substitute with nut-free options like sunflower seed butter or jam.
Conclusion
Fire up your oven and make these Chocolate Hazelnut Thumbprint Cookies tonight! Whether you’re baking for loved ones, building a holiday cookie box, or simply treating yourself, this recipe delivers buttery, tender perfection every time.
Over at FoodFansy, thousands of home cooks have fallen in love with these cookies, and I know you will too. They’re proof that simple ingredients, a little patience, and a lot of heart can create something truly magical.
If you enjoyed this recipe, be sure to share it with your friends or save it for later! I’d love to see your unique twist feel free to post your photos on Pinterest!
Chocolate Hazelnut Thumbprint Cookies – Rich, Buttery, and Irresistible
- Total Time: 32 minutes
- Yield: 24 cookies 1x
- Diet: Vegetarian
Description
These Chocolate Hazelnut Thumbprint Cookies are buttery, rich, and filled with smooth chocolate. Perfect for holidays or anytime baking!
Ingredients
1 cup unsalted butter, softened
3/4 cup granulated sugar
1 tsp vanilla extract
1 3/4 cups all-purpose flour
1/4 cup cocoa powder
1/2 cup finely ground hazelnuts
Pinch of salt
1/2 cup chocolate chips
2 tbsp heavy cream
1 tsp butter
Instructions
1. Preheat oven to 350°F (175°C).
2. Toast hazelnuts, cool, and grind finely.
3. Cream butter and sugar until fluffy; add vanilla.
4. Mix in flour, cocoa, salt, and hazelnuts to form dough.
5. Chill dough for 30 minutes.
6. Roll into 1-inch balls and press thumbprint centers.
7. Bake 10–12 minutes.
8. Melt chocolate, cream, and butter for filling.
9. Fill centers and let set before serving.
Notes
Store in an airtight container for up to 5 days.
You can substitute Nutella for the chocolate filling.
- Prep Time: 20 minutes
- Cook Time: 12 minutes
- Category: Dessert
- Method: Baking
- Cuisine: American
Nutrition
- Serving Size: 1 cookie
- Calories: 160
- Sugar: 9g
- Sodium: 40mg
- Fat: 10g
- Saturated Fat: 5g
- Unsaturated Fat: 3g
- Trans Fat: 0g
- Carbohydrates: 14g
- Fiber: 1g
- Protein: 2g
- Cholesterol: 20mg
Keywords: Chocolate Hazelnut Thumbprint Cookies, easy cookies, holiday baking