
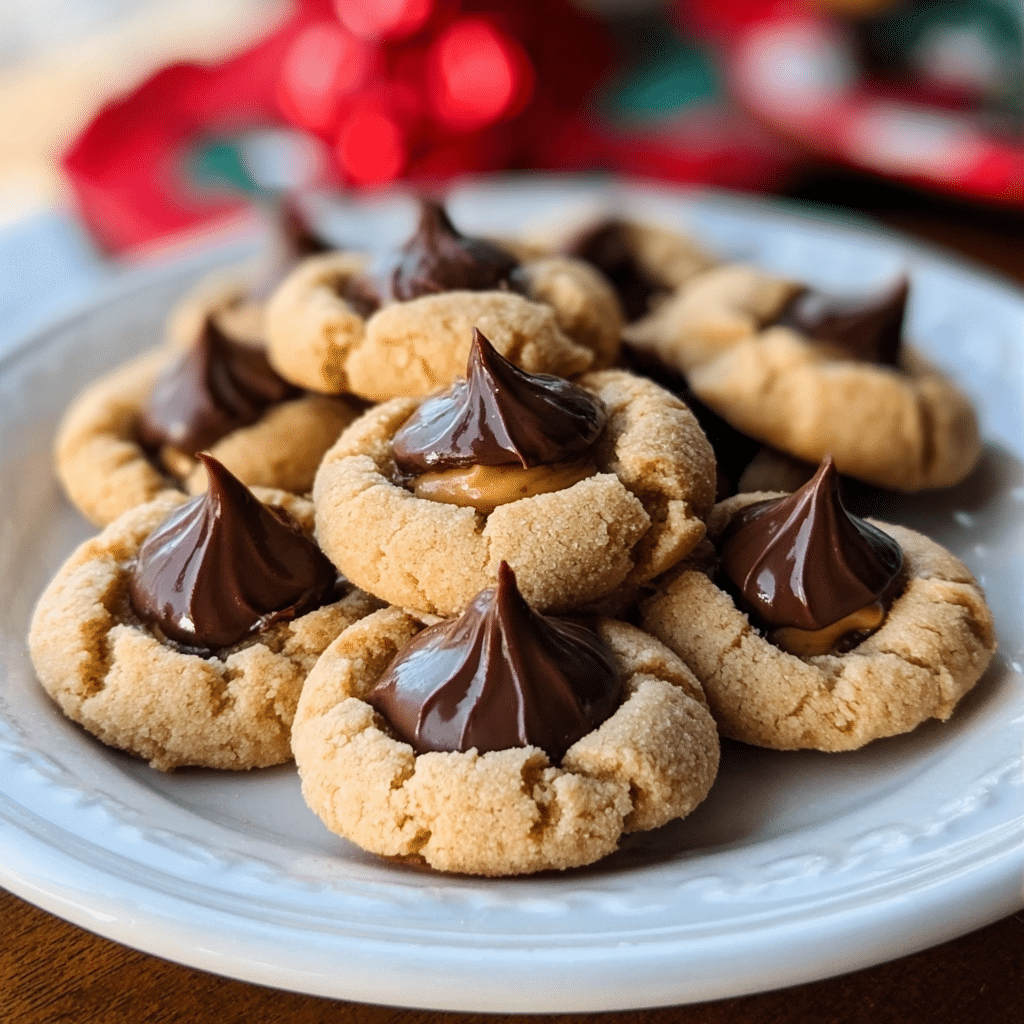
Peanut Butter Blossom Cookies just saying those words brings back a flood of memories for me. I remember being seven years old, standing on a wobbly step stool in my grandmother’s kitchen, chocolate kisses scattered across the counter like tiny silver treasures. She’d let me press each chocolate into the warm cookies, and I thought it was the most important job in the world.
Years later, after training in professional kitchens and exploring flavors from Bangkok to Barcelona, I still come back to these classic cookies. Why? Because sometimes the most extraordinary recipes are the ones that taste like home. These Peanut Butter Blossom Cookies aren’t just dessert they’re soft, chewy nostalgia wrapped in peanut buttery perfection with a chocolate kiss crown.
As someone who’s spent years perfecting both intricate pastries and comfort food classics, I can tell you that this recipe delivers every single time. Whether you’re baking for a holiday cookie exchange, a school bake sale, or simply craving something sweet on a Tuesday night, these cookies promise that perfect balance of tender chewiness and rich flavor.
In this guide, I’ll walk you through everything: why this recipe works so beautifully, how to choose the right ingredients, step-by-step instructions that guarantee success, pro tips for bakery-quality results, and creative variations to make these cookies your own. Let’s get baking.
Why This Peanut Butter Blossom Cookie Recipe Works
There’s a reason Peanut Butter Blossom Cookies have been a beloved classic for generations. This recipe combines simplicity with stunning results, and here’s exactly why it works so well:
- Perfect texture balance: The combination of butter and peanut butter creates cookies that are soft and chewy in the center with slightly crisp edges – the holy grail of cookie texture.
- Foolproof ingredient ratios: Equal parts butter, peanut butter, granulated sugar, and brown sugar create a balanced sweetness while ensuring the cookies hold their shape and maintain that signature tender crumb.
- Quick preparation: Unlike some cookie recipes that require overnight chilling or complicated techniques, these Peanut Butter Blossom Cookies come together in about 30 minutes from start to finish.
- Crowd-pleasing flavor: The marriage of salty-sweet peanut butter with milk chocolate is universally loved – I’ve never met anyone who can resist the combination.
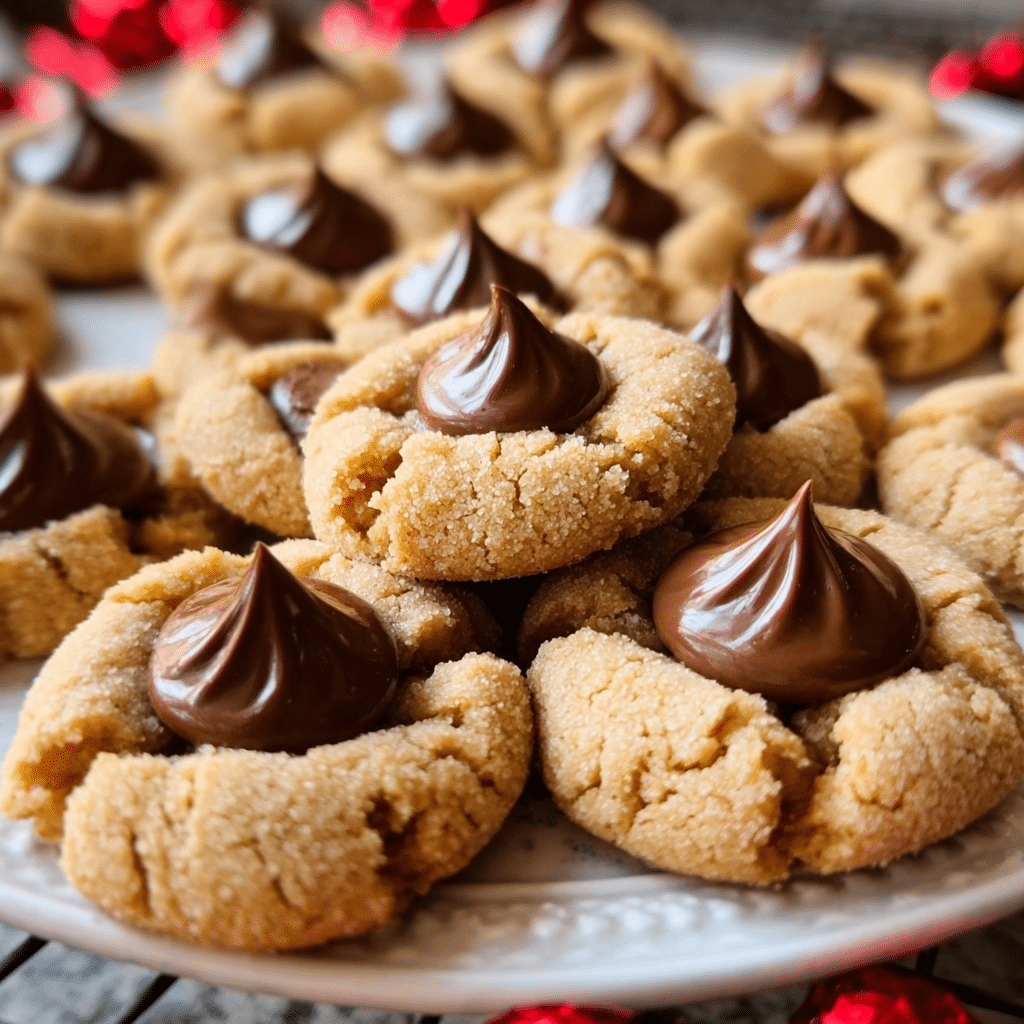
- Visually stunning: That iconic chocolate kiss pressed into the center makes these cookies as beautiful as they are delicious, perfect for gift-giving or special occasions.
- Pantry-friendly ingredients: Everything you need is likely already in your kitchen, making these an ideal last-minute baking project.
Choosing the Right Ingredients for Peanut Butter Blossom Cookies
Quality ingredients make all the difference in baking, and Peanut Butter Blossom Cookies are no exception. Here’s what you need to know:
Best Peanut Butter for This Recipe
The type of peanut butter you choose dramatically affects your cookies’ texture and flavor:
Creamy vs. Natural: Always use regular creamy peanut butter (like Jif or Skippy) for Peanut Butter Blossom Cookies. Natural peanut butter contains more oil and less stabilizers, which can make your cookies spread too much and become greasy. The commercial brands create that perfect chewy texture we’re after.
Avoid crunchy: While delicious in sandwiches, crunchy peanut butter disrupts the smooth, tender crumb that makes these cookies special.
Butter Selection Tips
Unsalted butter is essential – it gives you complete control over the salt level in your cookies. Make sure your butter is properly softened (not melted!) to room temperature. It should be soft enough to leave an indent when pressed but still hold its shape.
Sugar Considerations
The combination of granulated and brown sugar isn’t just for sweetness. Granulated sugar provides structure and that classic cookie crispness, while brown sugar adds moisture and creates chewiness thanks to its molasses content. Don’t skip either one.
Chocolate Kisses
Use milk chocolate Hershey’s Kisses for the authentic experience. Unwrap them before you start baking – trust me, trying to unwrap 24 kisses while your cookies are cooling is stressful! You can explore dark chocolate or even striped kisses for variety.
Substitutions for Dietary Needs
- Gluten-free: Swap all-purpose flour with a 1:1 gluten-free baking blend
- Vegan: Use vegan butter, flax eggs (1 tablespoon ground flaxseed + 3 tablespoons water per egg), and dairy-free chocolate
- Lower sugar: You can reduce each sugar by 2 tablespoons, though cookies will be slightly less sweet and tender
Ingredients & Prep for Peanut Butter Blossom Cookies
Let me break down everything you need to create perfect Peanut Butter Blossom Cookies:
Cookie Dough Essentials
Wet Ingredients:
- 1/2 cup unsalted butter, softened
- 1/2 cup creamy peanut butter (room temperature)
- 1/2 cup granulated sugar (plus extra for rolling)
- 1/2 cup packed light brown sugar
- 1 large egg (room temperature)
Dry Ingredients:
- 1 1/2 cups all-purpose flour
- 3/4 teaspoon baking soda
- 1/2 teaspoon baking powder
- 1/4 teaspoon salt
Topping:
- 24–30 chocolate kisses, unwrapped
Prep Work for Success
Temperature matters: This is crucial for Peanut Butter Blossom Cookies. All ingredients should be at room temperature before you begin. Cold butter won’t cream properly, and cold eggs can cause the dough to seize. Set everything out 30 minutes before baking.
Unwrap those kisses: Do this first! Trying to unwrap chocolates while warm cookies are waiting is a recipe for frustration. Plus, the oils from your hands can create white marks on the chocolate if you handle them too long.
Measure accurately: Use the spoon-and-level method for flour (spoon flour into measuring cup, level off with a knife). Too much flour makes dry, tough cookies.
Prep your workspace: Line baking sheets with parchment paper and set up your sugar bowl for rolling. Having everything ready makes the process smooth and enjoyable.
Step-by-Step Cooking Instructions for Peanut Butter Blossom Cookies
Let me walk you through the exact process I use every time I make these beloved cookies:
Pre-Cooking Prep for Peanut Butter Blossom Cookies
- Preheat your oven to 350°F (175°C). This is non-negotiable – an oven that’s too cool produces flat, greasy cookies, while one that’s too hot creates burnt edges and raw centers.
- Line baking sheets with parchment paper. This prevents sticking and promotes even browning. If you don’t have parchment, use silicone baking mats.
- Cream the butter mixture: In a large bowl, beat the softened butter, peanut butter, granulated sugar, and brown sugar together until light and fluffy (about 2-3 minutes with an electric mixer). This incorporates air, which helps create tender cookies. The mixture should look pale and creamy.
- Add the egg: Beat in the egg until completely smooth and incorporated. Scrape down the bowl sides to ensure even mixing.
- Combine dry ingredients: In a separate bowl, whisk together the flour, baking soda, baking powder, and salt. This distributes the leavening agents evenly.
- Mix the dough: Gradually add the dry mixture to the wet ingredients, mixing just until a cohesive dough forms. Don’t overmix – this develops gluten and creates tough cookies.
Baking Method for Peanut Butter Blossom Cookies
- Shape the dough: Roll the dough into 1-inch balls (about 1 tablespoon each). A cookie scoop makes this process faster and ensures uniform size.
- Sugar coating: Roll each ball in granulated sugar until completely coated. This creates a sweet, slightly crunchy exterior that contrasts beautifully with the soft center.
- Arrange on sheets: Place the sugar-coated balls on prepared baking sheets, spacing them about 2 inches apart. They’ll spread as they bake.
- Bake: Bake at 350°F (175°C) for 8–10 minutes. The edges should be set and just beginning to turn golden, but the centers will look slightly underdone. This is perfect! They’ll continue cooking as they cool.
- Add the kiss: The moment the cookies come out of the oven, immediately press a chocolate kiss firmly into the center of each cookie. The cookie will crack slightly around the edges – this is the signature look we want. Work quickly before the cookies cool too much.
Cooling for Peanut Butter Blossom Cookies
Let the cookies rest on the baking sheet for 2-3 minutes after adding the kisses. This brief waiting period allows them to set just enough that the chocolate won’t melt completely or slide off when you transfer them.
Carefully move the cookies to a wire cooling rack using a spatula. Let them cool completely (about 30 minutes) before storing. The chocolate will firm up and the cookies will reach their perfect texture.
Pro Tips for Perfect Peanut Butter Blossom Cookies
After making countless batches over the years, here are my insider secrets for bakery-quality results:
Avoiding Common Mistakes with Peanut Butter Blossom Cookies
Don’t overbake: This is the #1 mistake people make. Remember, cookies continue baking on the hot sheet after you remove them from the oven. If they look fully cooked in the oven, they’ll be overdone once cooled. Pull them when the edges are just set but centers still look soft.
Work quickly with the kisses: Have them unwrapped and ready. Press them in immediately after removing cookies from the oven. If you wait too long, the cookies cool and crack, potentially breaking apart.
Chill the dough if needed: If your kitchen is warm and the dough feels too soft to handle, refrigerate it for 15-20 minutes. This makes rolling easier and prevents excessive spreading.
Room temperature ingredients are crucial: Cold butter and eggs don’t incorporate properly, leading to dense, tough cookies. Set everything out ahead of time.
Tool Recommendations for Peanut Butter Blossom Cookies
- Cookie scoop: A 1-tablespoon scoop creates perfectly uniform cookies that bake evenly
- Stand or hand mixer: Makes creaming the butter mixture effortless and incorporates just the right amount of air
- Parchment paper: Prevents sticking and makes cleanup a breeze
- Wire cooling rack: Allows air circulation so bottoms don’t get soggy
- Oven thermometer: Ensures your oven temperature is accurate (many run hot or cool)
Storage & Reheating Peanut Butter Blossom Cookies
Room temperature: Store in an airtight container at room temperature for up to 5 days. Layer with parchment paper to prevent the kisses from sticking to the container lid.
Freezing baked cookies: Freeze in a single layer on a baking sheet until solid, then transfer to freezer bags. They’ll keep for up to 3 months. Thaw at room temperature for about 30 minutes.
Freezing dough: Roll into balls, freeze on a baking sheet, then store in freezer bags for up to 3 months. Bake from frozen, adding 1-2 extra minutes to the baking time. Roll in sugar and add kisses as usual.
Flavor Variations for Peanut Butter Blossom Cookies
While the classic version is perfection, here are some creative twists I’ve developed for Peanut Butter Blossom Cookies:
Chocolate Lover’s Twist
Replace 1/4 cup of the flour with unsweetened cocoa powder for Chocolate Peanut Butter Blossom Cookies. The result is a rich, double-chocolate experience that’s absolutely decadent. Use dark chocolate kisses for an even more intense flavor.
Salted Caramel Version
Swap the milk chocolate kisses for Rolo candies (the caramel-filled chocolates). Sprinkle each cookie with a tiny pinch of flaky sea salt immediately after pressing in the candy. The sweet-salty combination is addictive.
Almond Butter Blossoms
Replace the peanut butter with almond butter for a more sophisticated, nutty flavor. These Almond Butter Blossom Cookies have a slightly more delicate taste and work beautifully with dark chocolate kisses.
Holiday Variations
- Peppermint: Add 1/2 teaspoon peppermint extract to the dough and use candy cane Hershey’s Kisses
- Fall spice: Mix in 1 teaspoon cinnamon and 1/4 teaspoon nutmeg, top with caramel kisses
- Birthday: Add 1/2 cup rainbow sprinkles to the dough and use birthday cake kisses
Dietary Adaptations for Peanut Butter Blossom Cookies
| Dietary Need | Modification | Notes |
|---|---|---|
| Gluten-Free | Use 1:1 gluten-free flour blend | Bob’s Red Mill or King Arthur work best; may be slightly more crumbly |
| Vegan | Use vegan butter, flax egg (1 tbsp ground flaxseed + 3 tbsp water), dairy-free chocolate | Let flax egg sit 5 minutes before using |
| Keto/Low-Carb | Use almond flour (2 cups) + erythritol sweetener, sugar-free chocolate | Texture will be denser but still delicious |
| Nut-Free | Use sunflower seed butter or soy nut butter | May have slightly greenish tint (totally safe!) |
| Reduced Sugar | Cut each sugar by 2-3 tablespoons | Cookies will be less sweet and slightly less tender |
Serving Suggestions for Peanut Butter Blossom Cookies
These Peanut Butter Blossom Cookies are versatile enough for any occasion:
Perfect Pairings
Beverages: Serve warm with cold milk (classic!), hot coffee, chai tea, or hot chocolate. For adults, try them with a sweet dessert wine or Irish cream liqueur.
Ice cream: Make cookie sandwiches with vanilla ice cream, or crumble them over chocolate or peanut butter ice cream for an indulgent sundae.
Gift giving: Package in clear cellophane bags tied with ribbon for holiday gifts, teacher appreciation, or party favors. They ship well and stay fresh for days.
Occasion Ideas for Peanut Butter Blossom Cookies
- Holiday cookie trays: A must-have for Christmas, Hanukkah, or any winter celebration
- Bake sales: They’re eye-catching and always sell out first
- After-school snacks: Keep a batch in the cookie jar for hungry kids
- Potluck desserts: Easy to transport and please every age group
- Movie nights: Better than any store-bought treat
- Valentine’s Day: Use red or pink striped kisses for a festive touch
FAQs About Peanut Butter Blossom Cookies
Can I use natural peanut butter for Peanut Butter Blossom Cookies?
I don’t recommend it. Natural peanut butter has a different oil content and consistency, which causes the cookies to spread excessively and become greasy. Stick with commercial brands like Jif, Skippy, or Peter Pan for the best texture.
Why did my chocolate kisses melt completely?
This happens when the cookies are too hot when you add the kisses, or if you let them sit in the oven too long. Press the kisses in immediately after removing from the oven, and make sure your oven temperature is accurate (use an oven thermometer to check).
Can I make Peanut Butter Blossom Cookies ahead of time?
Absolutely! Baked cookies stay fresh for 5 days at room temperature, or you can freeze them for up to 3 months. You can also freeze the dough balls for up to 3 months and bake fresh cookies whenever you want them.
How do I keep my cookies from spreading too much?
Make sure your butter is softened but not melted, chill the dough if your kitchen is warm, don’t skip the flour measurement (use spoon-and-level method), and ensure your baking soda and powder are fresh (they lose potency after 6 months).
Can I double this recipe for Peanut Butter Blossom Cookies?
Yes! This recipe doubles beautifully. Just make sure to cream the butter mixture long enough (3-4 minutes) since the larger quantity needs more time to incorporate properly.
My cookies turned out dry – what happened?
Overbaking is usually the culprit. Remember that cookies continue baking on the hot sheet after you remove them from the oven. Also check that you didn’t add too much flour – it should be spooned into the measuring cup and leveled, not packed.
Are Peanut Butter Blossom Cookies safe during pregnancy?
Yes, these cookies are perfectly safe for pregnant women. They contain fully cooked eggs and no raw ingredients. However, if you have gestational diabetes, consult your doctor about the sugar content.
What if I don’t have chocolate kisses?
You can substitute with other small chocolates like Rolo candies, peanut butter cups cut in half, or even chocolate chips. The classic kiss shape is iconic, but the cookies will still taste amazing with alternatives.
Conclusion
There’s something magical about Peanut Butter Blossom Cookies the way they fill your kitchen with the warm scent of peanut butter and vanilla, how that chocolate kiss glistens in the center like a little edible jewel, and the soft, chewy texture that makes it impossible to eat just one.
These cookies represent everything I love about baking: simple ingredients transformed into something extraordinary, a recipe that brings people together, and flavors that taste like home no matter where you are.
Whether you’re baking them for the first time or the hundredth, I hope these Peanut Butter Blossom Cookies bring as much joy to your kitchen as they’ve brought to mine. Fire up that oven, unwrap those chocolate kisses, and let’s create some delicious memories together.
If you enjoyed this recipe, be sure to share it with your friends or save it for later! I’d love to see your unique twist feel free to post your photos on Pinterest!

Peanut Butter Blossom Cookies – Soft, Chewy & Irresistibly Sweet
- Total Time: 25 minutes
- Yield: 24 cookies 1x
- Diet: Vegetarian
Description
Soft and chewy peanut butter cookies topped with a rich chocolate kiss an all-time favorite treat for any occasion.
Ingredients
1/2 cup unsalted butter, softened
1/2 cup creamy peanut butter
1/2 cup granulated sugar
1/2 cup light brown sugar
1 large egg
1 1/2 cups all-purpose flour
3/4 tsp baking soda
1/2 tsp baking powder
1/4 tsp salt
24–30 chocolate kisses
Instructions
1. Preheat oven to 350°F (175°C) and line baking sheets with parchment paper.
2. Beat butter, peanut butter, and sugars until creamy.
3. Add egg and mix until smooth.
4. Whisk dry ingredients in another bowl.
5. Combine wet and dry mixtures to form dough.
6. Roll dough into 1-inch balls, coat with sugar, and place on baking sheet.
7. Bake for 8–10 minutes until edges are golden.
8. Immediately press a chocolate kiss in the center of each cookie.
9. Cool and enjoy.
Notes
You can substitute almond butter for a nutty variation.
Store cookies in airtight containers for up to 5 days.
- Prep Time: 15 minutes
- Cook Time: 10 minutes
- Category: Dessert
- Method: Baking
- Cuisine: American
Nutrition
- Serving Size: 1 cookie
- Calories: 130
- Sugar: 10g
- Sodium: 90mg
- Fat: 7g
- Saturated Fat: 3g
- Unsaturated Fat: 3g
- Trans Fat: 0g
- Carbohydrates: 14g
- Fiber: 1g
- Protein: 3g
- Cholesterol: 15mg
Keywords: peanut butter blossom cookies, easy cookies, chocolate cookies