
Hey there! I’m Emeli, and let me tell you about the morning that changed my breakfast game forever. Picture this: I’m standing in a tiny bakery in Stockholm, watching snowflakes dance past the window while the scent of cinnamon and butter wraps around me like a warm hug. That’s where I fell in love with the magic of cinnamon rolls but back home, I wanted something quicker, something I could slice and share without the wait. Enter these Cinnamon Roll Bliss Bars.
If you’ve ever wanted that gooey cinnamon roll experience without the yeast, the rise time, or the rolling pin gymnastics, you’re in exactly the right place. These bars deliver all the swirled, buttery, cinnamon-sugar bliss of your favorite bakery treat in a fraction of the time. Whether you’re feeding a crowd at brunch or sneaking a sweet moment with your morning coffee, these bars are about to become your new obsession.
In this guide, I’ll walk you through choosing the perfect ingredients, nailing that signature swirl, and troubleshooting common baking pitfalls. Plus, I’ve included flavor twists, serving ideas, and answers to your burning questions. Let’s dive in!
Why This Cinnamon Roll Bliss Bars Recipe Works
There’s a reason these bars have become a staple in my kitchen and soon, yours too. Here’s what makes them absolutely irresistible:
- No yeast, no stress: Unlike traditional cinnamon rolls, these bars use a simple batter that comes together in minutes. No kneading, no rising, no waiting around.
- Perfect swirl every time: The cinnamon filling rests just long enough to thicken, making it easy to create those gorgeous, Instagram-worthy swirls without the mess.
- Feeds a crowd effortlessly: One pan yields 12-16 generous bars—perfect for potlucks, bake sales, or Sunday brunch with the family.
- Customize to your heart’s content: From cream cheese frosting to maple glaze, these bars are a blank canvas for your favorite toppings and mix-ins.
Choosing the Right Ingredients for Cinnamon Roll Bliss Bars
The beauty of these bars lies in their simplicity, but quality ingredients make all the difference. Here’s what you need to know:
Best Ingredients for Cinnamon Roll Bliss Bars
Butter: Use real, unsalted butter not margarine. It creates that rich, bakery-quality flavor and tender crumb. European-style butter with higher fat content takes these bars from good to extraordinary.
Brown Sugar: The molasses in brown sugar adds depth and moisture to the cinnamon filling. Dark brown sugar gives you more intense caramel notes, while light brown keeps things subtle.
Cinnamon: This is your star player. Opt for Ceylon cinnamon (often called “true cinnamon”) for a sweeter, more delicate flavor, or stick with cassia cinnamon for that classic, bold punch.
Flour: All-purpose flour gives you the perfect texture not too cakey, not too dense. Measure by spooning it into your measuring cup and leveling off (don’t pack it down).
Buying Tips for Cinnamon Roll Bliss Bars
- Check your baking powder’s freshness: Old baking powder means flat, dense bars. Test it by dropping a teaspoon into hot water it should fizz enthusiastically.
- Room temperature matters: Cold butter won’t cream properly, and cold eggs can cause your batter to curdle. Set them out 30-60 minutes before baking.
- Vanilla extract quality: Pure vanilla extract costs more, but the flavor difference is real. Your kitchen (and your taste buds) will thank you.
Substitutions for Cinnamon Roll Bliss Bars
- Milk alternatives: Almond milk, oat milk, or coconut milk work beautifully in place of dairy milk. Keep the fat content similar for best results.
- Sugar swaps: Coconut sugar can replace brown sugar for a deeper, almost caramel-like flavor (though it won’t be as sweet).
- Gluten-free option: Use a 1:1 gluten-free baking flour blend. Your bars may be slightly more crumbly, but still delicious.
Ingredients & Prep for Cinnamon Roll Bliss Bars
Let’s break down everything you need and how to prep it for success.
Base Prep Essentials for Cinnamon Roll Bliss Bars
Before you even preheat your oven, take these critical steps:
- Measure ingredients accurately: Baking is chemistry. Use measuring cups for dry ingredients and liquid measuring cups for wet ones. Level off your measurements with a straight edge.
- Bring butter and eggs to room temperature: This isn’t just a suggestion cold ingredients don’t incorporate well, leading to a lumpy batter and uneven texture. The butter should be soft enough to leave an indent when pressed but not melty.
- Line your pan with parchment for easy removal: Cut parchment paper to fit the bottom of your 9×13-inch pan with a 2-inch overhang on two sides. This creates “handles” for lifting the bars out cleanly once cooled.
Cinnamon Filling for Cinnamon Roll Bliss Bars
This is where the magic happens that signature swirl that makes everyone swoon.
Ingredients:
- ½ cup (1 stick) unsalted butter, melted
- 1 cup packed brown sugar
- 2 tablespoons ground cinnamon
- 1 teaspoon vanilla extract
The Secret Step: After mixing all the filling ingredients together, let it rest for 5 minutes. This allows the sugar to absorb the butter and the mixture to thicken slightly, making it much easier to swirl without it sinking straight to the bottom of your batter.
Pantry Staples for Cinnamon Roll Bliss Bars
These everyday ingredients form the foundation of your bars:
- 2 cups all-purpose flour: The structure of your bars
- 1 cup granulated sugar: Sweetness and tenderness
- 2 teaspoons baking powder: Your leavening agent for that perfect rise
- ½ teaspoon salt: Balances sweetness and enhances all the flavors
- 1 cup whole milk: Moisture and richness (feel free to use 2% if that’s what you have)
Step-by-Step Cooking Instructions for Cinnamon Roll Bliss Bars
Let me walk you through this process like we’re baking together in my kitchen.
Pre-Cooking Prep for Cinnamon Roll Bliss Bars
- Preheat your oven to 350°F (175°C). Position your rack in the center of the oven for even baking.
- Prepare your pan: Line a 9×13-inch baking pan with parchment paper, leaving those handy overhangs.
- Mix dry ingredients: In a medium bowl, whisk together flour, granulated sugar, baking powder, and salt. Whisking aerates the flour and ensures even distribution of leavening.
- Cream butter and sugar: In a large bowl, beat the softened butter with an electric mixer on medium speed until creamy (about 1 minute). This incorporates air for a lighter texture.
- Combine gently: Add your dry ingredients and milk alternately to the butter mixture, starting and ending with dry ingredients. Mix on low speed just until combined—overmixing develops gluten, making your bars tough instead of tender. The batter should be thick but spreadable, like a soft cake batter.
Cooking Method for Cinnamon Roll Bliss Bars
- Spread the batter: Pour the batter into your prepared pan. Use an offset spatula to spread it evenly into all corners. The layer will be fairly thin that’s exactly what you want.
- Add the cinnamon filling: Drop spoonfuls of the rested cinnamon filling across the top of the batter. Don’t worry about being too precise rustic is beautiful.
- Create the swirl: Using a butter knife or wooden skewer, gently swirl the cinnamon mixture into the batter using figure-eight motions. Don’t overmix or you’ll lose the distinct swirl pattern. Two or three passes through the pan is plenty.
- Bake: Place the pan in your preheated oven and bake for 25-30 minutes. Your kitchen will smell absolutely heavenly resist the urge to open the oven door before 20 minutes or you risk the bars collapsing.
Doneness Check for Cinnamon Roll Bliss Bars
Here’s how to know when they’re perfectly baked:
- The center should be soft but not wet: The surface should look set and slightly golden, with the cinnamon swirls caramelized.
- The toothpick test: Insert a toothpick into the center (avoiding the gooey cinnamon swirls). It should come out with moist crumbs—not wet batter, but not completely clean either. These bars are meant to be tender, not dry.
- Edges pulling away slightly: The sides of the bars should just begin to pull away from the pan edges, with a light golden color.
Resting for Cinnamon Roll Bliss Bars
Patience, my friend this is crucial:
Let the bars cool in the pan for 15 minutes before slicing. This allows the structure to set and locks in that perfect soft, chewy texture. Cut too early and they’ll fall apart; too late and you miss that warm, melty moment. Use the parchment “handles” to lift the whole slab onto a cutting board, then slice into 12-16 bars with a sharp knife.
Pro Tips for Perfect Cinnamon Roll Bliss Bars
After making these countless times (and learning from a few kitchen mishaps), here are my insider secrets:
Avoiding Dense or Dry Cinnamon Roll Bliss Bars
- Don’t overmix the batter: Once you add the flour, mix just until you can’t see streaks of dry ingredients. Those few extra stirs might seem harmless, but they develop gluten, making your bars tough.
- Watch your oven temperature: Ovens lie. Invest in an oven thermometer many ovens run 25°F hotter or cooler than the dial indicates. Too hot and your bars dry out before cooking through.
- Don’t overbake: Remember, they continue cooking slightly as they cool. Pull them when they’re just set but still soft in the middle.
Tool Recommendations for Cinnamon Roll Bliss Bars
- 9×13-inch metal pan: Metal conducts heat better than glass, giving you more evenly baked bars with better browning.
- Parchment paper: Non-negotiable for easy removal and cleanup.
- Offset spatula: Makes spreading batter and frosting a breeze.
- Instant-read thermometer: While not essential for bars, it’s my secret weapon for all baking the center should read around 200-210°F when fully done.
Storage & Reheating for Cinnamon Roll Bliss Bars
- Room temperature: Store in an airtight container for up to 3 days. They’ll stay soft and delicious.
- Refrigerator: If you’ve added cream cheese frosting, refrigerate for up to 5 days. Bring to room temperature or warm slightly before serving.
- Freezer: Wrap individual bars in plastic wrap, then place in a freezer bag. Freeze for up to 3 months. Thaw overnight in the fridge or warm from frozen in the microwave for 20-30 seconds.
- Reheating: Microwave for 15-20 seconds to recapture that fresh-baked warmth.
Flavor Variations for Cinnamon Roll Bliss Bars
Once you’ve mastered the classic, these twists will keep things exciting:
Sweet Variations for Cinnamon Roll Bliss Bars
Maple Pecan: Replace the vanilla in the filling with maple extract and sprinkle ½ cup chopped pecans over the swirls before baking. Drizzle with maple glaze after cooling.
Cream Cheese Swirl: Add dollops of sweetened cream cheese (8 oz cream cheese beaten with ¼ cup sugar) alongside your cinnamon swirls for a tangy richness.
Apple Cinnamon: Fold ½ cup finely diced apple (tossed with lemon juice) into the batter before adding the cinnamon swirl.
Dietary-Friendly Cinnamon Roll Bliss Bars
Vegan Version: Use plant-based butter, non-dairy milk, and flax eggs (1 tablespoon ground flaxseed + 3 tablespoons water per egg, let sit 5 minutes).
Reduced Sugar: Cut the granulated sugar in the base to ¾ cup. The brown sugar in the filling provides plenty of sweetness.
Gluten-Free: Use your favorite 1:1 gluten-free flour blend. Add ¼ teaspoon xanthan gum if your blend doesn’t include it.
Global Flavor Twists for Cinnamon Roll Bliss Bars
| Variation | Filling Modification | Topping Suggestion |
|---|---|---|
| Mexican Chocolate | Add 2 tablespoons cocoa powder and ¼ teaspoon cayenne to cinnamon filling | Dust with cinnamon-sugar |
| Chai Spice | Replace cinnamon with chai spice blend (cinnamon, cardamom, ginger, cloves) | Vanilla glaze with a pinch of cardamom |
| Coconut Cream | Add ½ cup shredded coconut to filling | Coconut cream frosting |
| Espresso Cinnamon | Mix 1 tablespoon instant espresso into cinnamon filling | Coffee glaze |
Serving Suggestions for Cinnamon Roll Bliss Bars
These bars are versatile enough for any occasion:
Breakfast or Brunch: Serve warm with fresh berries and a dollop of Greek yogurt. Pair with strong coffee or chai tea.
Dessert: Add a scoop of vanilla ice cream and drizzle with caramel sauce for an indulgent treat.
Afternoon Snack: Perfect alongside a latte or hot chocolate.
Party Platter: Cut into smaller squares and dust with powdered sugar for an elegant presentation. They’re fantastic on a holiday cookie tray.
Beverage Pairings:
- Coffee: A medium roast enhances the cinnamon without competing
- Tea: Chai or Earl Grey complement the warm spices
- Milk: Classic pairing, especially for kids
- Dessert Wine: A late-harvest Riesling or Moscato d’Asti brings out the caramel notes
FAQs About Cinnamon Roll Bliss Bars
Can I make Cinnamon Roll Bliss Bars ahead of time?
Absolutely! Bake them up to 2 days ahead and store in an airtight container. Warm them slightly before serving for that fresh-baked experience. You can also freeze the baked, unfrosted bars for up to 3 months.
Why did my cinnamon filling sink to the bottom of my Cinnamon Roll Bliss Bars?
This happens when the filling is too thin or the batter is too thin. Make sure to let your filling rest for 5 minutes to thicken, and ensure your batter is thick enough (should be like soft cake batter, not pancake batter). Also, don’t swirl too aggressively gentle figure-eights are all you need.
Can I double this Cinnamon Roll Bliss Bars recipe?
Yes! Use two 9×13-inch pans and keep the baking time the same. Just make sure both pans are on the center rack (or rotate them halfway through baking if using two racks).
My Cinnamon Roll Bliss Bars turned out dry. What happened?
The most common culprits are overbaking and overmixing. Pull them from the oven when they’re just set but still soft in the center, and mix the batter only until combined. Also check that your baking powder is fresh old leavening can cause dry, dense results.
Can I add frosting to these Cinnamon Roll Bliss Bars?
Yes! A cream cheese frosting or simple powdered sugar glaze (powdered sugar mixed with milk and vanilla) is heavenly. Wait until the bars are completely cool before frosting, or the frosting will melt.
Are Cinnamon Roll Bliss Bars safe for pregnant women?
These bars contain fully cooked ingredients with no raw eggs or unpasteurized dairy in the final product, making them safe for pregnant women. If adding frosting with cream cheese, ensure it’s made with pasteurized dairy.
Conclusion
There you have it everything you need to create the most incredible Cinnamon Roll Bliss Bars that’ll have everyone asking for the recipe. These bars have earned their place in my regular rotation, and I have a feeling they’re about to become a staple in your kitchen too.
Fire up your oven and try these tonight! Whether you’re a seasoned baker or just starting out, these bars are foolproof, forgiving, and absolutely delicious. The smell alone is worth it, but that first warm, cinnamon-swirled bite? Pure magic.
Join the thousands of home cooks who’ve fallen in love with this recipe! I’d love to see your creations tag me on social media or leave a comment below telling me how yours turned out. Did you try one of the variations? Did your family devour them in minutes? Let me know!
If you enjoyed this recipe, be sure to share it with your friends or save it for later! I’d love to see your unique twist feel free to post your photos on Pinterest!

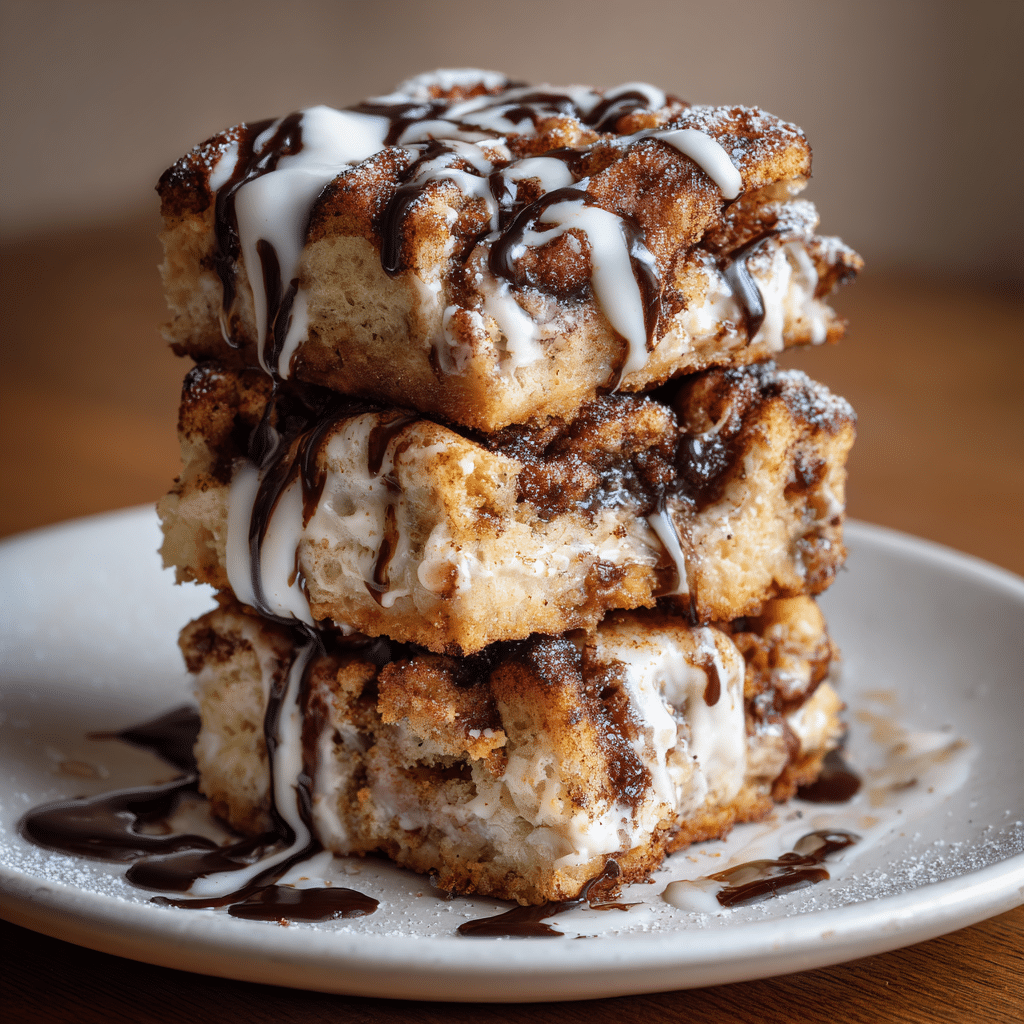
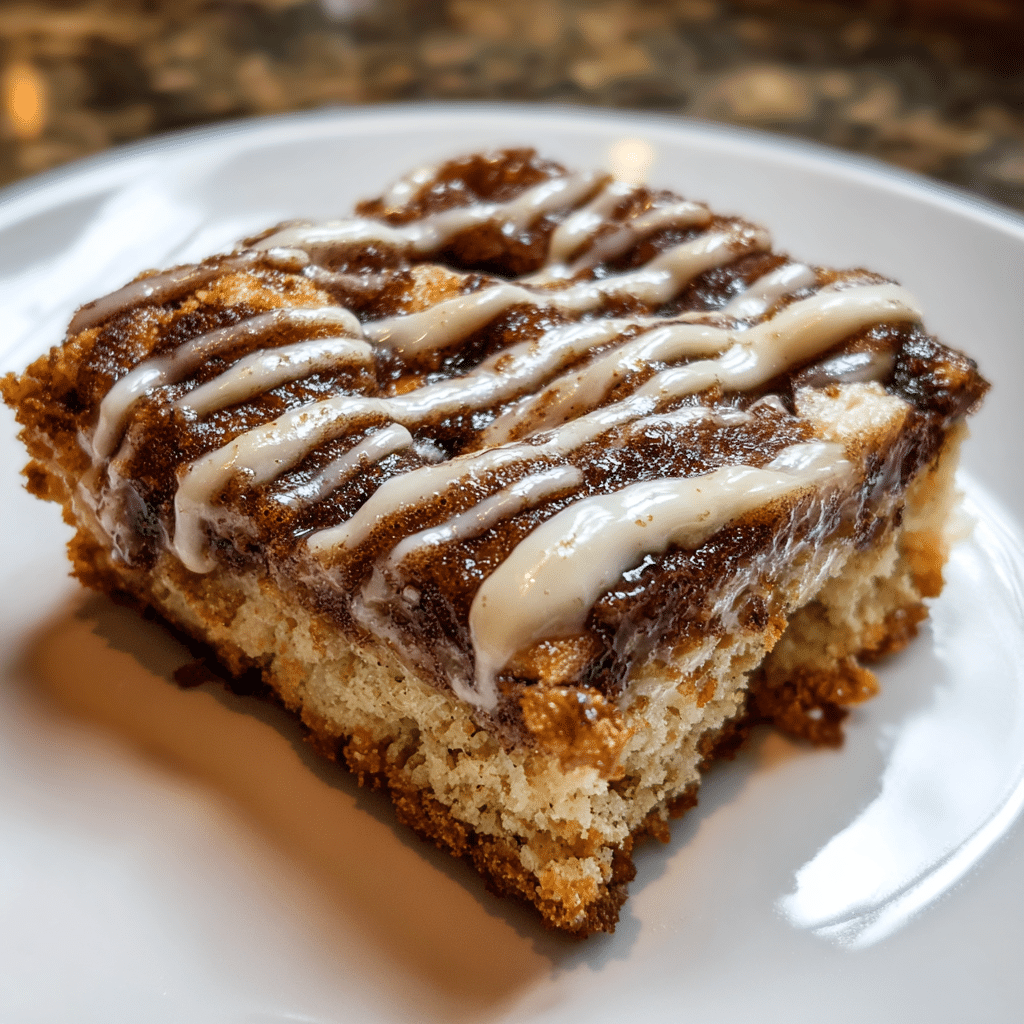
Cinnamon Roll Bliss Bars – Soft, Gooey & Irresistible
- Total Time: 45
- Yield: 16 1x
- Diet: Vegetarian
Description
These Cinnamon Roll Bliss Bars deliver all the gooey, buttery, cinnamon-swirled magic of classic cinnamon rolls without the yeast or wait time. Perfect for brunch, dessert, or any time you need a sweet treat, these tender bars feature a soft vanilla base with gorgeous ribbons of brown sugar cinnamon filling. Ready in under an hour and feeds a crowd!
Ingredients
2 cups all-purpose flour
1 cup granulated sugar
2 teaspoons baking powder
1/2 teaspoon salt
1 cup whole milk
1/2 cup (1 stick) unsalted butter, softened (for batter)
2 large eggs, room temperature
1 teaspoon vanilla extract
Cinnamon Filling:
1/2 cup (1 stick) unsalted butter, melted
1 cup packed brown sugar
2 tablespoons ground cinnamon
1 teaspoon vanilla extract
Instructions
1. Preheat your oven to 350°F (175°C). Line a 9×13-inch baking pan with parchment paper, leaving a 2-inch overhang on two sides for easy removal.
2. Make the cinnamon filling: In a small bowl, mix together melted butter, brown sugar, cinnamon, and vanilla extract until well combined. Let rest for 5 minutes to thicken slightly. Set aside.
3. Mix dry ingredients: In a medium bowl, whisk together flour, granulated sugar, baking powder, and salt until evenly combined.
4. Cream butter: In a large mixing bowl, beat the softened butter with an electric mixer on medium speed for about 1 minute until creamy and smooth.
5. Add wet ingredients: Beat in eggs and vanilla extract until well incorporated.
6. Combine wet and dry: Add the dry ingredient mixture and milk to the butter mixture alternately, starting and ending with dry ingredients. Mix on low speed just until combined—do not overmix. The batter should be thick but spreadable.
7. Spread batter: Pour the batter into your prepared pan and use an offset spatula to spread it evenly into all corners.
8. Add cinnamon swirl: Drop spoonfuls of the rested cinnamon filling across the top of the batter. Using a butter knife or wooden skewer, gently swirl the cinnamon mixture into the batter using figure-eight motions. Don’t overmix—two or three passes through the pan is perfect.
9. Bake: Place in the preheated oven and bake for 25-30 minutes, until the center is just set and a toothpick inserted comes out with moist crumbs (not wet batter).
10. Cool and slice: Let the bars cool in the pan for 15 minutes to set the texture. Use the parchment paper overhangs to lift the entire slab onto a cutting board, then slice into 12-16 bars with a sharp knife.
11. Serve: Enjoy warm or at room temperature. Optional: drizzle with cream cheese frosting or powdered sugar glaze.
Notes
Room temperature ingredients are crucial—cold butter won’t cream properly and cold eggs can curdle the batter. Set them out 30-60 minutes before baking.
Don’t skip the 5-minute rest time for the cinnamon filling—this helps it thicken so it swirls beautifully without sinking.
These bars are meant to be soft and tender—don’t overbake. Pull them when the center is just set but still slightly soft.
For a cream cheese frosting: Beat 4 oz softened cream cheese with 2 cups powdered sugar, 2 tablespoons softened butter, and 1 teaspoon vanilla until smooth. Spread over cooled bars.
Storage: Keep in an airtight container at room temperature for up to 3 days, or refrigerate if frosted for up to 5 days.
Freezer-friendly: Wrap individual bars in plastic wrap and freeze for up to 3 months. Thaw overnight or microwave for 20-30 seconds.
Gluten-free option: Use a 1:1 gluten-free baking flour blend as a direct substitute for all-purpose flour.
- Prep Time: 15
- Cook Time: 30
- Category: Dessert, Breakfast, Brunch
- Method: Baking
- Cuisine: American
Nutrition
- Serving Size: 1
- Calories: 285
- Sugar: 28g
- Sodium: 180mg
- Fat: 12g
- Saturated Fat: 7g
- Unsaturated Fat: 4g
- Trans Fat: 0g
- Carbohydrates: 42g
- Fiber: 1g
- Protein: 3g
- Cholesterol: 55mg
Keywords: cinnamon roll bars, cinnamon bliss bars, easy cinnamon rolls, cinnamon swirl bars, no yeast cinnamon rolls, cinnamon dessert bars, brunch bars, potluck dessert