
Hey there! I’m Emeli, and if you’re anything like me, you probably have a soft spot for those nostalgic flavors that instantly transport you back to simpler times. Today, I’m sharing something truly special—a Strawberry Pop-Tart Pie recipe that combines the beloved breakfast pastry we all grew up with into an irresistible homemade dessert.
Picture this: I was rummaging through my pantry last weekend, feeling that familiar tug of nostalgia when I spotted a box of strawberry Pop-Tarts tucked away on the shelf. Suddenly, I was eight years old again, sneaking warm toaster pastries before school. That’s when inspiration struck—what if I could capture that same magical flavor in a proper pie?
As someone who’s spent years perfecting dessert recipes from professional kitchens to cozy home baking sessions, I’ve learned that the best treats are often inspired by our fondest memories. This Strawberry Pop-Tart Pie delivers all the sweet, fruity goodness you remember, elevated with fresh strawberries and that iconic glaze we all love.
In this post, I’ll walk you through everything you need to know: from selecting the perfect strawberries to achieving that signature Pop-Tart glaze, plus pro tips for the flakiest crust and common troubleshooting questions.
Why This Strawberry Pop-Tart Pie Recipe Works
This Strawberry Pop-Tart Pie recipe isn’t just about nostalgia—it’s about creating something genuinely delicious that brings people together. Here’s what makes it so special:
• Uses simple, accessible ingredients that you can find at any grocery store • Ready in under 2 hours from start to finish, perfect for weekend baking • Balances fresh fruit with nostalgic flavors for both kids and adults • Customizable sweetness level to suit different taste preferences • Perfect for any occasion from family dinners to potluck gatherings
Choosing the Right Strawberries for Your Pop-Tart Pie
The foundation of any great Strawberry Pop-Tart Pie recipe starts with selecting the best fruit. Here’s what you need to know:
Best Strawberries for This Recipe
Fresh strawberries are non-negotiable for this recipe. Look for berries that are bright red, firm to the touch, and have that sweet, aromatic fragrance. The natural sugars in fresh strawberries create the perfect balance with our cornstarch thickener, giving you that ideal pie consistency that won’t be too runny or too thick.
Buying Tips
When shopping for your Strawberry Pop-Tart Pie, examine the berries carefully. Avoid any with white or green shoulders (they’re underripe), soft spots, or moldy areas. The best strawberries will have bright green, fresh-looking tops and should feel heavy for their size. Peak season (late spring to early summer) will give you the best flavor, but good-quality berries work year-round.
Substitutions
While fresh strawberries are ideal, you can use frozen strawberries in a pinch—just thaw and drain them first. For a twist on the classic Strawberry Pop-Tart Pie recipe, try mixing in some diced rhubarb for tartness, or add a handful of raspberries for extra complexity.
Ingredients & Prep for Your Strawberry Pop-Tart Pie
Getting organized before you start is key to baking success. Here’s how to prep for the perfect Strawberry Pop-Tart Pie:
Strawberry Prep Essentials
Start by hulling your 2 pounds of fresh strawberries—remove those green tops and any white, tough parts. I like to slice larger berries in half to ensure even cooking, but leave smaller ones whole. This helps create that beautiful, chunky filling texture that makes each bite interesting.
The Perfect Filling Mix
The magic happens when you combine your prepped strawberries with ¾ cup granulated sugar, ⅔ cup cornstarch, fresh lemon juice and zest, vanilla extract, and a pinch of salt. The cornstarch is crucial—it’s what transforms your juicy strawberries into that perfect pie filling consistency. The lemon brightens the flavor while the vanilla adds that classic Pop-Tart warmth.
Pantry Staples
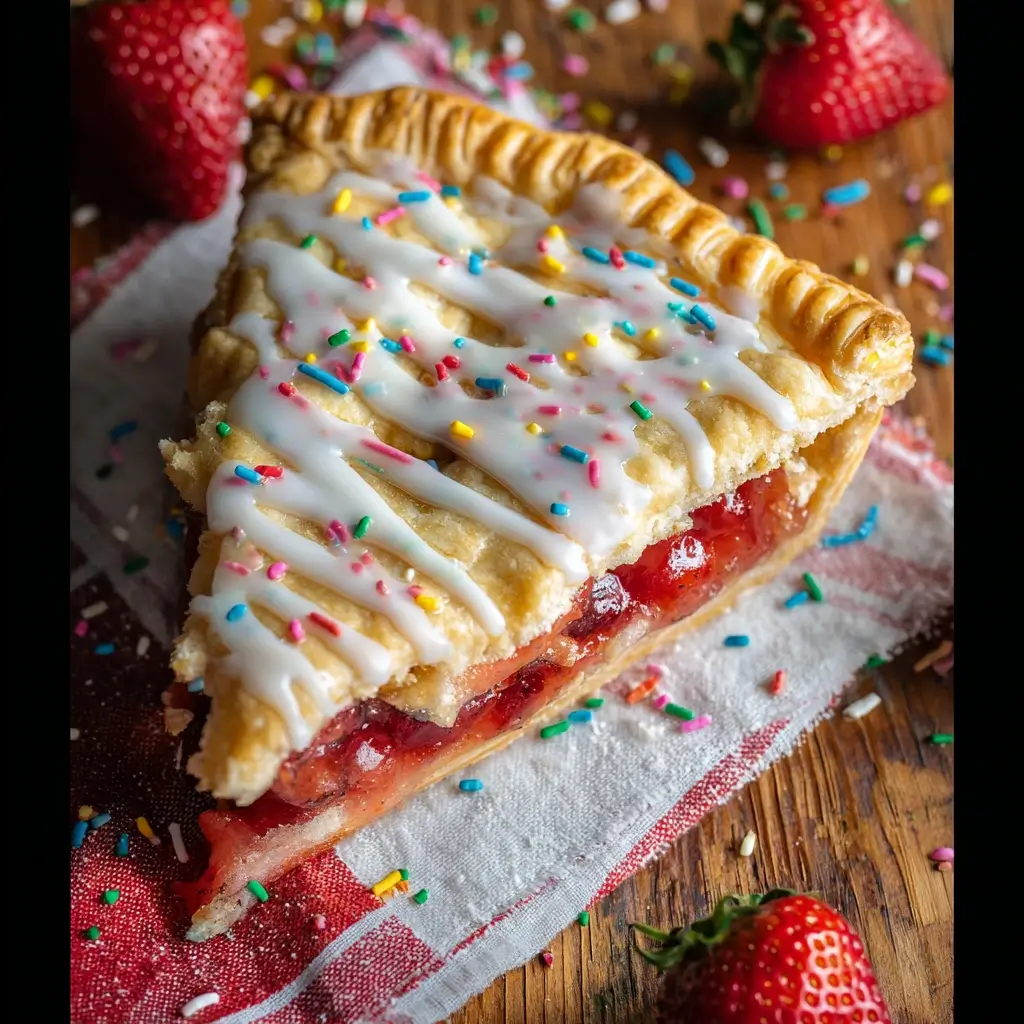
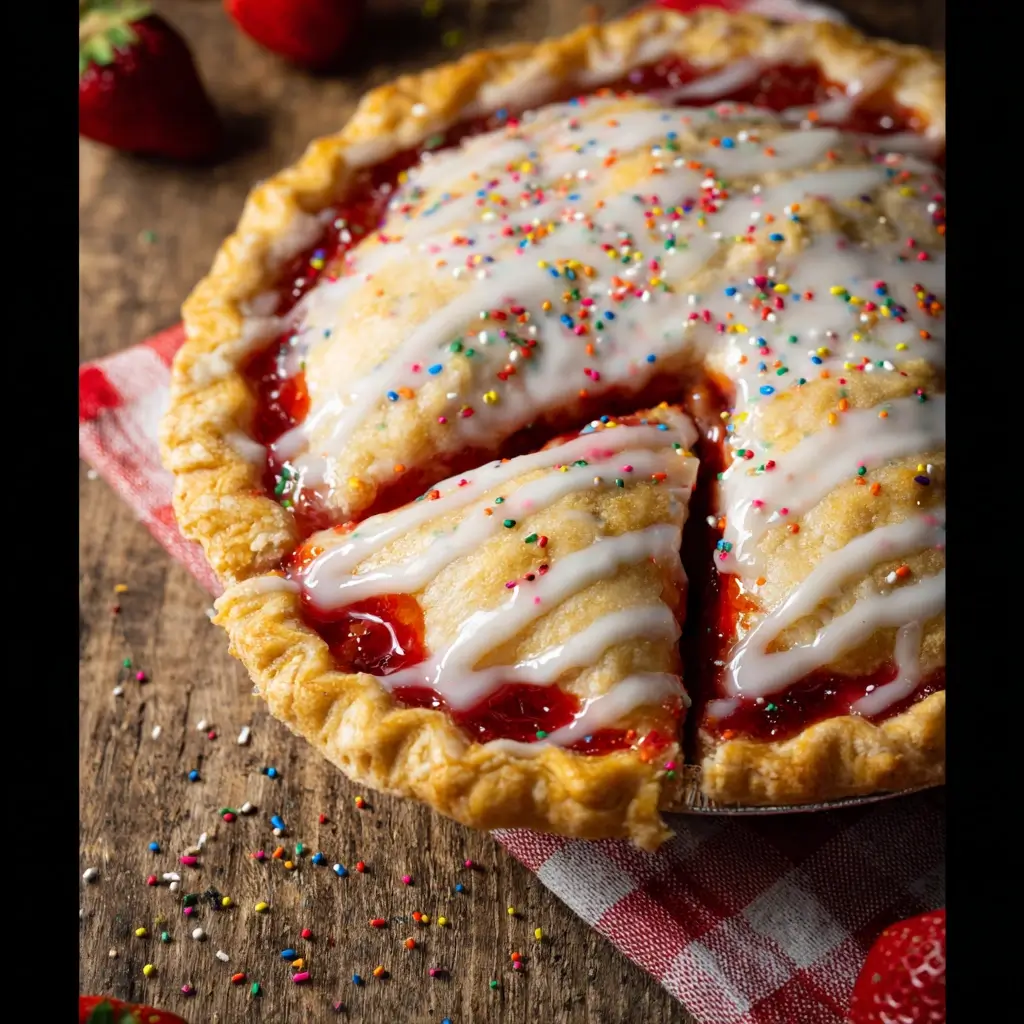
Make sure you have quality pie crusts (homemade or store-bought work great), powdered sugar for the glaze, half-and-half, and those fun rainbow nonpareil sprinkles that really make this Strawberry Pop-Tart Pie recipe pop!
Step-by-Step Cooking Instructions for Strawberry Pop-Tart Pie
Let me walk you through each step to ensure your Strawberry Pop-Tart Pie turns out perfectly every time:
Pre-Cooking Prep for Your Pop-Tart Pie
Preheat your oven to 375°F and grease your 9-inch pie plate. Gather all your ingredients and have them measured and ready—this recipe moves quickly once you start cooking the filling. Room temperature ingredients work best for even mixing.
Cooking Method for Strawberry Pop-Tart Pie
In a medium pot over medium-low heat, combine ⅓ cup water with your prepped strawberries, sugar, lemon juice, zest, salt, and vanilla. Stir gently and cook for 4-5 minutes until the strawberries begin to soften and release their juices. Add the cornstarch and continue cooking for 1-2 minutes, stirring constantly, until the mixture thickens and gels together beautifully.
Assembly Check for Your Pop-Tart Pie
Place your bottom crust in the prepared pie plate, then pour in the warm strawberry filling while it’s still hot—this helps prevent a soggy bottom. Top with your second crust, trim the edges leaving about ½ inch overhang, then crimp the edges together securely. Cut 4-5 small slits in the center of the top crust for steam vents.
Baking Your Strawberry Pop-Tart Pie
Bake for 35-45 minutes until the crust is golden brown and you can see the filling bubbling through the vents. The crust should sound hollow when gently tapped, and the edges should be a beautiful golden color.
Pro Tips for Perfect Strawberry Pop-Tart Pie
These insider secrets will take your Strawberry Pop-Tart Pie recipe from good to absolutely incredible:
Avoiding Soggy Crust in Your Pop-Tart Pie
The key to avoiding a soggy bottom is using the hot filling method I described above, plus making sure your oven is fully preheated. I also recommend placing your pie plate on a preheated baking sheet—the extra heat from below helps set that bottom crust quickly.
Tool Recommendations
A good pastry brush for egg wash (if you want extra browning), a sharp knife for clean crust cuts, and a wire cooling rack are essential. For the glaze, a fine-mesh strainer ensures no lumps in your powdered sugar mixture.
Storage & Reheating
Your finished Strawberry Pop-Tart Pie will keep covered at room temperature for 2 days, or refrigerated for up to 5 days. For longer storage, wrap well and freeze for up to 3 months. Reheat individual slices in a 350°F oven for 10 minutes to restore that crispy crust.
Flavor Variations for Your Strawberry Pop-Tart Pie Recipe
The beauty of this Strawberry Pop-Tart Pie is how easily you can customize it to suit different tastes:
Spicy Twist
Add a pinch of cayenne pepper or some minced crystallized ginger to the filling for a grown-up kick that complements the sweet strawberries beautifully.
Healthier Options
Reduce the sugar to ½ cup and add a tablespoon of honey for natural sweetness. You can also use a graham cracker crust for a different texture profile.
Global Flavors
Try adding cardamom and rose water for a Middle Eastern twist, or incorporate some balsamic vinegar for an Italian-inspired flavor that enhances the strawberries’ natural sweetness.
| Variation | Key Ingredients | Flavor Profile | Best For |
|---|---|---|---|
| Classic Pop-Tart | Vanilla, lemon zest | Sweet, nostalgic | All ages, family gatherings |
| Spiced Strawberry | Cinnamon, nutmeg | Warm, comforting | Fall/winter baking |
| Gourmet Berry | Balsamic, fresh herbs | Sophisticated, complex | Dinner parties |
| Tropical Twist | Coconut, lime zest | Bright, summery | Summer entertaining |
Serving Suggestions for Your Strawberry Pop-Tart Pie
This Strawberry Pop-Tart Pie recipe shines on its own, but here are some delicious pairing ideas:
Serve warm slices with a scoop of vanilla ice cream or fresh whipped cream. The contrast between the warm, fruity pie and cool, creamy accompaniment is absolutely divine. For a more indulgent treat, try it with a drizzle of heavy cream or a dollop of mascarpone.
For beverages, this pie pairs beautifully with coffee, black tea, or even a glass of cold milk for that authentic childhood experience. If you’re serving adults, consider a dessert wine like Moscato or a sparkling rosé.
FAQs About Strawberry Pop-Tart Pie
Here are the most common questions I get about this Strawberry Pop-Tart Pie recipe:
Can I use frozen strawberries? Yes, but thaw them completely and drain excess liquid first. You may need to reduce the water in the recipe by half to prevent a watery filling.
How do I prevent the filling from being too runny? Make sure to cook the cornstarch mixture long enough—it should coat the back of a spoon and feel thick when you stir it. If it’s still runny after baking, it will firm up as it cools.
Can I make this ahead of time? Absolutely! The pie actually tastes better the next day as the flavors meld together. Just add the glaze right before serving for the best appearance.
Conclusion
There’s something truly magical about transforming a beloved childhood treat into a show-stopping homemade dessert. This Strawberry Pop-Tart Pie captures all the nostalgic flavors we love while elevating them with fresh, quality ingredients and proper baking techniques.
Whether you’re baking for a special occasion or just want to bring some joy to an ordinary day, this recipe delivers every time. The combination of flaky crust, sweet-tart strawberry filling, and that iconic glaze creates a dessert that’s both familiar and special.
Ready to create some kitchen magic? Grab your apron and let’s make this Strawberry Pop-Tart Pie together! Don’t forget to share your results—I love seeing how this recipe brings families together around the table.
Join the thousands of home bakers who’ve already fallen in love with this recipe, and be sure to check out my [Classic Apple Pie Guide] for your next baking adventure!
If you enjoyed this recipe, be sure to share it with your friends or save it for later!
I’d love to see your unique twist—feel free to post your photos on Pinterest!