
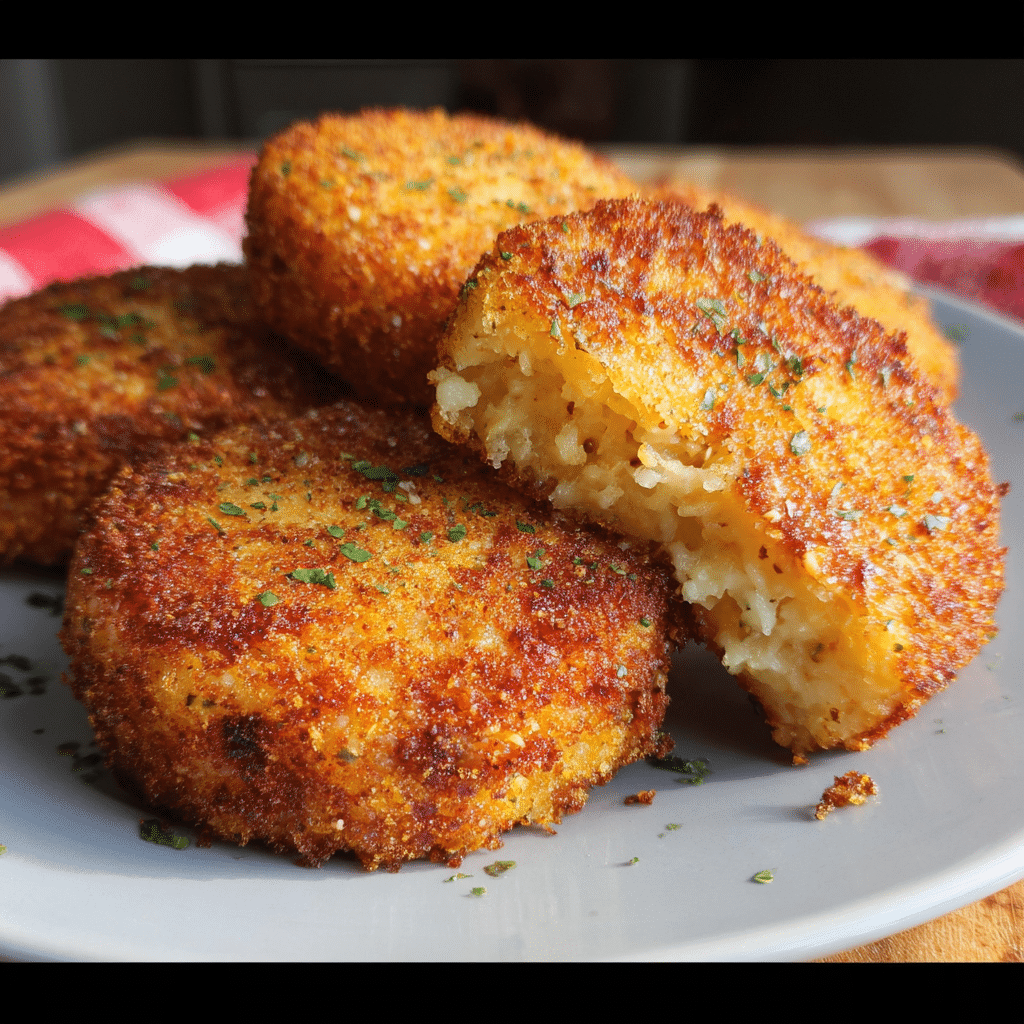
Cheesy Fried Grit Cakes—just saying those words takes me back to my grandmother’s kitchen in Alabama, where the smell of sizzling cornmeal and melted cheese would wake the entire house on Sunday mornings. If you’ve ever struggled with mushy, flavorless grits that fall apart the moment they hit the pan, you’re not alone. Most home cooks make the mistake of rushing the process or skipping the crucial chilling step that transforms humble grits into golden, crispy perfection.
Hey there! I’m Emeli, and after years of perfecting this recipe in professional kitchens and my own home, I can promise you these cheesy fried grit cakes will become your new obsession. They’re crispy on the outside, creamy on the inside, and packed with sharp cheddar flavor that’ll make your taste buds sing. Whether you’re hosting a Southern brunch or looking for the perfect side dish to elevate your weeknight dinner, this recipe delivers restaurant-quality results every single time.
What makes this recipe special? We’ll cover everything from selecting the right grits and cheese to mastering the double-coating technique that creates that incredible golden crust. Plus, I’ll share my pro tips for avoiding common pitfalls and creative variations that’ll keep this dish exciting.
Why This Cheesy Fried Grit Cakes Recipe Works
This isn’t just another grit recipe—it’s a carefully crafted technique that transforms a simple Southern staple into something extraordinary. Here’s what makes these cheesy fried grit cakes absolutely irresistible:
• Uses instant grits for consistent texture – No more guessing games with cooking times or lumpy results • Double-breading technique creates maximum crunch – That satisfying crackle when you bite in • Sharp cheddar adds bold flavor – None of that bland, boring grits nonsense • Make-ahead friendly for busy schedules – Prep the day before and fry when ready • Perfect for any meal – From breakfast to dinner sides, these adapt beautifully • Budget-friendly ingredients – Transform simple pantry staples into something special
The secret lies in the proper milk-to-water ratio and that crucial 3-hour chilling time. This allows the grits to set up perfectly, creating the ideal texture that holds together during frying while maintaining that creamy interior.
Choosing the Right Ingredients for Cheesy Fried Grit Cakes
Best Grits for This Recipe
When it comes to cheesy fried grit cakes, not all grits are created equal. Instant grits are your best friend here—they provide consistent results and the right texture for frying. Stone-ground grits, while delicious for porridge, can be too coarse and unpredictable for this application. Look for well-known brands like Quaker or Jim Dandy for reliable results.
Cheese Selection Tips
Sharp cheddar is non-negotiable for this recipe. The bold flavor cuts through the mild grits and provides that tangy bite that makes these cakes memorable. Avoid pre-shredded cheese if possible—freshly grated melts more smoothly and provides better flavor. If you can’t find sharp cheddar, extra-sharp works beautifully, though you might want to reduce the amount slightly.
Breadcrumb Alternatives
While Panko breadcrumbs create the ultimate crispy coating, you can substitute with regular breadcrumbs, crushed cornflakes, or even finely ground crackers. The key is using something with texture that will adhere well to the egg wash and create that golden crust we’re after.
Ingredients & Prep for Cheesy Fried Grit Cakes
Essential Grit Cake Components
Before you start cooking, proper preparation sets you up for success. Have all your ingredients measured and ready—this recipe moves quickly once you begin. The milk and water combination creates richness while preventing the grits from becoming too heavy. That quarter teaspoon of salt might seem small, but it’s crucial for bringing out the corn flavor in the grits.
Coating Station Setup
Organization is key when breading these grit cakes. Set up your coating station with three shallow dishes: egg wash (eggs beaten with milk), seasoned Panko breadcrumbs mixed with Creole seasoning, and a clean plate for the finished coated cakes. This assembly-line approach prevents mess and ensures even coating.
Make-Ahead Strategy
The beauty of this recipe lies in its make-ahead nature. The grit mixture actually improves after chilling overnight, developing deeper flavors and a firmer texture that’s easier to cut and handle. Cover the chilled grits tightly with plastic wrap to prevent them from drying out or picking up refrigerator odors.
Step-by-Step Cooking Instructions for Cheesy Fried Grit Cakes
Pre-Cooking Prep for Cheesy Fried Grit Cakes
Start by heating your milk, water, and salt in a large, heavy-bottomed saucepan. The heavy bottom prevents scorching, which can give your grits an unpleasant burnt flavor. When the mixture begins to simmer—you’ll see small bubbles forming around the edges—reduce the heat to low and slowly whisk in the grits. This gradual addition prevents lumps from forming.
Continue cooking while stirring constantly for about 5 minutes until the mixture thickens to a porridge-like consistency. Remove from heat and immediately stir in the shredded cheese and pepper until completely melted and incorporated. The residual heat will melt the cheese perfectly without making it stringy.
Chilling Method for Cheesy Fried Grit Cakes
Spread the hot grit mixture into a greased 8×8 baking dish, smoothing the top with a spatula. The layer should be about 1 inch thick for optimal cake formation. Cover tightly with plastic wrap, pressing it directly onto the surface to prevent a skin from forming. Refrigerate for at least 3 hours, though overnight is even better.
Coating Process for Cheesy Fried Grit Cakes
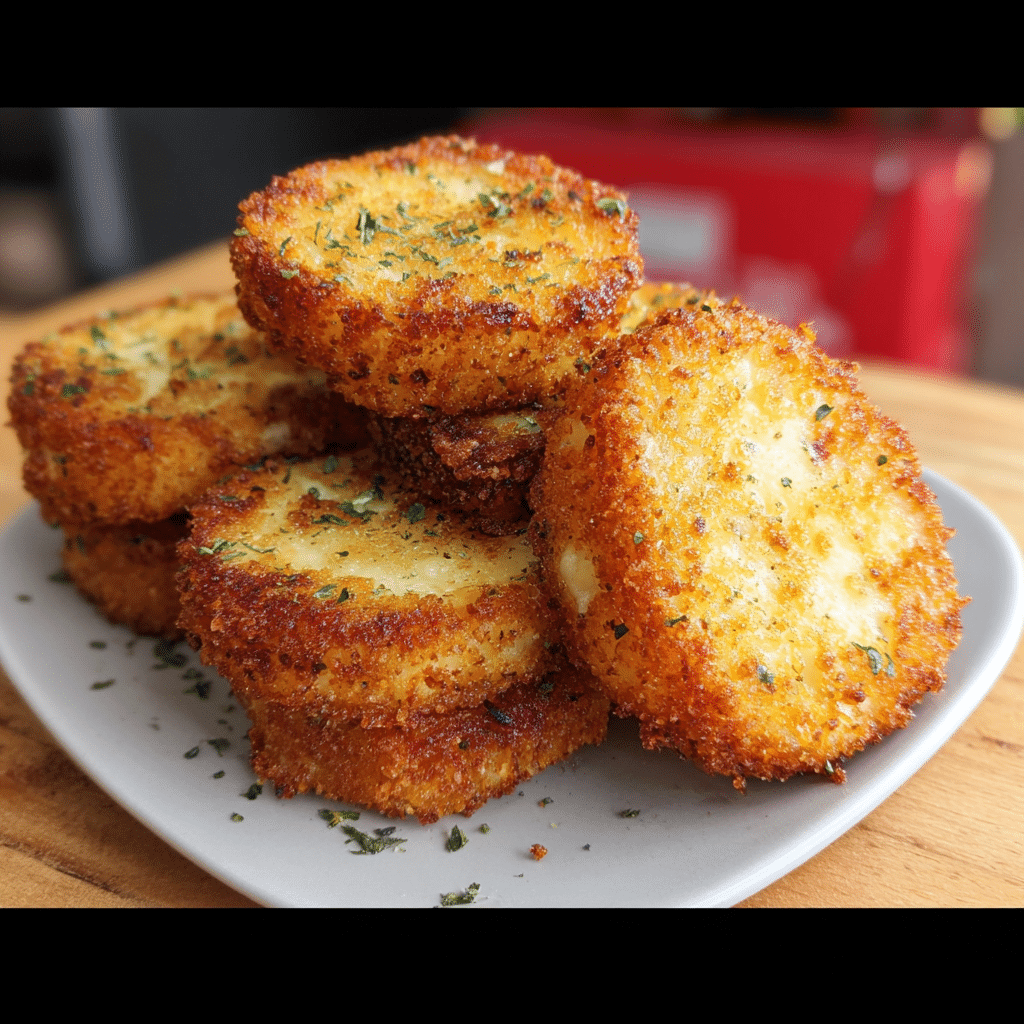
Once chilled and firm, use a round cookie cutter or glass to cut circles from the grit mixture. Dip each cake first in the egg wash, ensuring all surfaces are coated, then roll in the seasoned breadcrumbs. For extra crunch, repeat this process—double coating creates that restaurant-quality crust that makes these cakes special.
Frying Technique for Cheesy Fried Grit Cakes
Heat oil in a large skillet over medium heat—about 350°F if you have a thermometer. The oil should be deep enough to come halfway up the sides of the grit cakes. Carefully place the coated cakes in the hot oil, being careful not to overcrowd the pan. Fry for 2-3 minutes per side until golden brown and crispy. Transfer to a paper towel-lined plate to drain excess oil.
Pro Tips for Perfect Cheesy Fried Grit Cakes
Avoiding Common Mistakes with Cheesy Fried Grit Cakes
The biggest mistake home cooks make is rushing the chilling process. Those three hours aren’t optional—they’re what transforms loose grits into sliceable cakes. If you’re short on time, you can speed this up by placing the dish in the freezer for about 90 minutes, but watch carefully to prevent freezing solid.
Temperature control during frying is crucial. Too hot, and the outside burns before the inside warms through. Too cool, and you’ll end up with greasy, soggy cakes. Medium heat gives you that perfect golden exterior while ensuring the interior becomes creamy and warm.
Essential Tool Recommendations
A good meat thermometer helps monitor oil temperature, while a heavy-bottomed skillet ensures even heat distribution. Sharp cookie cutters or a glass with thin edges create clean cuts that hold together better during coating and frying. Having a spider strainer or slotted spoon makes turning and removing the cakes much easier.
Storage & Reheating Guidelines
Leftover grit cakes keep in the refrigerator for up to 3 days. To reheat, place them on a baking sheet in a 375°F oven for about 10 minutes until heated through and crispy again. Avoid microwaving, which makes the coating soggy. You can also freeze the uncooked, coated cakes for up to 2 months—fry them straight from frozen, adding an extra minute to the cooking time.
Flavor Variations for Cheesy Fried Grit Cakes
Spicy Southern Twist
Transform these into fiery delights by adding a teaspoon of cayenne pepper to the grit mixture and substituting pepper jack cheese for half the cheddar. Mix some hot sauce into the egg wash for an extra kick that’ll wake up your taste buds. Serve with a cooling ranch or blue cheese dipping sauce to balance the heat.
Herb-Crusted Version
Elevate the flavor profile by mixing fresh chopped herbs like thyme, rosemary, and chives into the breadcrumb coating. This variation pairs beautifully with roasted meats and adds a sophisticated touch to brunch spreads. The herbs provide a fresh contrast to the rich, cheesy interior.
International Fusion Flavors
For a Mexican-inspired version, add cumin and paprika to the grits along with pepper jack cheese, then serve with salsa and sour cream. An Italian twist involves mixing parmesan into the coating and serving with marinara sauce for dipping. These global variations show how versatile this basic technique can be.
Flavor Variation Comparison Table
| Variation | Key Ingredients | Best Served With | Difficulty Level |
|---|---|---|---|
| Classic Southern | Sharp cheddar, Creole seasoning | Fried chicken, collard greens | Easy |
| Spicy Cajun | Pepper jack, cayenne, hot sauce | Blackened fish, coleslaw | Easy |
| Herb-Crusted | Fresh thyme, rosemary, chives | Roasted lamb, asparagus | Moderate |
| Mexican Fusion | Pepper jack, cumin, paprika | Carnitas, black beans | Easy |
| Italian Style | Parmesan, Italian herbs | Chicken parmesan, marinara | Moderate |
| Breakfast Style | Bacon bits, chives, mild cheddar | Scrambled eggs, sausage | Easy |
Serving Suggestions for Cheesy Fried Grit Cakes
These versatile cakes shine as both a side dish and a base for creative presentations. For a classic Southern meal, pair them with fried chicken, collard greens, and cornbread. The crispy texture provides a delightful contrast to tender braised vegetables, while the cheesy flavor complements smoky meats perfectly.
For an elevated brunch presentation, top each cake with a poached egg and hollandaise sauce, creating a Southern-inspired eggs Benedict that’ll impress any crowd. They also make an excellent base for shrimp and grits—simply sauté some shrimp with garlic and serve over the warm cakes with a drizzle of the pan sauce.
Wine pairings depend on your preparation and accompaniments. A crisp Sauvignon Blanc cuts through the richness beautifully, while a light Pinot Noir complements the corn and cheese flavors without overwhelming them. For beer lovers, a wheat beer or light lager provides the perfect refreshing contrast to the rich, fried exterior.
FAQs About Cheesy Fried Grit Cakes
Can I use frozen grit cakes? Yes! You can freeze the shaped, uncoated grit cakes for up to 2 months. Thaw them in the refrigerator overnight before coating and frying. You can also freeze them after coating—just fry directly from frozen, adding an extra minute to each side.
How do I fix grit cakes that fall apart? If your cakes are crumbling, they likely weren’t chilled long enough or the mixture was too thin. Make sure you’re using the exact milk-to-grits ratio specified and allow a full 3 hours for chilling. Adding an extra egg to the mixture can also help bind things together.
Are these safe during pregnancy? Yes, when prepared properly with pasteurized dairy products and cooked to the proper temperature. The eggs are fully cooked during frying, and the cheese is heated through, making this a safe option for pregnant women.
Can I make these gluten-free? Absolutely! Substitute the Panko breadcrumbs with gluten-free breadcrumbs or crushed gluten-free crackers. The grits themselves are naturally gluten-free, so this is an easy adaptation that doesn’t compromise on flavor or texture.
What oil is best for frying? Vegetable oil, canola oil, or peanut oil all work well due to their high smoke points and neutral flavors. Avoid olive oil, which can become bitter when heated to frying temperatures and will overpower the delicate corn and cheese flavors.
Conclusion
Fire up that skillet and get ready to create some serious Southern magic! These cheesy fried grit cakes represent everything I love about comfort food—they’re approachable enough for beginners yet sophisticated enough to serve at your fanciest dinner party. The combination of creamy interior, crispy coating, and bold cheddar flavor creates a dish that’s truly greater than the sum of its parts.
Join the thousands of home cooks who’ve already fallen in love with this recipe—I get messages weekly from readers who’ve made these the star of their Sunday brunch or the secret weapon in their weeknight dinner rotation. There’s something magical about transforming simple grits into these golden, crispy cakes that never fails to bring smiles to the table.
Ready for your next Southern cooking adventure? Try my Classic Buttermilk Biscuits or explore my Ultimate Fried Chicken Guide to create a complete comfort food feast. And don’t forget to share your grit cake creations with me on social media—I love seeing how you make this recipe your own!
Happy cooking, y’all!
– Emeli
Founder & Chef at FoodFansy.com
If you enjoyed this recipe, be sure to share it with your friends or save it for later!
I’d love to see your unique twist—feel free to post your photos on Pinterest!
Print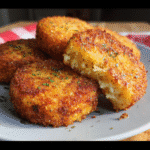
Cheesy Fried Grit Cakes: 7 Secrets for Ultimate Crispy Perfection
- Total Time: 30 mins
Description
These Cheesy Fried Grit Cakes are a fun take on a classic Southern Recipe. Fried to a perfect golden brown, they are perfect for Breakfast, Lunch, Dinner or even an Appetizer!
Ingredients
- 2 cups milk to simmer with water.
- 2 cups water
- ¼ teaspoon salt
- 1 cup instant grits
- ½ teaspoon pepper
- ½ cup shredded sharp cheddar cheese
- 3 eggs
- 2 tablespoons milk to add to eggs and breadcrumb coating later.
- 2 cups Panko breadcrumbs
- 1 tablespoon Creole seasoning
- oil (enough to for about 1/2 inch in your fry pan)
Instructions
. Heat 2 cups of milk, water, and salt in a large saucepan over medium high heat.. When the milk begins to simmer, reduce heat and stir in the grits. Cover and cook until thickened, around 5 minutes.
- Remove from heat and stir in the shredded cheese and pepper until well combined.
- Spread the mixture into a baking dish and chill for 3 hours, until set.
- When ready to fry, heat the oil in a large skillet over medium heat.
- Whisk together the eggs and tbsp milk in a shallow dish. In a separate dish, mix together the breadcrumbs and Creole seasoning.
- Use a round cookie cutter to cut out the grits.
- Dip each grits cake in the egg mixture, then the breadcrumb mixture. Repeat the process again, dipping in the egg mixture and then breadcrumbs. Continue dipping all the grits cakes in the egg and breadcrumbs until they’re all coated.
- Place the coated grits cakes in the hot oil and cook each side until browned, between two and three minutes on each side. Transfer to a paper-towel lined plate to cool slightly before serving.
Notes
These Cheesy Fried Grit Cakes are a crispy, golden delight with a creamy, cheesy center. Made from chilled, cooked grits, they’re pan-fried to perfection for a savory Southern twist that works great as a side dish, appetizer, or hearty brunch item. Customize them with your favorite cheese or add jalapeños for a spicy kick!
- Prep Time: 15 mins
- Cook Time: 15 mins
- Category: Breakfest
- Method: No-Bake
- Cuisine: Southern, American
Nutrition
- Serving Size: 1 grit cake
- Calories: 210kcal
- Sugar: 1g
- Sodium: 320mg
- Fat: 13g
- Saturated Fat: 5g
- Unsaturated Fat: 7g
- Trans Fat: 0g
- Carbohydrates: 16g
- Fiber: 1g
- Protein: 5g
- Cholesterol: 25mg