
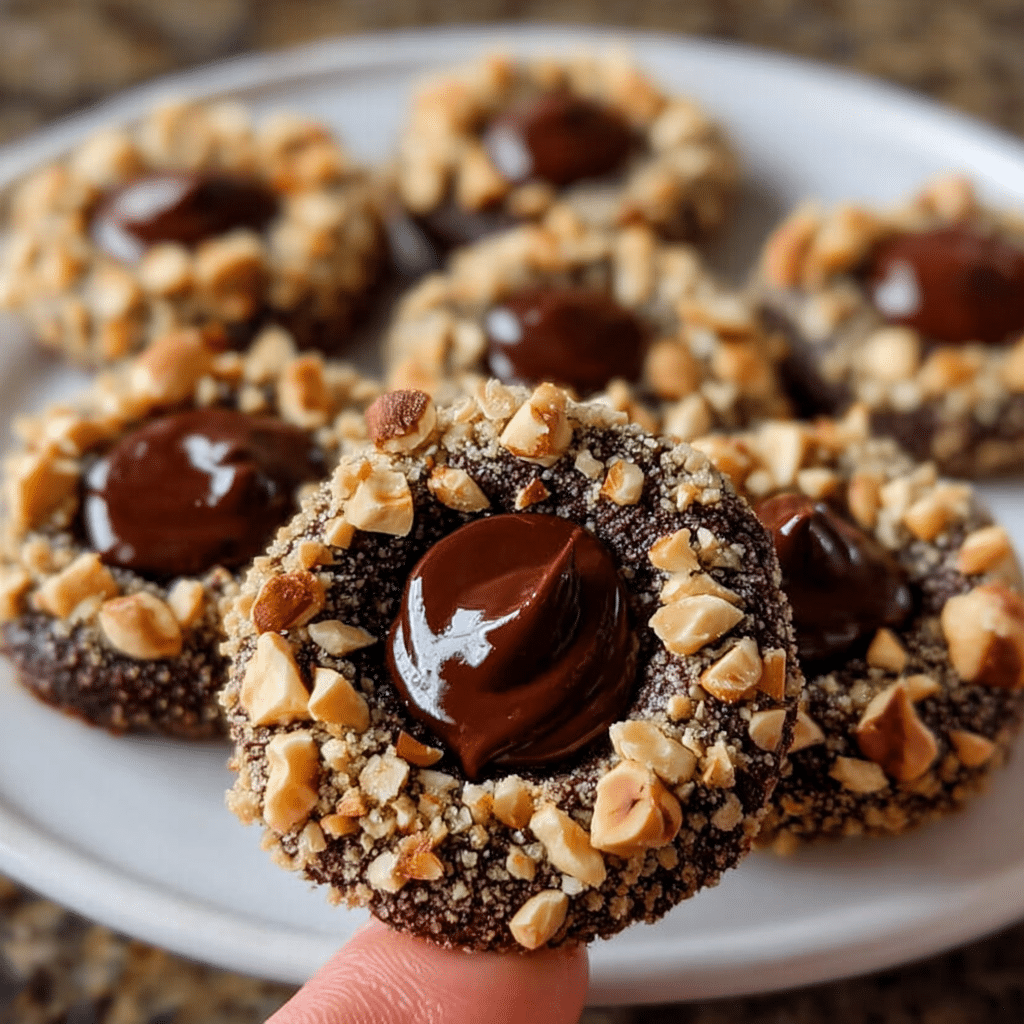
Chocolate Hazelnut Thumbprint Cookies might just be the answer to your cookie cravings that you never knew you needed. Picture this: it’s a rainy afternoon in my kitchen, and I’m reminiscing about the cozy café in Prague where I first tasted a similar treat during my culinary travels. The barista there rolled warm, cocoa-dusted cookies in crushed hazelnuts and filled the centers with molten chocolate hazelnut spread. That moment sparked something magical—a cookie that bridges the gap between elegant European patisserie and comforting home baking.
These Chocolate Hazelnut Thumbprint Cookies deliver everything you want in a perfect cookie: rich chocolate flavor, buttery texture, and that irresistible nutty crunch, all crowned with a dollop of creamy chocolate hazelnut spread. As someone who’s spent years perfecting cookie recipes in both professional kitchens and my own home, I can promise you that this recipe creates cookies that are tender on the inside, slightly crisp on the outside, and absolutely impossible to resist.
In this guide, I’ll walk you through everything you need to know—from selecting the perfect hazelnuts to achieving that signature thumbprint indent, plus all my professional tips for cookie perfection. Whether you’re baking for a special occasion or simply treating yourself to something extraordinary, these cookies will become your new go-to indulgence.
Why This Chocolate Hazelnut Thumbprint Cookies Recipe Works
This Chocolate Hazelnut Thumbprint Cookies recipe has been my secret weapon for impressing both fellow chefs and home cooks alike. Here’s what makes it absolutely foolproof:
• Uses simple, pantry-friendly ingredients that you likely already have on hand, making it perfect for spontaneous baking sessions • Requires just 15 minutes of active prep time before the oven does all the work, ideal for busy weeknight desserts or last-minute entertaining • Perfect balance of textures with a tender chocolate cookie base, crunchy hazelnut coating, and smooth, creamy filling that creates an unforgettable bite • Naturally portion-controlled thumbprint design prevents overindulgence while looking professionally elegant • Stays fresh for days when stored properly, making them excellent for meal prep, gift-giving, or keeping on hand for unexpected guests
Choosing the Right Ingredients for Chocolate Hazelnut Thumbprint Cookies
The secret to exceptional Chocolate Hazelnut Thumbprint Cookies lies in selecting quality ingredients that complement each other perfectly.
Best Cocoa Powder for This Recipe
Dutch-processed cocoa powder is non-negotiable for these cookies. Unlike natural cocoa powder, Dutch-processed cocoa has been treated with an alkali to neutralize its acidity, resulting in a deeper, more mellow chocolate flavor and that beautiful dark color. It also blends more easily into the dough, preventing lumps and ensuring even distribution throughout each cookie.
Hazelnut Selection Tips
Look for whole, raw hazelnuts that you can toast yourself—pre-toasted nuts often lack the fresh, aromatic oils that make these cookies special. When shopping, choose hazelnuts that feel heavy for their size and have a uniform color without dark spots. If you can’t find whole hazelnuts, pre-chopped ones work, but toast them briefly in a dry pan to refresh their flavor before using.
Butter and Sugar Substitutions
European-style butter with higher fat content creates the most tender cookies, but regular unsalted butter works beautifully too. For the powdered sugar, avoid substituting with granulated sugar as it affects both texture and the creaming process. If you need to make your own powdered sugar, blend granulated sugar in a food processor until fine and powdery.
Ingredients & Prep for Chocolate Hazelnut Thumbprint Cookies
Cookie Prep Essentials
Start by bringing your butter to room temperature—this is crucial for proper creaming. Cold butter won’t incorporate air properly, resulting in dense cookies. If you’re short on time, cut the butter into small cubes to speed up the softening process. Room temperature butter should give slightly when pressed but not be melted or greasy.
Hazelnut Preparation
Toast your hazelnuts in a 180°C oven for 8-10 minutes until fragrant and lightly golden. Let them cool completely before chopping them finely—warm nuts will release oils that can affect the cookie dough consistency. I prefer chopping by hand for better control over the size, aiming for pieces roughly the size of coarse breadcrumbs.
Essential Baking Setup
Prepare your workspace by lining two large baking sheets with parchment paper and setting up your hazelnut coating station. Having everything ready before you start rolling the dough makes the process much smoother and prevents the butter in the dough from becoming too warm from handling.
Step-by-Step Cooking Instructions for Chocolate Hazelnut Thumbprint Cookies
Pre-Cooking Prep for Chocolate Hazelnut Thumbprint Cookies
Begin by preheating your oven to 180°C (355°F) with fan, or 160°C (320°F) without fan. Position your oven racks in the center position to ensure even baking. Measure all ingredients precisely—baking is a science, and accuracy matters for consistent results. Have your toasted, cooled hazelnuts chopped and ready in a shallow bowl for rolling.
Mixing Method for Chocolate Hazelnut Thumbprint Cookies
Whisk together flour, cocoa powder, and salt in a medium bowl until no streaks remain—this ensures even distribution of the cocoa throughout every cookie. In a separate large bowl, cream the butter and powdered sugar using an electric mixer on high speed for a full 3 minutes until the mixture is pale, fluffy, and has increased in volume. Add the egg yolk, milk, and vanilla extract, beating until just combined. Gradually fold in the flour mixture using a wooden spoon or rubber spatula until a soft dough forms.
Shaping and Baking Technique for Chocolate Hazelnut Thumbprint Cookies
Using a small ice cream scoop or tablespoon, portion the dough into 30 equal pieces, each about 1.5 tablespoons. Roll each portion into a smooth ball between your palms, then roll in the chopped hazelnuts, pressing gently to ensure they adhere. Place cookies on prepared baking sheets, spacing them about 2 inches apart. Bake one tray at a time for exactly 8 minutes—they’ll look slightly underbaked but will continue cooking on the hot pan.
Creating Perfect Indentations for Chocolate Hazelnut Thumbprint Cookies
The moment the cookies come out of the oven, work quickly to create the thumbprint indentations. Use a round measuring tablespoon to gently press into the center of each cookie, creating a well about 1/2 inch deep. If the cookies crack slightly around the edges, use a round cookie cutter slightly larger than the cookie to gently reshape them while they’re still warm. This technique ensures perfectly round, professional-looking cookies every time.
Pro Tips for Perfect Chocolate Hazelnut Thumbprint Cookies
Avoiding Common Cookie Disasters
The biggest mistake I see home bakers make with Chocolate Hazelnut Thumbprint Cookies is overbaking. These cookies should look slightly underdone when you remove them from the oven—they’ll be soft to the touch and may seem fragile, but they’ll firm up as they cool. Trust the 8-minute timer and resist the urge to bake longer.
Essential Tool Recommendations
Invest in a good ice cream scoop for portioning—it creates uniform cookies that bake evenly. A digital kitchen scale ensures accuracy, especially important when working with cocoa powder which can be tricky to measure by volume. A wire cooling rack is essential for proper air circulation, preventing soggy cookie bottoms.
Storage and Make-Ahead Tips
Store unfilled cookies in an airtight container for up to one week, or freeze for up to three months. Fill with chocolate hazelnut spread just before serving to maintain the best texture contrast. If you must store filled cookies, place them in a single layer in the refrigerator and bring to room temperature before serving for optimal flavor.
Flavor Variations for Chocolate Hazelnut Thumbprint Cookies
International Twists
Transform these Chocolate Hazelnut Thumbprint Cookies with global flavor profiles. For a French-inspired version, substitute the hazelnut spread with high-quality apricot preserves and roll in chopped almonds instead of hazelnuts. Create an Italian-inspired variation using pistachio spread and crushed pistachios for rolling.
Dietary Adaptations
Make these cookies gluten-free by substituting the all-purpose flour with a 1:1 gluten-free flour blend that contains xanthan gum. For a dairy-free version, use vegan butter and ensure your chocolate hazelnut spread is dairy-free. The cookies maintain their delicious texture with these simple swaps.
Seasonal Celebrations
During the holidays, add a pinch of cinnamon and nutmeg to the dough for warm spice notes. For spring celebrations, try filling half the cookies with lemon curd and rolling them in chopped toasted almonds for a bright, fresh contrast to the rich chocolate base.
Flavor Comparison Table
| Variation | Rolling Coating | Filling | Best Season |
|---|---|---|---|
| Classic | Chopped hazelnuts | Chocolate hazelnut spread | Year-round |
| French Elegance | Sliced almonds | Apricot preserves | Spring/Summer |
| Italian Romance | Crushed pistachios | Pistachio spread | Fall/Winter |
| Holiday Spice | Hazelnuts + cinnamon sugar | Spiced chocolate spread | Winter holidays |
| Citrus Bright | Toasted coconut | Lemon curd | Spring/Summer |
Serving Suggestions for Chocolate Hazelnut Thumbprint Cookies
Serve these Chocolate Hazelnut Thumbprint Cookies alongside a steaming cup of espresso or rich hot chocolate for the ultimate afternoon treat. They’re elegant enough for dinner parties when arranged on a beautiful platter with fresh berries and a dusting of powdered sugar. For casual gatherings, pack them in decorative tins as thoughtful take-home gifts.
These cookies pair beautifully with dessert wines like Port or Moscato, which complement the nutty-chocolate flavors without overwhelming them. For coffee lovers, try them with a bold French roast or smooth cold brew. During the holidays, serve alongside mulled wine or spiced cider for a cozy, festive touch.
FAQs About Chocolate Hazelnut Thumbprint Cookies
Can I use a different nut spread for these Chocolate Hazelnut Thumbprint Cookies? Absolutely! Almond butter, peanut butter, or even cookie butter work wonderfully. Just ensure the spread is thick enough to hold its shape in the cookie well.
How do I prevent my Chocolate Hazelnut Thumbprint Cookies from spreading too much? Make sure your butter isn’t over-softened and that you’re not overmixing the dough. If your kitchen is very warm, chill the shaped cookies for 15 minutes before baking.
Can I make the cookie dough ahead of time? Yes! The dough can be made up to 2 days in advance and stored covered in the refrigerator. Let it come to room temperature before shaping, as cold dough will be difficult to roll.
What’s the best way to store filled Chocolate Hazelnut Thumbprint Cookies? Store filled cookies in a single layer in an airtight container at room temperature for up to 3 days. For longer storage, freeze unfilled cookies and add the spread just before serving.
My cookies cracked when I made the thumbprint—how can I prevent this? Work quickly while the cookies are still hot from the oven, and press gently but firmly. If cracks appear, use a round cookie cutter to gently reshape the cookie while it’s still warm.
Conclusion
Fire up your oven and treat yourself to these irresistible Chocolate Hazelnut Thumbprint Cookies tonight! There’s something magical about the combination of rich chocolate, toasted hazelnuts, and creamy filling that transforms an ordinary evening into something special. These cookies have become a favorite among the thousands of home cooks in the FoodFansy community, and I know they’ll find a special place in your recipe collection too.
Ready to explore more indulgent treats? Try my [Salted Caramel Brownies] or [Classic French Macarons] for your next baking adventure. Don’t forget to share your cookie creations with me on social media—I love seeing your beautiful results and hearing your personal touches on this beloved recipe!
If you enjoyed this recipe, be sure to share it with your friends or save it for later!
I’d love to see your unique twist—feel free to post your photos on Pinterest!
Print
Chocolate Hazelnut Thumbprint Cookies: 7 Secrets to Perfect Results
- Total Time: 2hours
Description
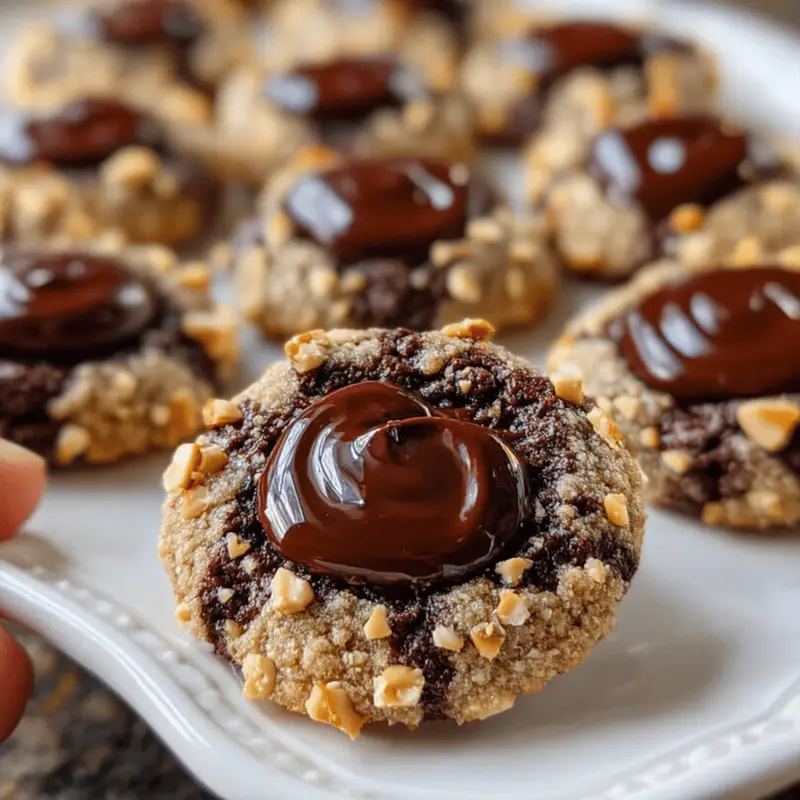
These deeply rich and soft Chocolate Hazelnut Thumbprint Cookies melt in your mouth and are filled with chocolate ganache and packed with crispy hazelnuts!
Ingredients
Hazelnut Cookies
▢
200 g all-purpose flour, plain flour
▢
30 g Dutch processed cocoa powder
▢
1/4 tsp salt
▢
250 g unsalted butter
▢
1 egg yolk
▢
40 g milk
▢
115 g powdered sugar
▢
2 tsp vanilla extract
▢
125 g finely chopped hazelnuts, toasted (see notes)
▢
100 g chocolate hazelnut spread, see notes
Instructions
Hazelnut Cookies
Preheat your oven to 180C / 355F (fan on), 160C / 320F (fan off). Line two large baking trays with baking paper and set aside.
Combine dry ingredients – Add the flour, cocoa powder and salt into a medium sized mixing bowl and use a whisk to combine. Set aside.
Cream butter and sugar – To a separate bowl, add the butter, powdered sugar, egg yolk and milk and beat on high speed until fluffy and pale, about 3 minutes.
Roll out cookies – Roll out about thirty 1 1/2 tablespoon sized balls. Using an ice cream scoop to do this will make it an easier process. I used the OXO Good Grips Small ice cream scoop.
Roll in hazelnuts and bake – Roll each ball in crushed hazelnuts. Space the cookies across two baking trays and bake one at a time, in the middle rack for 8 minutes. Do not flatten the cookies before baking, they will flatten and spread In the oven.
Indent the cookies – As soon as they come out of the oven grab a measuring tablespoon and indent each cookie. Then shuffle a round cookie cutter slightly larger than the cookie around the cookies to make them round again. Allow to cool completely.
Fill with hazelnut spread – Add the chocolate hazelnut filling to the centre of each cookie using spoons or a piping bag to finish. Let them set completely before serving.
Notes
How to toast your hazelnuts – to toast your hazelnuts, place on a metal baking sheet and bake in an preheated oven on 180C / 355F (fan off) for 10 minutes or until golden. Take out and allow to cool completely before chopping or adding to a food processor to chop.
Chocolate hazelnut spread – You can use any type you like. Personally I think a better quality, non palm oil spread is better and tastes better.
Storage – Cookies can be stored in an airtight container for up to three days. They can be frozen for up to 2 months! Thaw at room temperature before serving.
- Prep Time: 25minutes
- Cook Time: 16mins
- Category: Desssert
- Cuisine: BRITISH
Nutrition
- Calories: 149kcal
- Sugar: 6g
- Sodium: 23mg
- Fat: 11g
- Saturated Fat: 6g
- Trans Fat: 0.3g
- Carbohydrates: 12g
- Fiber: 1g
- Protein: 2g
- Cholesterol: 25mg
Keywords: Chocolate Hazelnut Thumbprint Cookies