
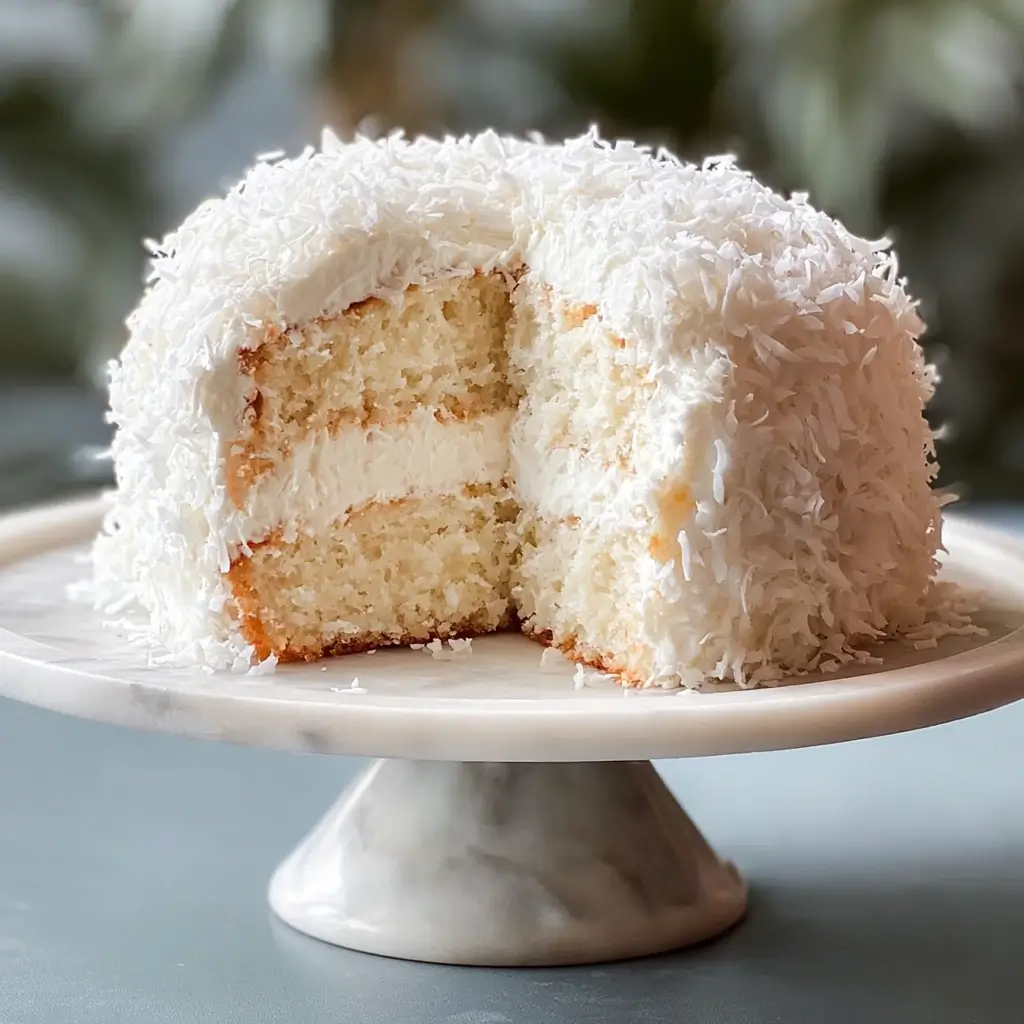
Coconut Cloud Cake might just be the answer to every baker’s dream of creating something truly spectacular without the fuss. You know that feeling when you bite into a cake that’s supposed to be moist and fluffy, but instead, you’re met with a dense, dry disappointment? I’ve been there too many times to count.
This Coconut Cloud Cake recipe promises something different—a cake so light and airy it literally melts on your tongue, with layers of coconut flavor that transport you straight to paradise. As someone who’s spent years perfecting dessert recipes in professional kitchens and home kitchens alike, I can tell you that this cake has become my go-to showstopper for everything from birthday celebrations to casual Sunday dinners.
Hey there! I’m Emeli, and through my culinary journey from scrambling eggs as a kid to exploring dessert techniques around the world, I’ve learned that the most memorable cakes aren’t necessarily the most complicated ones. This Coconut Cloud Cake recipe came to me during a particularly humid summer when I was craving something tropical yet comforting. After countless tweaks and taste tests with friends and family, I finally achieved that perfect balance of coconut flavor and cloud-like texture.
In this guide, I’ll walk you through choosing the right coconut products, mastering the fluffy frosting technique, assembly tips that ensure picture-perfect results, and answer all those burning questions you might have about baking the perfect coconut cake.
Why This Coconut Cloud Cake Recipe Works
There’s something magical about a cake that looks as good as it tastes, and this Coconut Cloud Cake delivers on both fronts. After years of testing various coconut cake recipes, I’ve discovered what makes this one stand out from the crowd.
What makes this recipe special:
• Uses the perfect coconut milk ratio – Not too heavy, not too subtle, creating that ideal coconut flavor without overwhelming the delicate cake structure
• Whipped cream cheese frosting technique – Takes just 15 minutes to create a frosting that’s stable enough for decorating yet light enough to complement the cake
• Foolproof for beginners – Clear instructions and timing that work whether you’re a weekend baker or preparing for a special celebration
• Customizable coconut intensity – Easy to adjust the coconut flavor from subtle to bold based on your family’s preferences
Choosing the Right Coconut Products for Your Coconut Cloud Cake
The secret to an exceptional Coconut Cloud Cake lies in selecting quality coconut products that work harmoniously together. Not all coconut products are created equal, and understanding the differences can elevate your baking game significantly.
Best Coconut Products for This Recipe
Coconut Milk: Full-fat canned coconut milk is your best friend here. Unlike light coconut milk, the full-fat version provides the richness and moisture that makes this cake incredibly tender. Look for brands without guar gum if possible, as they tend to have a cleaner coconut flavor.
Coconut Extract: Pure coconut extract intensifies the tropical flavor without adding extra liquid to your batter. Avoid imitation extracts, which can taste artificial and harsh.
Shredded Coconut: Sweetened shredded coconut works beautifully for the topping. The fine shreds adhere better to the frosting and create that stunning textural contrast.
Buying Tips for Your Coconut Cloud Cake
When shopping for coconut products, check the expiration dates carefully—coconut milk and extract can go rancid quickly. For the freshest flavor, buy coconut extract in small bottles since a little goes a long way. If you’re feeling adventurous, look for organic coconut products, which often have a more pronounced, authentic coconut taste.
Substitutions for Your Coconut Cloud Cake
Coconut Milk Alternatives: In a pinch, you can substitute whole milk mixed with 2 tablespoons of melted coconut oil, though the coconut flavor will be less pronounced.
Extract Swaps: If you can’t find coconut extract, double the vanilla extract and add 2 tablespoons of cream of coconut (like Coco López) to the batter.
Toasted vs. Fresh Coconut: Fresh shredded coconut creates a more elegant presentation, while toasted coconut adds a deeper, nuttier flavor profile to your Coconut Cloud Cake.
Ingredients & Prep for Your Coconut Cloud Cake
Proper preparation is the foundation of any successful Coconut Cloud Cake. Taking time to prep your ingredients correctly ensures even mixing, proper rise, and that signature fluffy texture we’re after.
Cake Prep Essentials for Your Coconut Cloud Cake
Room Temperature Ingredients: This isn’t just a suggestion—it’s crucial. Cold eggs and butter won’t incorporate properly, leading to a dense cake. Take your eggs, butter, and cream cheese out of the refrigerator 2-3 hours before baking.
Proper Measuring: Use the spoon-and-level method for flour to avoid a heavy cake. Too much flour is the enemy of our cloud-like texture.
Pan Preparation: Grease your pans thoroughly and line with parchment paper. This Coconut Cloud Cake has a tender crumb that can stick easily.
Frosting Components for Your Coconut Cloud Cake
Cream Cheese: Full-fat cream cheese creates the best texture. Low-fat versions can make the frosting too thin and unstable.
Heavy Cream: Must be cold for proper whipping. I recommend chilling your bowl and beaters in the freezer for 10 minutes before whipping.
Powdered Sugar: Sifting prevents lumps and creates a silky-smooth frosting that’s perfect for this Coconut Cloud Cake.
Pantry Staples for Your Coconut Cloud Cake
Quality Vanilla Extract: Pure vanilla extract complements the coconut beautifully without competing with it.
Cake Flour Option: While all-purpose flour works perfectly, cake flour will create an even more tender Coconut Cloud Cake.
Coconut Oil: Have some on hand for greasing pans—it adds an extra subtle coconut note.
Step-by-Step Cooking Instructions for Your Coconut Cloud Cake
Creating the perfect Coconut Cloud Cake is all about technique and timing. Follow these detailed steps, and you’ll have a bakery-quality cake that impresses every time.
Pre-Baking Prep for Your Coconut Cloud Cake
Start by preheating your oven to 350°F (175°C)—this temperature is crucial for even baking. Grease two 9-inch round cake pans thoroughly with butter or coconut oil, then line with parchment paper circles. This double protection ensures your Coconut Cloud Cake releases perfectly.
Measure all ingredients and bring eggs, butter, and cream cheese to room temperature. This step cannot be rushed—cold ingredients will create a lumpy batter that won’t rise properly.
Mixing Method for Your Coconut Cloud Cake
Cream the softened butter and granulated sugar for 3-4 minutes until the mixture is light, fluffy, and pale in color. This incorporates air that helps create the cake’s tender crumb. Add eggs one at a time, beating well after each addition—this prevents curdling.
Mix in vanilla and coconut extracts until just combined. The key to a perfect Coconut Cloud Cake is alternating wet and dry ingredients: add one-third of the flour mixture, then half the coconut milk, another third of flour, remaining coconut milk, and finally the last of the flour. Mix until just incorporated—overmixing develops gluten, resulting in a tough cake.
Baking Your Coconut Cloud Cake
Divide batter evenly between prepared pans and smooth tops with an offset spatula. Bake for 25-30 minutes, rotating pans halfway through for even browning. Your Coconut Cloud Cake is done when a toothpick inserted in the center comes out clean or with just a few moist crumbs.
Cooling Process for Your Coconut Cloud Cake
Let cakes cool in pans for exactly 10 minutes—no longer, or they might stick. Turn out onto wire racks and cool completely before frosting. This patience prevents the frosting from melting and ensures clean, professional-looking layers.
Pro Tips for Perfect Coconut Cloud Cake
After countless batches of Coconut Cloud Cake, I’ve learned some insider secrets that make the difference between good and extraordinary results.
Avoiding Dense or Dry Coconut Cloud Cake
Don’t Overmix: Once you add flour, mix just until combined. Lumps are better than a tough cake.
Check Your Leavening: Ensure your baking powder is fresh—it loses potency after 6 months. Test by adding a teaspoon to hot water; it should foam vigorously.
Moisture Tricks: Brush each layer with simple syrup (equal parts sugar and water) before frosting for extra moisture that keeps your Coconut Cloud Cake tender for days.
Essential Tools for Your Coconut Cloud Cake
Stand Mixer: While not absolutely necessary, it makes creating the fluffy frosting much easier and more consistent.
Offset Spatula: Essential for smooth frosting application and professional-looking results.
Bench Scraper: Helps achieve those clean, sharp edges that make your Coconut Cloud Cake look bakery-perfect.
Storage & Serving Your Coconut Cloud Cake
Refrigeration: This Coconut Cloud Cake must be refrigerated due to the cream cheese frosting. It actually improves in flavor after a day as the layers meld together.
Serving Temperature: Let the cake sit at room temperature for 15-20 minutes before serving for the best texture and flavor.
Freezing: Wrap unfrosted cake layers tightly and freeze for up to 3 months. Thaw completely before frosting.
Flavor Variations for Your Coconut Cloud Cake
One of the beautiful things about this Coconut Cloud Cake recipe is its versatility. Here are some exciting variations that have become favorites in my kitchen.
Tropical Twist Coconut Cloud Cake
Transform your Coconut Cloud Cake into a tropical paradise by adding crushed pineapple to the batter. Drain 1 cup of crushed pineapple thoroughly and fold it into the batter just before baking. The pineapple adds natural sweetness and incredible moisture.
Chocolate Coconut Cloud Cake
For chocolate lovers, replace 1/2 cup of flour with unsweetened cocoa powder. Add chocolate shavings between layers and dust the top with cocoa powder for an elegant Coconut Cloud Cake variation that’s perfect for special occasions.
Lime Coconut Cloud Cake
Add the zest of 2 limes to the batter and 1 tablespoon of lime juice to the frosting. This citrusy twist brightens the coconut flavor and creates a refreshing Coconut Cloud Cake that’s perfect for summer entertaining.
Coconut Cloud Cake Flavor Variations Table
| Variation | Batter Addition | Frosting Modification | Topping Change |
|---|---|---|---|
| Tropical Paradise | 1 cup drained crushed pineapple | Add 2 tbsp pineapple juice | Toasted coconut + pineapple chunks |
| Chocolate Coconut | Replace 1/2 cup flour with cocoa | Add 1/4 cup cocoa powder | Chocolate shavings + coconut |
| Lime Coconut | Zest of 2 limes | Add 1 tbsp lime juice | Lime zest + toasted coconut |
| Rum Coconut | 2 tbsp dark rum | 1 tbsp rum extract | Toasted coconut + rum-soaked currants |
| Almond Coconut | 1/2 tsp almond extract | 1/4 tsp almond extract | Sliced almonds + coconut flakes |
Serving Suggestions for Your Coconut Cloud Cake
A beautiful Coconut Cloud Cake deserves equally thoughtful accompaniments. Here are my favorite ways to serve this showstopper dessert.
Perfect Pairings: Serve slices with fresh berries—strawberries and raspberries provide a lovely tartness that balances the sweet coconut. A drizzle of passion fruit coulis adds tropical flair and beautiful color contrast.
Beverage Combinations: This Coconut Cloud Cake pairs beautifully with coffee, particularly cold brew or espresso. For wine lovers, a late-harvest Riesling or Moscato complements the coconut flavors perfectly. For non-alcoholic options, try coconut water with a splash of lime or tropical fruit teas.
Presentation Ideas: Garnish individual slices with toasted coconut flakes, a sprig of mint, or a few tropical fruit pieces. For special occasions, surround the cake with orchids or tropical flowers for an Instagram-worthy presentation.
FAQs About Coconut Cloud Cake
Over the years, I’ve received countless questions about perfecting this Coconut Cloud Cake recipe. Here are the most common concerns and my tried-and-true solutions.
Can I make this Coconut Cloud Cake ahead of time? Absolutely! This Coconut Cloud Cake actually improves in flavor after a day in the refrigerator. You can bake the layers up to 3 days ahead and freeze them for up to 3 months. The frosted cake keeps beautifully for 4-5 days refrigerated.
Why did my Coconut Cloud Cake turn out dense? Dense cake usually results from overmixing the batter, using cold ingredients, or measuring flour incorrectly. Ensure all ingredients are at room temperature and mix just until combined after adding flour.
Can I use coconut flour in this Coconut Cloud Cake? Coconut flour behaves very differently from regular flour and cannot be substituted 1:1. It would require a completely different recipe formulation to work properly.
Is this Coconut Cloud Cake safe during pregnancy? Yes, this recipe uses pasteurized dairy products and fully cooked eggs, making it safe for pregnant women. The coconut products are also pregnancy-safe.
Can I make this Coconut Cloud Cake dairy-free? While the coconut milk makes part of the recipe naturally dairy-free, you’d need to substitute the butter and cream cheese. I recommend using vegan butter and dairy-free cream cheese alternatives, though the texture may be slightly different.
Conclusion
There’s something truly special about sharing a slice of homemade Coconut Cloud Cake with the people you love. This recipe has become a cornerstone in my baking repertoire, and I hope it brings as much joy to your kitchen as it has to mine.
Ready to create your own slice of paradise? Gather your ingredients, preheat that oven, and let’s make some magic happen in your kitchen tonight! The beauty of this Coconut Cloud Cake is that it’s impressive enough for special occasions yet simple enough for any day that calls for a little sweetness.
Join the FoodFansy family of home bakers who’ve fallen in love with this recipe—share your creations with us on social media using #FoodFansyCoconut! I love seeing your beautiful cakes and hearing about the memories you’re creating around the table.
If you enjoyed this recipe, be sure to share it with your friends or save it for later!
I’d love to see your unique twist—feel free to post your photos on Pinterest!
Until next time, happy baking! – Emeli