
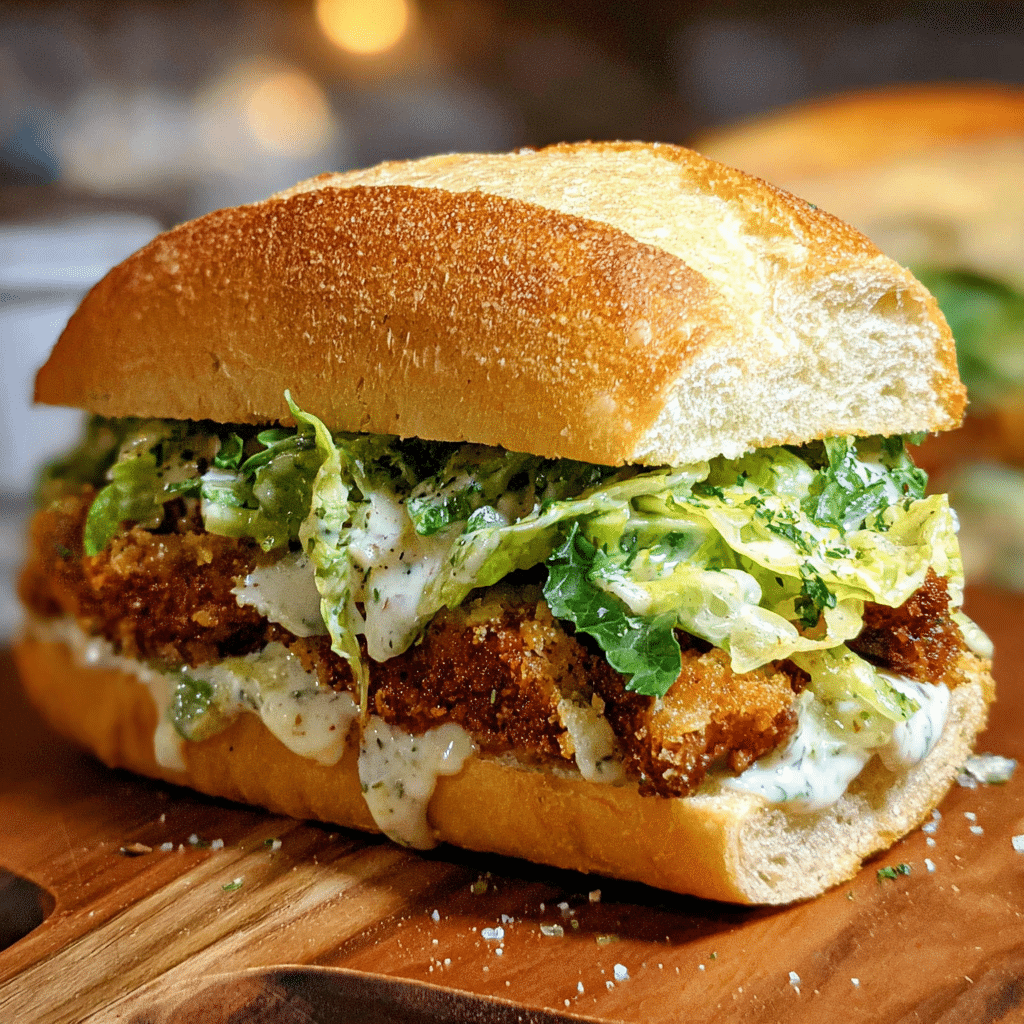
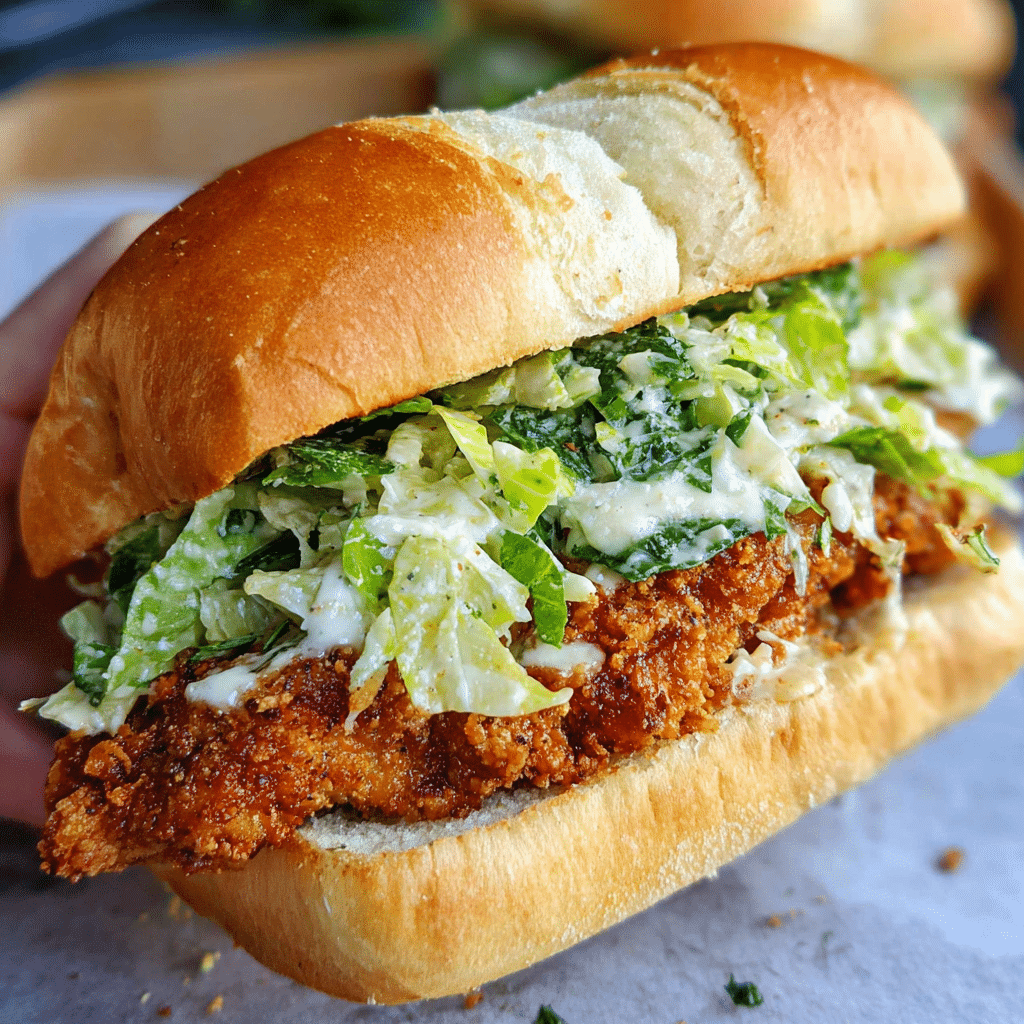
Crispy Chicken Caesar Sandwich – just saying those words makes my mouth water! You know that feeling when you bite into a sandwich and everything just works? The crunch, the creaminess, the perfect balance of flavors that makes you close your eyes and savor every single bite? That’s exactly what this recipe delivers.
Hey there! I’m Emeli, and if there’s one thing I’ve learned from my years in professional kitchens and exploring street food around the world, it’s that the most memorable meals often come in the simplest packages. This Crispy Chicken Caesar Sandwich is proof of that philosophy – it takes the beloved Caesar salad we all know and love and transforms it into something extraordinary.
I first created this sandwich during a particularly hectic week when I was craving something satisfying but didn’t want to spend hours in the kitchen. What started as a quick lunch experiment has become one of my most requested recipes at FoodFansy. The secret? It’s all about building layers of flavor and texture that complement each other perfectly.
In this post, I’ll walk you through everything you need to know: from selecting the perfect chicken cuts to mastering that golden, crispy coating, plus my pro tips for assembly that prevents soggy sandwiches. We’ll also cover flavor variations, serving suggestions, and answer all those burning questions you might have.
Why This Crispy Chicken Caesar Sandwich Recipe Works
This isn’t just another chicken sandwich – it’s a carefully crafted combination that hits every note your taste buds are craving. Here’s what makes this Crispy Chicken Caesar Sandwich so special:
• Uses affordable, accessible chicken cutlets that cook evenly and stay tender • Three-stage breading system creates an incredibly crispy coating that stays crunchy • Homemade Caesar dressing that’s creamier and more flavorful than store-bought • Perfect for any occasion – quick weeknight dinners or impressive weekend entertaining • Customizable to dietary preferences with easy swaps and variations • Ready in under 30 minutes from start to finish
The beauty of this recipe lies in its simplicity. Every component serves a purpose, and when they come together, they create something that’s much greater than the sum of its parts.
Choosing the Right Chicken for Your Crispy Chicken Caesar Sandwich
Getting the chicken right is absolutely crucial for this Crispy Chicken Caesar Sandwich. Let me share what I’ve learned about selecting and preparing the perfect protein.
Best Cuts for This Recipe
Chicken cutlets are my go-to choice for this sandwich, and here’s why: they’re already the perfect thickness (about ½ inch), they cook evenly, and they fit perfectly on sandwich bread. If you can’t find pre-cut cutlets, you can easily make your own by slicing chicken breasts horizontally in half.
Chicken thighs can also work beautifully if you prefer darker meat – they’re more forgiving and stay juicier, though they’ll need a bit longer cooking time. Just make sure to pound them to an even thickness.
Buying Tips
When shopping for your Crispy Chicken Caesar Sandwich chicken, look for: • Bright pink color without any gray spots • Firm texture that springs back when pressed • Fresh smell – avoid anything with an off odor • Even thickness if buying pre-cut cutlets
Don’t hesitate to ask your butcher to slice chicken breasts into cutlets for you – they’re usually happy to help, and it saves you time at home.
Substitutions
While chicken is traditional, you can absolutely experiment: • Turkey cutlets work identically to chicken • Pork tenderloin sliced thin creates a delicious variation • Firm white fish like cod or halibut for a seafood twist
Ingredients & Prep for Your Crispy Chicken Caesar Sandwich
The key to a perfect Crispy Chicken Caesar Sandwich is having everything prepped and ready before you start cooking. Let me break down each component.
Chicken Prep Essentials
Start by laying your chicken cutlets on a cutting board. If they’re uneven in thickness, gently pound them with a meat mallet or rolling pin until they’re uniformly about ½ inch thick. This ensures even cooking and prevents some pieces from being overcooked while others are still raw.
Season both sides generously with salt and ground black pepper. I like to do this about 15 minutes before breading to let the seasoning penetrate the meat.
The Triple-Threat Breading Station
This is where the magic happens for your Crispy Chicken Caesar Sandwich. Set up three shallow dishes:
Flour Mixture: Combines all-purpose flour with salt and smoked paprika. The paprika adds both color and a subtle smoky flavor that complements the Caesar dressing beautifully.
Egg Mixture: Beaten eggs with a pinch of salt create the “glue” that helps the breadcrumbs adhere properly.
Breadcrumb Mixture: This is my secret weapon – a combination of panko and regular breadcrumbs with herbs, spices, and Parmesan cheese. The panko provides incredible crunch, while the regular breadcrumbs help everything stick together.
Caesar Dressing from Scratch
Nothing beats homemade Caesar dressing for your Crispy Chicken Caesar Sandwich. My version uses: • Full-fat mayonnaise as the creamy base • Greek yogurt for tang and extra protein • Fresh lemon juice for brightness • Worcestershire sauce for that umami depth • Fresh garlic and Parmesan for authentic Caesar flavor
Mix everything together until smooth and creamy, then reserve 4-5 tablespoons to toss with your chopped romaine. The rest will be your sandwich spread.
Step-by-Step Cooking Instructions for Crispy Chicken Caesar Sandwich
Now for the fun part – bringing your Crispy Chicken Caesar Sandwich to life! Follow these steps for perfect results every time.
Pre-Cooking Prep for Crispy Chicken Caesar Sandwich
Before you heat any oil, make sure your breading station is set up and your chicken is properly seasoned. Pat the chicken cutlets completely dry with paper towels – any excess moisture will prevent the breading from adhering properly.
Have a wire cooling rack set up near your stove for draining the cooked chicken. This keeps the bottom from getting soggy while maintaining that crispy texture we’re after.
Cooking Method for Crispy Chicken Caesar Sandwich
Heat about ½ inch of oil in a large skillet over medium heat. The oil is ready when you drop in a few breadcrumbs and they immediately start sizzling.
Working with one cutlet at a time, dredge it in the flour mixture, shaking off any excess. Next, dip it completely in the egg mixture, letting any excess drip off. Finally, press it firmly into the breadcrumb mixture, making sure both sides are well coated.
Carefully place the breaded chicken in the hot oil. Don’t overcrowd the pan – work in batches if necessary. The chicken should sizzle immediately when it hits the oil.
Doneness Check for Crispy Chicken Caesar Sandwich
Cook for 4-5 minutes on the first side until deep golden brown, then flip and cook for another 4-5 minutes. The internal temperature should reach 165°F when checked with a meat thermometer.
You’ll know it’s done when the coating is deep golden brown and the chicken feels firm when gently pressed with a spatula.
Resting Your Crispy Chicken Caesar Sandwich Components
Transfer the cooked chicken to your wire rack and let it rest for 2-3 minutes. This brief rest allows the juices to redistribute while keeping the coating crispy.
Meanwhile, toss your chopped romaine with the reserved Caesar dressing, creating the perfect salad component for your sandwich.
Pro Tips for Perfect Crispy Chicken Caesar Sandwich
After making countless Crispy Chicken Caesar Sandwich variations, here are my insider secrets for guaranteed success.
Avoiding Tough or Dry Chicken in Your Crispy Chicken Caesar Sandwich
Don’t overcrowd the pan – this lowers the oil temperature and creates soggy breading instead of crispy coating. Cook in batches if you’re making multiple sandwiches.
Control your heat – if the oil is too hot, the outside will burn before the inside cooks through. Medium heat is your sweet spot.
Use a meat thermometer – guessing leads to overcooked, dry chicken. 165°F is your target temperature.
Essential Tool Recommendations for Crispy Chicken Caesar Sandwich
• Instant-read thermometer for perfect doneness every time • Wire cooling rack to maintain crispiness • Shallow dishes for your breading station – pie plates work perfectly • Tongs for safe flipping and handling
Storage & Reheating Your Crispy Chicken Caesar Sandwich
Cooked chicken can be stored in the refrigerator for up to 3 days. To reheat and restore crispiness, place on a wire rack over a baking sheet and reheat in a 350°F oven for 5-7 minutes.
For meal prep, you can bread the chicken ahead of time and store it covered in the refrigerator for up to 24 hours before frying.
Flavor Variations for Your Crispy Chicken Caesar Sandwich
One of the things I love most about this Crispy Chicken Caesar Sandwich is how easily it adapts to different flavor profiles and dietary needs.
Spicy Twist on Crispy Chicken Caesar Sandwich
Add a kick to your sandwich by incorporating: • Chipotle peppers in adobo mixed into the Caesar dressing • Cayenne pepper added to the breadcrumb mixture • Hot sauce drizzled on the chicken before serving • Jalapeño slices added to the sandwich assembly
Keto and Paleo Crispy Chicken Caesar Sandwich Adaptations
For keto dieters: Skip the flour in the breading and use only the egg and a mixture of grated Parmesan and pork rinds for coating. Serve in lettuce wraps instead of bread.
For paleo followers: Use almond flour instead of wheat flour, and serve in large romaine leaves or on grain-free bread.
Global Flavors for Your Crispy Chicken Caesar Sandwich
Mediterranean twist: Add dried oregano, sun-dried tomatoes, and kalamata olives to your Caesar salad.
Asian fusion: Incorporate sesame oil in the dressing and add crispy wonton strips to the sandwich.
Mexican-inspired: Use lime juice instead of lemon in the dressing and add avocado and cilantro to the assembly.
Crispy Chicken Caesar Sandwich Flavor Comparison Table
| Variation | Key Ingredients | Flavor Profile | Best For |
|---|---|---|---|
| Classic | Traditional Caesar, Parmesan | Rich, garlicky, umami | Caesar salad lovers |
| Spicy | Chipotle, cayenne, hot sauce | Heat with smoky depth | Spice enthusiasts |
| Mediterranean | Oregano, sun-dried tomatoes, olives | Herbaceous, briny | Greek food fans |
| Keto | Pork rind coating, lettuce wrap | Crunchy, low-carb | Keto dieters |
| Asian Fusion | Sesame oil, wonton strips | Nutty, crispy texture | Adventurous eaters |
Serving Suggestions for Your Crispy Chicken Caesar Sandwich
A great Crispy Chicken Caesar Sandwich deserves equally great accompaniments. Here are my favorite pairings that complement without competing.
Perfect side dishes include crispy sweet potato fries, homemade coleslaw, or a simple arugula salad with lemon vinaigrette. The key is choosing sides that add different textures and flavors without overwhelming the main event.
Beverage pairings can elevate your meal significantly. For wine lovers, a crisp Sauvignon Blanc or light Pinot Grigio cuts through the richness beautifully. Beer enthusiasts should try a wheat beer or pilsner. For non-alcoholic options, sparkling water with lemon or a classic iced tea work wonderfully.
Presentation tips: Cut your Crispy Chicken Caesar Sandwich diagonally and serve it with a pickle spear and your chosen side. A small ramekin of extra Caesar dressing for dipping takes it to restaurant quality.
FAQs About Crispy Chicken Caesar Sandwich
Can I use frozen chicken for my Crispy Chicken Caesar Sandwich? Yes, but make sure it’s completely thawed and patted dry. Frozen chicken retains more moisture, which can prevent proper breading adhesion. Thaw overnight in the refrigerator for best results.
How do I fix overcooked chicken in my Crispy Chicken Caesar Sandwich? Unfortunately, you can’t reverse overcooking, but you can prevent it by using a meat thermometer and cooking at medium heat. If your chicken does get overcooked, extra Caesar dressing can help add moisture back to the sandwich.
Is this Crispy Chicken Caesar Sandwich recipe safe for pregnant women? As long as the chicken reaches an internal temperature of 165°F and you use pasteurized eggs in the Caesar dressing, it’s perfectly safe. Always use a meat thermometer to ensure proper cooking.
Can I make the Caesar dressing ahead for my Crispy Chicken Caesar Sandwich? Absolutely! The dressing actually improves in flavor when made a day ahead. Store it covered in the refrigerator for up to one week.
What’s the best bread for a Crispy Chicken Caesar Sandwich? I prefer French baguettes for their crusty exterior and soft interior, but ciabatta, sourdough, or even brioche buns work beautifully. Choose something sturdy enough to hold all the components without getting soggy.
Conclusion
There you have it – everything you need to create the perfect Crispy Chicken Caesar Sandwich that’ll have your family and friends asking for the recipe! This isn’t just a sandwich; it’s a celebration of flavors and textures that come together in the most satisfying way possible.
Fire up that skillet and try this tonight! I promise you won’t regret it. The combination of crispy, perfectly seasoned chicken with creamy Caesar dressing and fresh romaine creates something truly special that bridges the gap between comfort food and gourmet dining.
Join the thousands of home cooks who’ve already fallen in love with this recipe by sharing your creations on social media – I love seeing your beautiful sandwich photos and hearing about your favorite variations!
Ready for your next culinary adventure? Try our [Homemade Focaccia Bread Guide] for the perfect foundation for your sandwiches, or dive into our [Ultimate Caesar Salad Masterclass] to perfect your dressing-making skills even further.
If you enjoyed this recipe, be sure to share it with your friends or save it for later!
I’d love to see your unique twist—feel free to post your photos on Pinterest!
Happy cooking, and remember – the best meals are the ones shared with the people you love.
– Emeli, Founder & Chef at FoodFansy.com
Print
Crispy Chicken Caesar Sandwich: Ultimate Recipe That Never Fails
- Total Time: 35 minutes
- Yield: 5 sanswiches
Description
This Chicken Caesar Sandwich features crispy breaded chicken, creamy Caesar dressing, and fresh romaine on a crusty baguette for a mouthwatering, satisfying meal. Perfect for lunch or dinner!
Ingredients
Caesar Dressing
½ cup full-fat mayonnaise
3 tablespoon Greek yogurt
1 teaspoon Dijon mustard
1 teaspoon Worcestershire sauce
2 tablespoon lemon juice
¼ cup Parmesan cheese freshly grated
1-2 garlic cloves minced
¼ teaspoon black pepper
Pinch sea salt
Chicken
5 chicken cutlets see note 1
sea salt to taste
ground black pepper to taste
Oil for frying
Flour Mixture
⅓ cup all-purpose flour
½ teaspoon salt
¾ teaspoon smoked paprika
Egg Mixture
2 eggs
¼ teaspoon salt
Breadcrumbs Mixture
¾ cup panko crumbs
¼ cup breadcrumbs
1 teaspoon dried parsley
½ teaspoon ground black pepper
½ teaspoon sea salt
½ dried oregano
1 teaspoon garlic powder
¼ cup Parmesan cheese freshly grated
Assembly
2 romaine hearts chopped
1-2 French baguettes
Parmesan cheese freshly grated
Instructions
In a bowl, prepare the Caesar dressing by mixing all ingredients. Stir until smooth and creamy. Take 4–5 tablespoons of this dressing and mix it with the chopped romaine lettuce in a medium bowl. Cover both the salad and the remaining dressing and refrigerate both components separately for later.
Lay the chicken cutlets on a cutting board. If they are uneven in thickness, gently pound them with a meat mallet or rolling pin to make them even. Sprinkle both sides with salt and ground black pepper.
Set up the breading station with three shallow plates. In the first, mix the flour, salt, and smoked paprika. In the second, whisk the eggs with salt until well combined. In the third, panko, breadcrumbs, dried parsley, black pepper, salt, dried oregano, garlic powder, and grated Parmesan cheese.
Heat oil in a frying pan over medium heat. Take one chicken cutlet and dredge it in the flour mixture, shake off any excess. Next, dip it into the eggs mixture. Finally, firmly press it into the breadcrumb mix. Repeat for all cutlets.
Once the oil is hot (test by dropping in a few breadcrumbs—if they sizzle, it’s ready), carefully place the chicken into the pan. Fry until golden brown on one side, then flip and cook the other side until crispy and fully cooked. This should take about 4-5 minutes per side, depending on thickness. Remove and place on a wire rack to drain excess oil. Fry in batches so not to overcrowd.
Slice the baguettes into 12 cm (5″) portions and cut each one open lengthwise. Spread a layer of the reserved Caesar dressing , place a crispy chicken cutlet on top, followed by a generous amount of the Caesar salad. Sprinkle with extra grated Parmesan. Close the sandwiches and serve immediately with fries.
Preheat oven to 350°F (175°C).
Brush tortillas with melted butter on both sides.
Combine sugar and crushed Fruity Pebbles in a shallow dish.
Dip tortillas in cereal mixture to coat.
Drape over oven rack or taco mold; bake 8–10 mins.
Cool completely before filling.
Beat cream cheese, powdered sugar, and vanilla until smooth.
Add heavy cream and whip until thick.
Fold in Fruity Pebbles cereal.
Pipe or spoon filling into taco shells.
Top with more cereal and optional whipped cream.
- Prep Time: 15 minutes
- Cook Time: 20 minutes
- Category: Dinner
- Cuisine: French-Inspired
Nutrition
- Calories: 600 kcal
- Sugar: 4g
- Sodium: 950mg
- Fat: 33g
- Saturated Fat: 8g
- Unsaturated Fat: 21g
- Trans Fat: 0.5g
- Carbohydrates: 40g
- Fiber: 2g
- Protein: 35g
- Cholesterol: 90mg
Keywords: Crispy Chicken Caesar Sandwich