
Italian Chicken Panini: The Ultimate Guide to Crispy, Juicy Perfection
Hey there! I’m Emeli, and I’ll never forget the first time I bit into a real Italian panini at a tiny café in Florence. The bread was perfectly crisp, the chicken tender and fragrant with herbs, and the melted cheese… pure magic. That moment inspired me to recreate that experience at home, and after countless kitchen experiments, I’ve cracked the code. If you’re tired of soggy sandwiches or dry, flavorless chicken breasts, you’re in the right place.
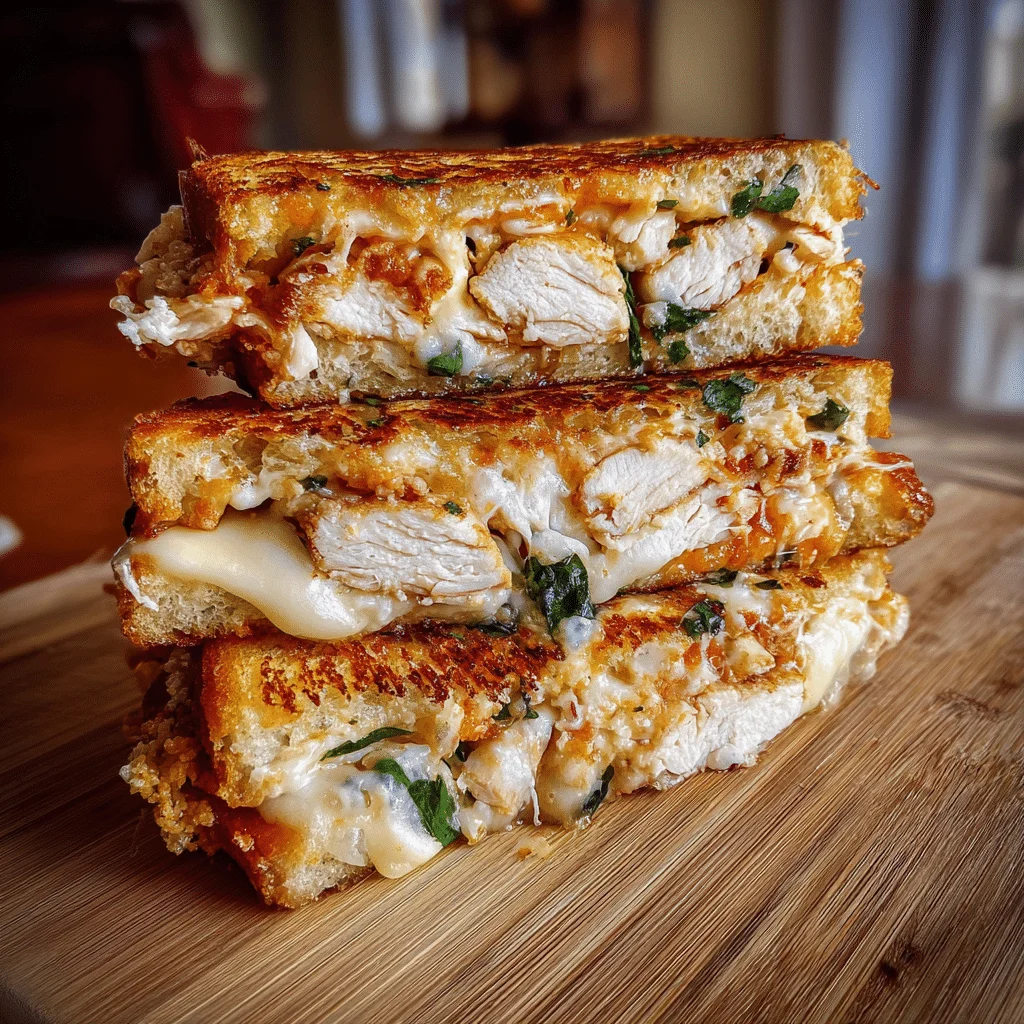
This Italian Chicken Panini recipe delivers restaurant-quality results in under 30 minutes. Picture this: juicy, herb-marinated chicken paired with melted cheese and golden, crispy bread that shatters with every bite. As someone who’s spent years exploring Italian trattorias and perfecting home cooking techniques at FoodFansy, I’ve learned that the secret isn’t fancy ingredients it’s understanding a few key steps that transform simple components into something extraordinary.
In this guide, I’ll walk you through everything: choosing the right chicken, marinading shortcuts that actually work, pressing techniques for that perfect crunch, and pro tips to avoid common pitfalls. Let’s bring a taste of Italy to your kitchen.
Why This Italian Chicken Panini Recipe Works
This isn’t just another sandwich recipe it’s a foolproof formula for weeknight dinners and weekend gatherings alike. Here’s what makes it special:
- Uses affordable, easy-to-find ingredients: Chicken breasts, basic Italian herbs, and pantry staples you probably already have
- Quick marination delivers maximum flavor: Just 15-30 minutes transforms plain chicken into something aromatic and tender
- Versatile for any occasion: Perfect for busy weeknight dinners, meal prep lunches, or casual entertaining
- Customizable to your taste: The base recipe welcomes endless variations, from spicy to Mediterranean-style
- Foolproof cooking method: Even beginners can achieve juicy chicken and crispy bread every time
Choosing the Right Meat for Italian Chicken Panini
The foundation of a great panini starts with selecting quality chicken. Here’s what you need to know.
Best Cuts for Italian Chicken Panini
Boneless, skinless chicken breasts are the traditional choice for this recipe, and for good reason. They’re lean, cook quickly, and slice beautifully for layering. The key is buying breasts that are roughly the same size and thickness for even cooking. If you’re feeling adventurous, boneless chicken thighs offer a juicier, more forgiving option with slightly deeper flavor they’re harder to overcook and stay moist even if you leave them on the heat a bit too long.
Buying Tips for Italian Chicken Panini
Look for chicken with a healthy pink color and firm texture. Avoid any pieces with a grayish tint or excessive liquid in the package, which can indicate older meat. If you’re at a butcher counter, don’t hesitate to ask them to pound the chicken breasts to an even thickness—most are happy to help, and it saves you time at home. For the freshest option, check the sell-by date and choose packages from the back of the display case.
Substitutions for Italian Chicken Panini
No chicken on hand? Turkey cutlets work beautifully with the same Italian seasonings and cook in similar time. For a vegetarian twist, try thick slices of grilled portobello mushrooms or marinated firm tofu. Even thinly sliced pork tenderloin makes a delicious alternative, though you’ll want to adjust the cooking time slightly.
Ingredients & Prep for Italian Chicken Panini
Preparation is where good cooking becomes great cooking. These simple steps ensure your chicken is tender and flavorful.
Meat Prep Essentials for Italian Chicken Panini
Start by trimming any excess fat from your chicken breasts while a little fat adds flavor, too much can make your panini greasy. Next, place each breast between two sheets of plastic wrap or parchment paper and lightly pound with a meat mallet or rolling pin until it’s an even thickness, about ½ to ¾ inch throughout. This ensures the chicken cooks evenly without dry edges and undercooked centers. Finally, pat the chicken completely dry with paper towels. This crucial step helps the marinade adhere better and promotes better browning during cooking.
Marinades & Seasoning for Italian Chicken Panini
The marinade is where the magic happens. In a bowl, whisk together olive oil, minced garlic (fresh is best, but jarred works in a pinch), dried oregano, dried basil, freshly ground black pepper, and salt. The olive oil carries the flavors and keeps the chicken moist, while the garlic and herbs deliver that authentic Italian character. Place your prepared chicken in a shallow dish or resealable bag, pour the marinade over it, and turn to coat evenly.
Marinate for at least 15 to 30 minutes at room temperature for best results. If you have more time, refrigerate for up to 4 hours just remember to bring it back to room temperature before cooking. The acids and oils in the marinade work to tenderize the meat while infusing it with flavor.
Pantry Staples for Italian Chicken Panini
Keep these basics stocked for spontaneous panini nights: good quality olive oil (extra virgin for the marinade adds more flavor), lemon juice or a splash of red wine vinegar (the acid helps tenderize the chicken), and a blend of Italian dried herbs like oregano, basil, thyme, and rosemary. These simple ingredients form the backbone of countless Italian-inspired dishes beyond just this panini.
Step-by-Step Cooking Instructions for Italian Chicken Panini
Follow these steps for panini perfection every time.
Pre-Cooking Prep for Italian Chicken Panini
Remove your marinated chicken from the refrigerator about 15-20 minutes before cooking, allowing it to come to room temperature. This ensures even cooking throughout. While the chicken rests, preheat your grill pan, cast-iron skillet, or regular skillet over medium heat. Season the chicken one more time with a light sprinkle of salt and pepper if desired. Have your panini bread, cheese, and any additional toppings ready so you can work efficiently once the chicken is done.
Cooking Method for Italian Chicken Panini
Add a small drizzle of olive oil to your preheated pan. Place the chicken breasts in the pan without crowding work in batches if necessary. Cook undisturbed for 5 to 6 minutes on the first side until you see a golden-brown crust forming. Flip carefully and cook for another 5 to 6 minutes on the second side until the chicken is cooked through and golden.
Once the chicken is done, remove it from heat and let it rest briefly. While it rests, assemble your sandwiches: layer your chosen bread with the sliced chicken, cheese (provolone, mozzarella, or fontina are classic choices), and any extras like roasted peppers or fresh basil. Heat your panini press according to manufacturer directions, or use your skillet over medium heat. If using a skillet, place the sandwich in the pan and press down firmly with a heavy pot or another skillet. Cook for 2-3 minutes per side until the bread is crispy and golden and the cheese has melted beautifully.
Doneness Check for Italian Chicken Panini
Food safety is non-negotiable with chicken. Use an instant-read meat thermometer inserted into the thickest part of the breast it should reach an internal temperature of 165°F (74°C). If you don’t have a thermometer, cut into the thickest part of one piece; the meat should be opaque throughout with clear juices running out, never pink or red.
Resting for Italian Chicken Panini
Once your chicken reaches the proper temperature, transfer it to a cutting board and let it rest for 5 minutes before slicing. This brief resting period allows the juices to redistribute throughout the meat rather than running out onto your cutting board. The result? Juicier, more flavorful chicken in every bite of your panini.
Pro Tips for Perfect Italian Chicken Panini
These insider techniques take your panini from good to unforgettable.
Avoiding Tough or Dry Meat in Italian Chicken Panini
The biggest mistake home cooks make is overcooking chicken. Since it continues cooking slightly after you remove it from heat, pull it off when it just reaches 165°F. Don’t overcrowd your pan this traps steam and prevents proper browning, leading to steamed rather than seared chicken. If you’re cooking multiple breasts, give each piece breathing room or work in batches. For extra insurance against dryness, try brining your chicken in salted water for 30 minutes before marinating, or baste it with the marinade or a bit of butter during the final minutes of cooking.
Tool Recommendations for Italian Chicken Panini
Invest in a good instant-read meat thermometer it’s the most reliable way to avoid overcooking. A cast-iron grill pan creates beautiful sear marks and distributes heat evenly. For pressing, a dedicated panini press is convenient but not necessary; a heavy skillet or pot works perfectly as a makeshift press. Keep a pair of tongs handy for flipping without piercing the meat, which releases precious juices.
Storage & Reheating for Italian Chicken Panini
Cooked chicken can be refrigerated in an airtight container for up to 3 days. For longer storage, freeze the cooked, cooled chicken (sliced or whole) in a freezer-safe bag with a little olive oil or broth to prevent freezer burn it’ll keep for up to 3 months. To reheat, warm gently in a covered skillet with a splash of broth or water to restore moisture. For assembled paninis, they’re best eaten fresh, but you can refrigerate for a day and reheat in a skillet or toaster oven to re-crisp the bread.
Flavor Variations for Italian Chicken Panini
One of the joys of this recipe is its adaptability. Here are some delicious twists to try.
Spicy Twist for Italian Chicken Panini
Add heat by mixing red pepper flakes or cayenne pepper into your marinade, or spread spicy calabrian chili paste on your bread before assembling. For a smoky kick, add a teaspoon of smoked paprika to the herb blend. Top with sliced pickled jalapeños for tangy heat that cuts through the richness of the cheese.
Keto/Paleo Italian Chicken Panini
Make this recipe diet-friendly by using low-carb alternatives. Swap traditional bread for cloud bread, lettuce wraps, or portobello mushroom caps as your “buns.” Ensure your marinade contains no added sugars, and skip honey or sweet glazes. Load up on keto-friendly toppings like avocado, bacon, and extra cheese for a satisfying, low-carb meal.
Global Flavors for Italian Chicken Panini
While the classic Italian version is timeless, the concept translates beautifully across cuisines. Try a Greek-inspired version with oregano, lemon, and feta cheese with tzatziki. Go Mediterranean with sun-dried tomatoes, kalamata olives, and hummus. For an Asian fusion, marinate with soy sauce, ginger, and sesame oil, then top with pickled vegetables and sriracha mayo. The possibilities are endless once you understand the basic technique.
| Variation | Key Ingredients | Best Cheese | Serving Suggestion |
|---|---|---|---|
| Classic Italian | Oregano, basil, garlic | Mozzarella or Provolone | With marinara for dipping |
| Spicy Calabrian | Calabrian chilies, red pepper flakes | Pepper Jack | With arugula salad |
| Greek-Style | Lemon, oregano, feta | Feta crumbles | With cucumber-tomato salad |
| Pesto Lover’s | Basil pesto, sun-dried tomatoes | Fresh Mozzarella | With minestrone soup |
| Caprese | Fresh basil, tomatoes, balsamic | Fresh Mozzarella | With roasted vegetables |
Serving Suggestions for Italian Chicken Panini
A great panini deserves equally delicious accompaniments.
Pair your Italian Chicken Panini with classic sides that complement without overwhelming. Creamy mashed potatoes offer comforting richness, while roasted or grilled asparagus adds a fresh, slightly bitter contrast. A simple arugula salad dressed with lemon and olive oil cuts through the richness of the cheese. For something heartier, serve with tomato soup or minestrone for the ultimate comfort meal. Crispy sweet potato fries or a bowl of Italian wedding soup round out the plate beautifully.
For beverages, consider a crisp Italian white wine like Pinot Grigio or Verdicchio, which won’t overpower the flavors. If you prefer red, a light Chianti works wonderfully. Beer lovers should reach for a crisp lager or a wheaty hefeweizen. For a non-alcoholic option, sparkling water with lemon or Italian sodas like San Pellegrino make refreshing companions.
FAQs About Italian Chicken Panini
Can I use frozen chicken for Italian Chicken Panini?
Yes, but proper thawing is essential for food safety and even cooking. Thaw chicken completely in the refrigerator overnight, never at room temperature. Once thawed, pat it very dry, as frozen chicken tends to release more moisture. The texture may be slightly different from fresh, but with proper marination and cooking, you’ll still achieve delicious results.
How do I fix overcooked Italian Chicken Panini?
Unfortunately, you can’t reverse overcooking, but you can salvage dry chicken. Slice it thinly and add extra moisture to your panini use more cheese, add sliced tomatoes, spread pesto or mayo generously, or even drizzle with a little olive oil. The moisture from these additions will help mask the dryness. For next time, invest in a meat thermometer to catch it at exactly 165°F.
Is Italian Chicken Panini safe for pregnant women?
Yes, as long as the chicken reaches the safe internal temperature of 165°F throughout. Pregnant women should avoid undercooked poultry due to the risk of foodborne illness. Use a thermometer to verify doneness, and ensure any cheese you use is pasteurized (most supermarket cheeses are, but check soft cheeses carefully). When properly cooked with pasteurized ingredients, this panini is perfectly safe and nutritious during pregnancy.
Can I make Italian Chicken Panini ahead of time?
You can prep components in advance to save time. Marinate the chicken up to 4 hours ahead and refrigerate, or cook the chicken a day ahead and refrigerate. However, assemble and press the paninis just before serving for the best texture—assembled sandwiches become soggy if they sit too long. If you must make them ahead, keep components separate and assemble at the last moment.
What if I don’t have a panini press for Italian Chicken Panini?
No problem! A regular skillet works perfectly. Assemble your sandwich, place it in a preheated skillet over medium heat, then press down firmly with another heavy skillet, a foil-wrapped brick, or a heavy pot. Cook for 2-3 minutes per side, maintaining steady pressure, until the bread is golden and crispy. You’ll achieve the same delicious results.
Fire Up Your Panini Press and Get Cooking!
There you have it everything you need to create an Italian Chicken Panini that rivals your favorite café. This recipe has been a game-changer for countless home cooks at FoodFansy, turning ordinary weeknight dinners into something special. The combination of tender, herb-marinated chicken, melted cheese, and that signature crispy pressed bread is simply irresistible.
I’d love to hear how your panini turns out! Share your photos and any creative variations you try join the growing community of over 5,000 home cooks who’ve fallen in love with this recipe. And if you’re ready for your next culinary adventure, check out our [Homemade Focaccia Bread Guide] to take your sandwich game to the next level, or explore our [Mediterranean Grilled Chicken Recipes] collection for more flavor-packed inspiration.
If you enjoyed this recipe, be sure to share it with your friends or save it for later! I’d love to see your unique twist feel free to post your photos on Pinterest!

Italian Chicken Panini – Easy, Juicy & Crowd-Pleasing Recipe
- Total Time: 35
- Yield: 4 1x
Description
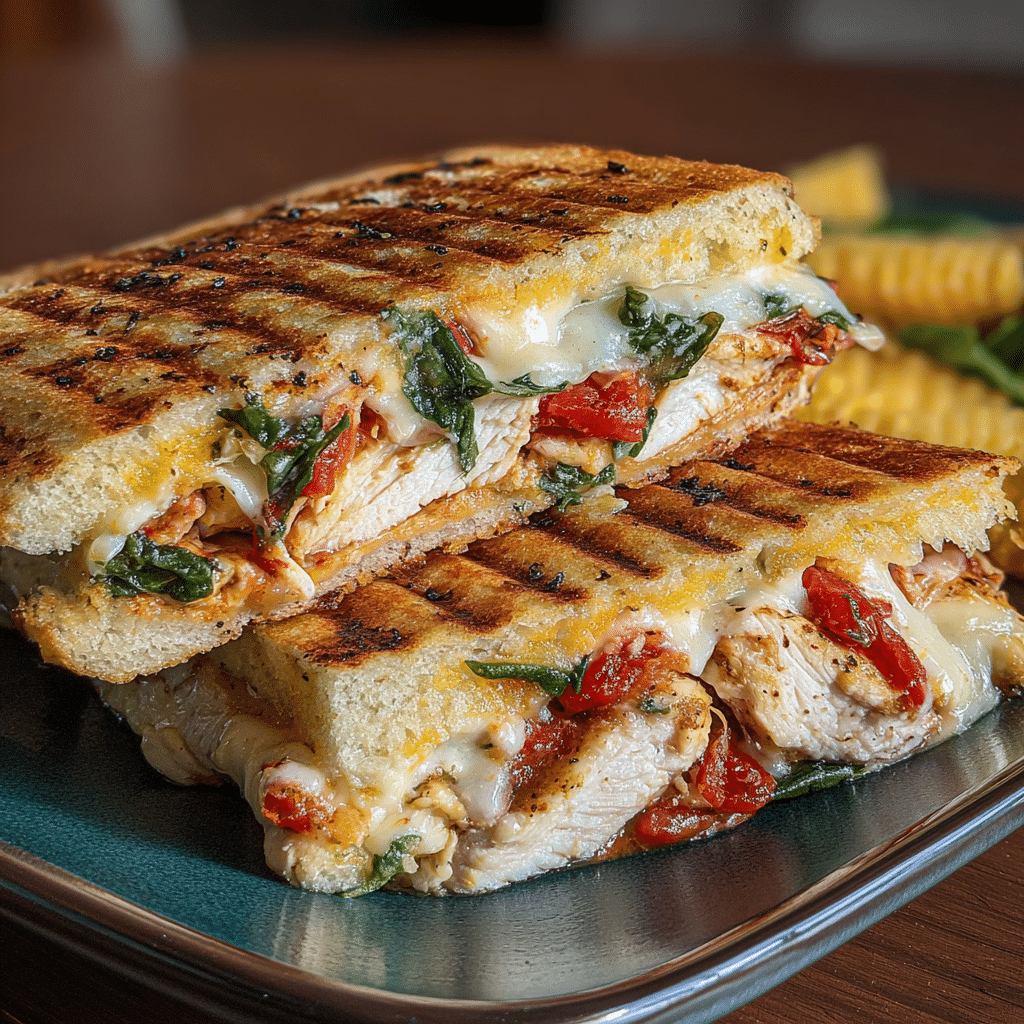
This Italian Chicken Panini delivers restaurant-quality results with juicy, herb-marinated chicken, melted cheese, and perfectly crispy pressed bread. Ready in under 30 minutes, it’s the ultimate weeknight dinner or lunch that brings authentic Italian flavors to your kitchen.
Ingredients
2 boneless, skinless chicken breasts (about 1 lb total)
3 tablespoons olive oil
3 cloves garlic, minced
1 teaspoon dried oregano
1 teaspoon dried basil
1/2 teaspoon black pepper
1/2 teaspoon salt
1 tablespoon lemon juice or red wine vinegar
4 ciabatta or focaccia rolls, sliced horizontally
4 slices provolone or mozzarella cheese
Fresh basil leaves (optional)
Roasted red peppers (optional)
Butter or olive oil for pressing
Instructions
1. Trim excess fat from chicken breasts and pat completely dry with paper towels.
2. Place chicken between plastic wrap or parchment paper and lightly pound to an even 1/2 to 3/4-inch thickness.
3. In a bowl, whisk together olive oil, minced garlic, oregano, basil, black pepper, salt, and lemon juice or vinegar.
4. Place chicken in a shallow dish or resealable bag, pour marinade over it, and turn to coat evenly. Marinate for 15-30 minutes at room temperature (or up to 4 hours refrigerated).
5. Remove chicken from refrigerator 15-20 minutes before cooking to bring to room temperature. Preheat a grill pan or skillet over medium heat.
6. Add a drizzle of olive oil to the preheated pan. Cook chicken for 5-6 minutes per side until golden brown and internal temperature reaches 165°F (74°C).
7. Remove chicken from heat and let rest for 5 minutes, then slice into strips or keep whole for sandwiches.
8. To assemble paninis, layer bottom half of each roll with sliced chicken, cheese, and any optional toppings like fresh basil or roasted peppers. Top with the other half of the roll.
9. Heat panini press according to manufacturer directions, or preheat a skillet over medium heat. Brush the outside of each sandwich lightly with butter or olive oil.
10. Press sandwiches in panini press for 3-4 minutes, or in skillet (using a heavy pot to press down) for 2-3 minutes per side, until bread is golden and crispy and cheese is melted.
11. Slice in half diagonally and serve immediately while hot and crispy.
Notes
For extra juicy chicken, brine in salted water for 30 minutes before marinating.
Don’t overcrowd the pan when cooking chicken – work in batches if needed for proper browning.
Chicken thighs can be substituted for a juicier, more forgiving option.
No panini press? Use a heavy skillet or pot to press down on sandwiches in a regular pan.
Store cooked chicken in an airtight container for up to 3 days, or freeze for up to 3 months.
For keto/low-carb, use cloud bread or lettuce wraps instead of regular bread.
Try variations: add calabrian chili paste for spicy, pesto for herbaceous, or sun-dried tomatoes for Mediterranean flair.
Pair with arugula salad, tomato soup, or sweet potato fries for a complete meal.
- Prep Time: 20
- Cook Time: 15
- Category: Main Course, Sandwich, Lunch
- Method: Grilling, Pan-Searing, Pressing
- Cuisine: Italian
Nutrition
- Serving Size: 1
- Calories: 485
- Sugar: 3
- Sodium: 680
- Fat: 22
- Saturated Fat: 8
- Unsaturated Fat: 12
- Trans Fat: 0
- Carbohydrates: 35
- Fiber: 2
- Protein: 38
- Cholesterol: 95
Keywords: italian chicken panini, chicken panini recipe, grilled chicken sandwich, pressed sandwich, easy panini, herb chicken panini, italian sandwich