

Mini Mummy Pizzas are the perfect solution when you need a Halloween snack that’s actually fun to make with kids without the usual kitchen chaos. Picture this: it’s late October, the air is crisp, and you’re scrambling for a festive treat that won’t leave you cleaning sauce off the ceiling. Sound familiar?
I’m Emeli, and here at FoodFansy, I’ve spent years crafting recipes that bring people together whether it’s a cozy family dinner or a spooky Halloween party. These Mini Mummy Pizzas deliver every time: bubbly mozzarella “bandages,” adorable olive eyes, and that irresistible pizza flavor everyone loves. They’re quick (just 10 minutes in the oven!), customizable, and honestly? They’re as much fun to assemble as they are to eat.
In this guide, I’ll walk you through choosing the best pizza bases, creating those perfect cheesy wraps, and adding your own creative twists. Plus, I’ll share pro tips to avoid soggy crusts and answer all your burning questions about make-ahead options and dietary swaps. Let’s get spooky in the kitchen!
Why This Mini Mummy Pizzas Recipe Works
These Mini Mummy Pizzas hit the sweet spot between festive and practical and that’s why they’ve become a FoodFansy favorite:
- Uses everyday ingredients you probably already have: English muffins, pizza sauce, and mozzarella are pantry staples that transform into something magical.
- Ready in under 20 minutes from prep to plate: Perfect for busy parents or last-minute party hosts who need a win.
- Kid-friendly and customizable: Little hands love arranging the “bandages,” and you can sneak in veggies without any complaints.
- Scales beautifully for parties or small gatherings: Make six for the family or triple the batch for a Halloween bash.
Choosing the Right Base for Mini Mummy Pizzas
The foundation of your Mini Mummy Pizzas matters more than you’d think. Here’s how to pick the perfect canvas:
Best Bases for This Recipe
English muffins are my go-to for their sturdy texture and pre-split convenience they hold toppings beautifully without getting soggy. Pita rounds offer a slightly chewier bite and work great if you’re feeding a crowd. For a from-scratch feel, use small store-bought pizza dough circles (about 4 inches) pressed flat they bake up golden and crispy.
Buying Tips
Look for English muffins with “nooks and crannies” (like Thomas’ brand) those little pockets catch the sauce and create extra flavor. If using pita, grab the thicker Greek-style rounds rather than thin pocket pitas. At the bakery section, ask for fresh pizza dough if pre-made rounds aren’t available; just roll and cut your own circles.
Substitutions
Swap in mini bagels for extra chewiness, flatbread for a cracker-like crunch, or even flour tortillas baked until crispy for a lighter option. Gluten-free? Use gluten-free English muffins or cauliflower pizza crusts.
Ingredients & Prep for Mini Mummy Pizzas
Dough & Sauce Essentials for Mini Mummy Pizzas
- 6 mini pizza bases (English muffins, pita rounds, or small dough circles)
- ½ cup pizza sauce or tomato puree – Use store-bought or homemade marinara
- 1 cup shredded mozzarella cheese – The star of your mummy wraps
- Black olives, sliced – These become the spooky “eyes”
Topping Prep Essentials for Mini Mummy Pizzas
The magic happens with string cheese or thin mozzarella strips pull apart string cheese into thin strands or slice fresh mozzarella into ¼-inch-wide strips. These create the authentic “bandage” look when crisscrossed.
Optional add-ins bring color and nutrition: diced bell peppers (red or orange for Halloween vibes), thinly sliced mushrooms, or chopped spinach tucked under the cheese.
Pantry Staples
- Olive oil for brushing the baking sheet (prevents sticking)
- A pinch of dried oregano and basil to elevate the flavor beyond basic pizza
Step-by-Step Cooking Instructions for Mini Mummy Pizzas
Pre-Cooking Prep for Mini Mummy Pizzas
Start by preheating your oven to 375°F (190°C) this moderate temperature melts the cheese perfectly without burning the edges. Line a baking sheet with parchment paper and lightly brush it with olive oil to ensure easy cleanup and prevent sticking.
If using English muffins, split them in half using a fork (not a knife) to preserve those textured nooks. For pita or dough circles, place them directly on the prepared sheet.
Cooking Method for Mini Mummy Pizzas
Spread a spoonful of pizza sauce on each base, leaving a small border around the edges about ¼ inch prevents overflow. If adding optional toppings like bell peppers or mushrooms, arrange them now in a single layer.
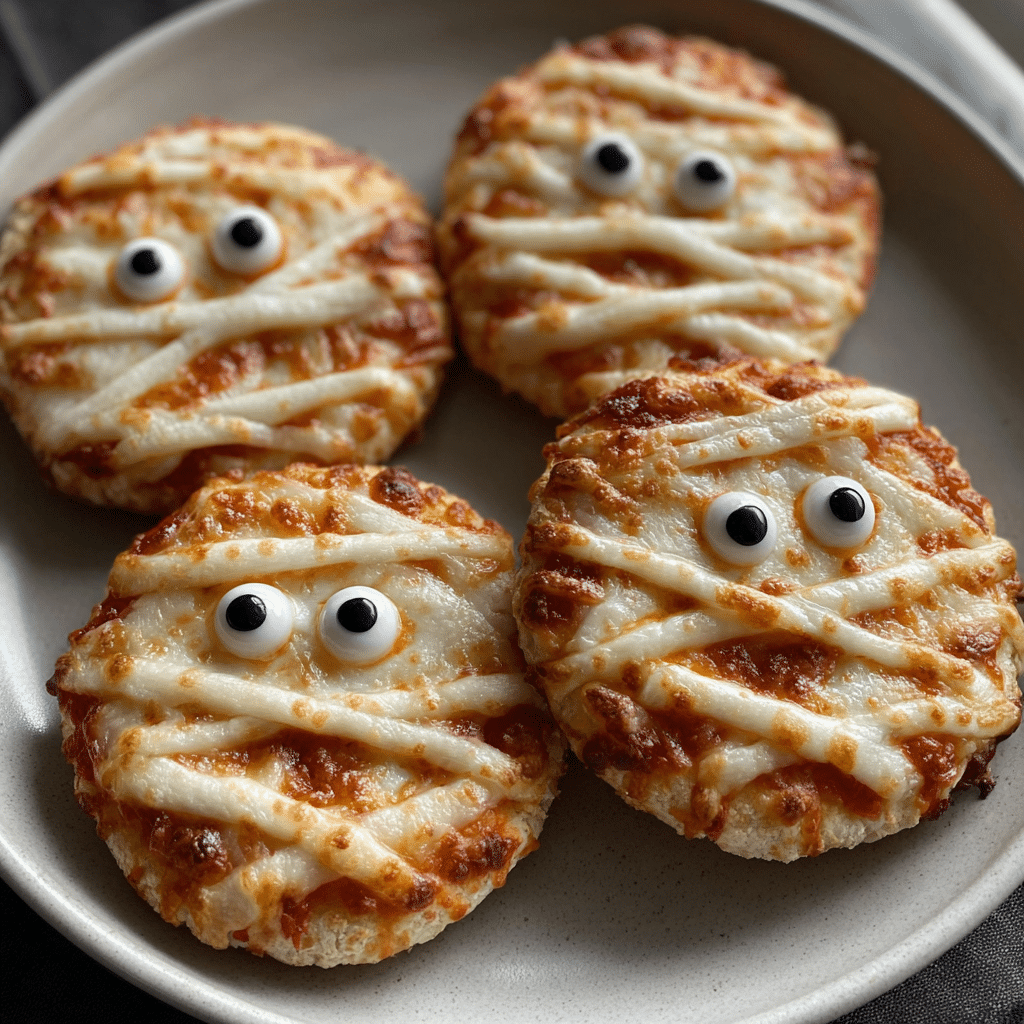
Here’s where it gets fun: Lay mozzarella strips crisscrossed over the sauce, intentionally leaving gaps to mimic mummy wraps. Don’t worry about perfection messy looks more authentic! Place two olive slices near the top for eyes, positioning them where a mummy’s face would peek through.
Bake for 8–10 minutes or until the cheese is melted, bubbly, and just starting to turn golden at the edges.
Doneness Check for Mini Mummy Pizzas
Your Mini Mummy Pizzas are ready when the cheese is fully melted with no white unmelted spots remaining, and the edges of the “bandages” develop a slight golden hue. The base should feel firm when gently pressed with a spatula.
Resting for Mini Mummy Pizzas
Let them cool for 2–3 minutes before serving this crucial step allows the cheese to set slightly, making the pizzas easier to handle (especially for little fingers). It also prevents roof-of-the-mouth burns!
Pro Tips for Perfect Mini Mummy Pizzas
Avoiding Soggy or Burnt Bases
Pat your pizza sauce with a paper towel if it seems watery excess moisture is the enemy of crispy crusts. For English muffins, toast them lightly for 2 minutes before adding toppings if you want extra crunch.
Tool Recommendations for Mini Mummy Pizzas
A pizza cutter makes slicing string cheese into thin strips lightning-fast. Use a silicone baking mat instead of parchment for even easier cleanup and better heat distribution. A small offset spatula helps transfer pizzas from sheet to plate without disturbing the “bandages.”
Storage & Reheating
Refrigerate leftovers in an airtight container for up to 3 days. Reheat in a 350°F oven for 5 minutes to restore crispness microwaving makes them rubbery. To freeze, assemble uncooked pizzas, freeze on a sheet until solid, then transfer to freezer bags for up to 2 months. Bake from frozen, adding 3–4 minutes to the cooking time.
Flavor Variations for Mini Mummy Pizzas
Spicy Mummy Twist
Add a kick of heat by mixing red pepper flakes into your pizza sauce or sprinkling jalapeño slices under the cheese. For adventurous adults, drizzle with hot honey after baking.
Keto & Low-Carb Mini Mummy Pizzas
Swap the base for portobello mushroom caps (remove gills first) or zucchini rounds sliced ½-inch thick. Use sugar-free marinara and full-fat mozzarella bake at 400°F for 12 minutes since veggies release moisture.
Global Mummy Flavors
Try an Italian herb crust by brushing bases with garlic butter and sprinkling with Parmesan before adding sauce. Go Mediterranean with feta cheese, sun-dried tomatoes, and kalamata olives. For a Mexican twist, use refried beans instead of pizza sauce, pepper jack cheese, and top with cilantro post-bake.
Comparison Table: Mini Mummy Pizza Variations
| Variation | Base | Sauce | Cheese | Special Touch | Bake Time |
|---|---|---|---|---|---|
| Classic Mummy | English muffin | Pizza sauce | Mozzarella | Black olive eyes | 8-10 min |
| Spicy Mummy | Pita round | Spicy marinara | Pepper jack | Jalapeño slices | 8-10 min |
| Keto Mummy | Portobello cap | Sugar-free marinara | Full-fat mozzarella | Parmesan crust | 12 min |
| Mediterranean | Flatbread | Pesto | Feta + mozzarella | Sun-dried tomatoes | 9-11 min |
| Mexican Mummy | Mini tortilla | Refried beans | Pepper jack | Cilantro garnish | 7-9 min |
Serving Suggestions for Mini Mummy Pizzas
Mini Mummy Pizzas shine brightest as part of a Halloween spread. Serve them alongside:
- Veggie “fingers”: Carrot and celery sticks with ranch dip (bonus points for almond “fingernails”)
- Spooky fruit plate: Clementine “pumpkins” with celery stems and grape “eyeballs”
- Creamy tomato soup: Perfect for dunking mummy wraps
- Sweet potato fries: Bake them spooky by cutting into crinkle shapes
For drinks, pair with sparkling apple cider, orange cream soda floats, or “witches’ brew” punch. Adults might enjoy a crisp Pinot Grigio or light amber ale that won’t overpower the tomato and cheese flavors.
FAQs About Mini Mummy Pizzas
Can I make Mini Mummy Pizzas ahead of time?
Yes! Assemble them completely (sauce, toppings, cheese, olives) up to 4 hours ahead. Cover with plastic wrap and refrigerate, then bake when guests arrive. For best results, let them sit at room temperature for 10 minutes before baking.
Can I use frozen pizza dough?
Absolutely. Thaw according to package directions, roll out to ¼-inch thickness, and cut into 4-inch circles. These will need 10-12 minutes at 375°F since they’re thicker than muffins.
How do I fix pizzas that are too saucy?
If your mummy looks like it’s drowning, use a paper towel to dab excess sauce before adding cheese. Next time, use just 1-2 teaspoons of sauce per pizza less is more.
Are Mini Mummy Pizzas safe for toddlers?
Yes, but cut them into bite-sized quarters and ensure olives are sliced thin to avoid choking hazards. Let cool completely before serving to little ones.
Can I make these dairy-free?
Swap in dairy-free mozzarella shreds (Violife or Daiya brands melt well). Use olive oil-based sauce and check that your base is dairy-free.
What if I don’t have black olives for eyes?
Get creative! Use halved cherry tomatoes, capers, pepperoni circles, or even small rounds of bell pepper. For a vegetarian look, try sunflower seeds or pumpkin seeds.
Conclusion
There you have it Mini Mummy Pizzas that are equal parts adorable, delicious, and stress-free. Whether you’re hosting a Halloween party, looking for a fun weeknight dinner, or just want to see your kids’ faces light up with excitement, this recipe delivers every single time.
Fire up your oven tonight and create some edible magic. Trust me, these cheesy little mummies will become a seasonal tradition in your home, just like they have in mine.
If you enjoyed this recipe, be sure to share it with your friends or save it for later! I’d love to see your unique twist feel free to post your photos on Pinterest!
Print
Mini Mummy Pizzas – Fun, Easy & Cheesy Halloween Snack
- Total Time: 20 minutes
- Yield: 6 mini pizzas 1x
- Diet: Vegetarian
Description
Mini Mummy Pizzas are fun, cheesy, and perfect for Halloween! A quick snack made with pizza sauce, mozzarella, and olives.
Ingredients
6 mini pizza bases (English muffins or pita bread)
1/2 cup pizza sauce
1 cup shredded mozzarella cheese
6 black olive slices (for eyes)
1 tbsp olive oil
Pinch of dried oregano and basil
Optional: diced bell peppers, mushrooms, or spinach
Instructions
1. Preheat oven to 375°F (190°C).
2. Line a baking sheet with parchment paper.
3. Spread pizza sauce over each base.
4. Add toppings if desired.
5. Place mozzarella strips like mummy wraps.
6. Add two olive slices for eyes.
7. Bake for 8–10 minutes until cheese melts.
8. Cool for 2–3 minutes before serving.
Notes
Let kids assemble their own mummies for a fun cooking activity.
You can use whole-wheat or gluten-free bases.
Store leftovers in an airtight container for up to 2 days.
- Prep Time: 10 minutes
- Cook Time: 10 minutes
- Category: Snack
- Method: Baking
- Cuisine: American
Nutrition
- Serving Size: 1 mini pizza
- Calories: 140
- Sugar: 2g
- Sodium: 210mg
- Fat: 6g
- Saturated Fat: 3g
- Unsaturated Fat: 2g
- Trans Fat: 0g
- Carbohydrates: 15g
- Fiber: 1g
- Protein: 7g
- Cholesterol: 10mg
Keywords: Mini Mummy Pizzas, Halloween snacks, cheesy pizza bites