
Mini Mummy Pizzas are about to become your Halloween hero! Tired of spending hours crafting elaborate spooky treats that leave you exhausted before the party even starts? I completely understand that struggle. Last Halloween, I found myself frantically trying to pipe intricate ghost faces on cupcakes at 11 PM, my kitchen looking like a flour bomb had exploded.
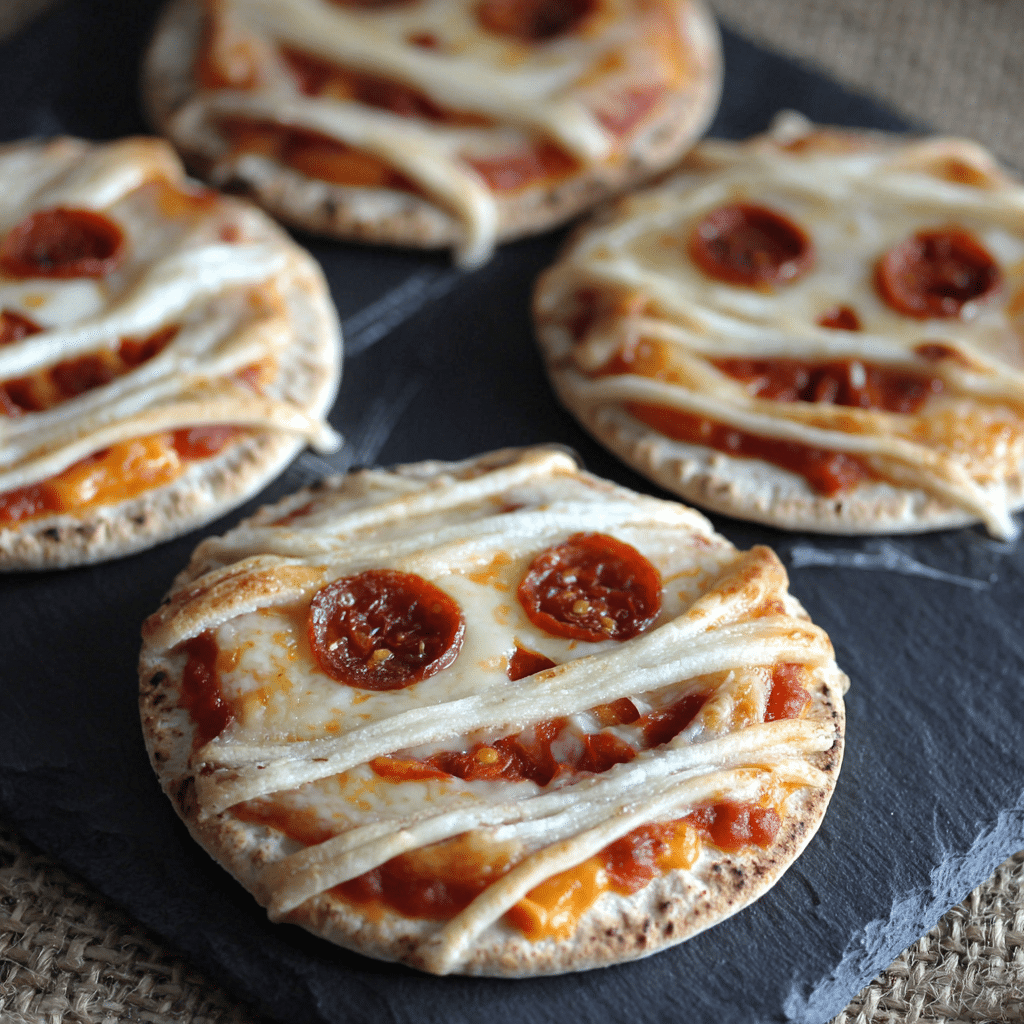
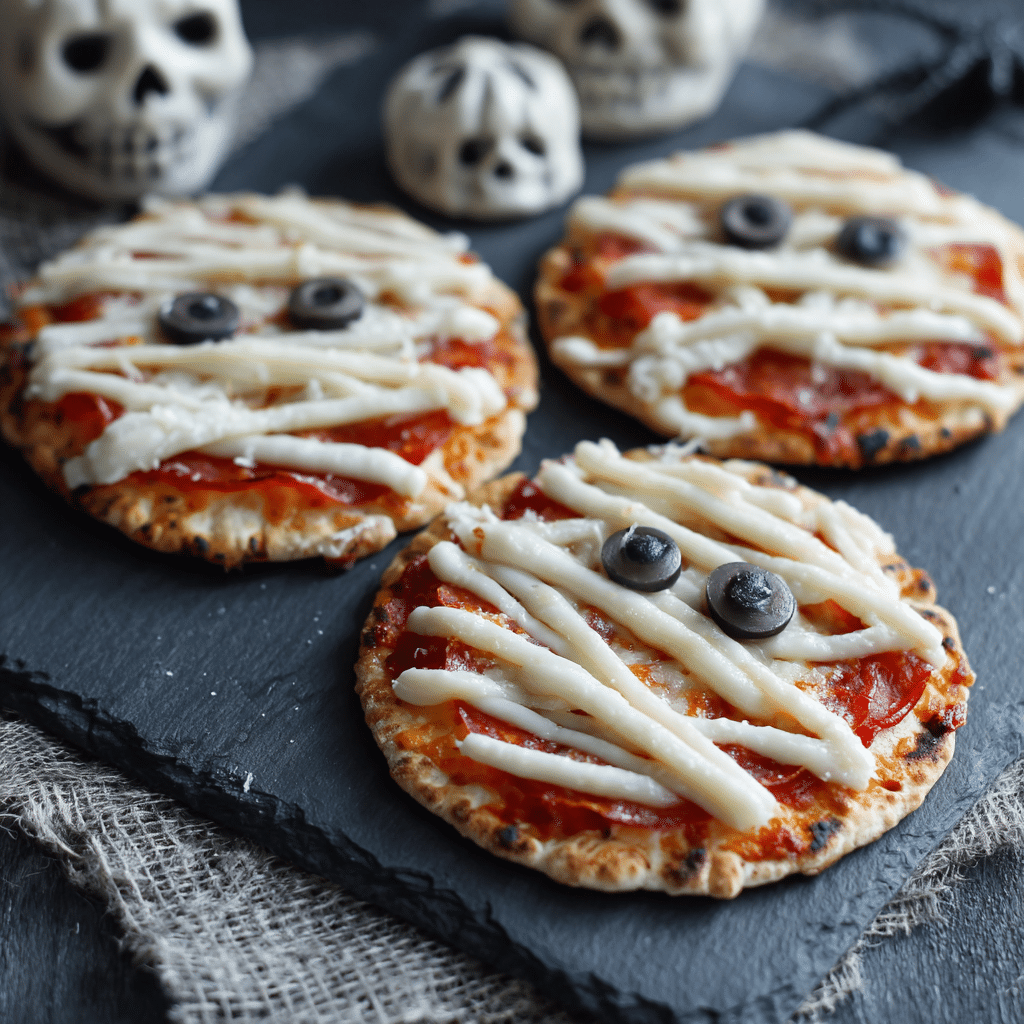
Hey there! I’m Emeli, and as a chef who’s navigated both professional kitchens and the beautiful chaos of home cooking, I’ve learned that the most memorable dishes are often the simplest ones. These Mini Mummy Pizzas promise to deliver maximum spook factor with minimal effort crispy English muffins wrapped in gooey string cheese “bandages” with olive slice eyes that’ll make everyone smile (or delightfully shriek!).
My expertise comes from years of creating crowd-pleasing recipes that work for real home cooks, and I’ve discovered that the best party foods combine familiar flavors with playful presentation. These mummy pizzas do exactly that, transforming everyday ingredients into Halloween magic.
In this guide, we’ll cover everything you need to know: why this recipe works so brilliantly, choosing the right ingredients for maximum impact, step-by-step instructions that guarantee success, pro tips for the perfect mummy look, creative variations to match your party theme, and answers to common questions that’ll make you the Halloween hero of your neighborhood.
Why This Mini Mummy Pizza Recipe Works
These Mini Mummy Pizzas are pure Halloween genius, and here’s exactly why they’ll become your go-to spooky snack:
Incredibly beginner-friendly: Uses just four simple ingredients that you can find at any grocery store English muffins, pizza sauce, string cheese, and olives. No hunting for specialty items or complicated techniques required.
Ready in under 15 minutes: From prep to plate, these mummies come together faster than you can say “trick or treat,” making them perfect for last-minute party additions or when little goblins demand immediate snack satisfaction.
Crowd-pleasing flavors: Everyone loves pizza, and these deliver that familiar, comforting taste with a playful Halloween twist that appeals to both kids and adults.
Interactive and fun: Kids can help create the mummy wrappings, making this recipe a wonderful family activity that builds excitement for Halloween while keeping little hands busy.
Budget-friendly magic: Transform inexpensive pantry staples into party-worthy treats that look like you spent way more time and money than you actually did.
Choosing the Right Ingredients for Mini Mummy Pizzas
Success with these Mini Mummy Pizzas starts with selecting the right foundation ingredients that’ll give you the best flavor and presentation.
Best Base Options for This Recipe
English muffins are the gold standard because their nooks and crannies hold the pizza sauce perfectly, and their size is ideal for individual servings. The slightly dense texture won’t get soggy under the cheese and sauce, maintaining that satisfying bite. Look for whole wheat varieties for extra flavor depth, or stick with classic white for kid-friendly appeal.
Pizza sauce matters more than you think. Choose a sauce with good consistency not too watery (which makes soggy mummies) or too thick (which doesn’t spread evenly). Quality jarred marinara works beautifully, or use leftover homemade sauce if you have it.
String Cheese Selection Tips
Go for real mozzarella string cheese rather than processed cheese sticks. The natural mozzarella pulls apart into those perfect irregular strips that create authentic-looking mummy bandages. Brands like Sargento or Kraft work wonderfully, and buying in bulk saves money for parties.
Room temperature cheese is your secret weapon. Let the string cheese sit out for 10-15 minutes before using it’ll pull apart more easily into those wispy, bandage-like strands that make your mummies look professionally spooky.
Olive Options and Substitutions
Black olives create the most dramatic eyes, but green olives work too if that’s what you have on hand. Pre-sliced saves time, but whole olives that you slice yourself often have better texture and won’t fall apart as easily during baking.
Creative eye alternatives: Try capers for tiny beady eyes, small cherry tomato slices for red “zombie” eyes, or even small pieces of bell pepper for colorful variations.
Ingredients & Prep for Mini Mummy Pizzas
Getting your Mini Mummy Pizza ingredients prepped properly sets you up for Halloween success and makes the assembly process smooth and enjoyable.
Essential Prep Steps
English muffin preparation begins with splitting them cleanly in half using a fork (not a knife) to maintain those signature nooks and crannies. Optional toasting for 1-2 minutes creates a slightly crispy base that prevents sogginess and adds extra flavor dimension.
Sauce application technique: Use about 1 tablespoon of pizza sauce per muffin half, spreading it evenly but leaving a small border around the edges. This prevents sauce from bubbling over and makes your mummies look neater.
String Cheese Bandage Creation
The art of mummy wrapping starts with pulling your room-temperature string cheese apart into long, irregular strips. Don’t aim for perfection real mummy bandages would be tattered and uneven, so embrace the messy, organic look.
Strategic placement involves laying the cheese strips across the sauce in random, overlapping patterns, deliberately leaving gaps and creating that authentic wrapped appearance. Save the eye area for last, ensuring you have clear spaces for your olive placement.
Make-Ahead Tips
Prep components separately up to a day in advance. Store sauce-topped muffin halves covered in the refrigerator, keep pulled cheese strips in an airtight container, and have your olive slices ready to go. This makes party day assembly lightning-fast.
Step-by-Step Cooking Instructions for Mini Mummy Pizzas
Creating perfect Mini Mummy Pizzas is all about timing and technique. Follow these detailed steps for spooky success every time.
Pre-Cooking Prep for Mini Mummy Pizzas
Set your oven to 220°C/430°F/200°C fan-forced and let it fully preheat while you assemble. A hot oven is crucial for achieving that perfect balance of melted cheese and crispy base without overcooking.
Prepare your workspace by laying out all ingredients within easy reach. Line a baking sheet with parchment paper for easy cleanup and to prevent sticking. Having everything organized makes the assembly process smooth and prevents any “mummy emergencies.”
English muffin foundation: Split and optionally toast your muffin halves until just lightly golden. This step adds flavor and helps prevent the base from becoming soggy under the sauce and cheese.
Cooking Method for Mini Mummy Pizzas
Sauce application: Spread approximately 1 tablespoon of pizza sauce on each muffin half, creating an even layer that reaches almost to the edges but doesn’t overflow. Think of this as your mummy’s “skin” showing through the bandages.
Creating the mummy wrappings: Pull apart your string cheese into long, irregular strips. Lay these across the sauce-covered muffins in overlapping, random patterns that mimic aged bandages. Don’t worry about perfect coverage gaps and uneven areas add to the authentic mummy aesthetic.
Eye placement strategy: Before adding the final cheese strips, identify where you want the eyes to sit (usually in the upper portion of each muffin). Leave clear spaces, then place two olive slices for each mummy’s eyes. Add any final cheese strips around the eyes if needed.
Doneness Check for Mini Mummy Pizzas
Baking time ranges from 5-10 minutes depending on your oven and desired cheese meltedness. Watch for the cheese to become bubbly and slightly golden in spots, but not so melted that your carefully crafted bandage pattern disappears.
Visual cues for perfection: The cheese should be fully melted and starting to bubble, the muffin edges should be lightly toasted, and the olive eyes should be warmed through but not shriveled.
Resting for Mini Mummy Pizzas
Cool for 2-3 minutes before serving to prevent molten cheese burns (especially important with kids around). The cheese will be extremely hot straight from the oven, and a brief cooling period makes them safe to handle while maintaining that perfect gooey texture.
Pro Tips for Perfect Mini Mummy Pizzas
Mastering Mini Mummy Pizzas goes beyond just following the recipe these insider techniques will elevate your spooky snacks from good to absolutely frightfully fantastic.
Avoiding Common Mistakes with Mini Mummy Pizzas
Don’t overload with sauce as this creates soggy bottoms and causes cheese to slide off during baking. A thin, even layer provides flavor without compromising structure. If your sauce seems watery, pat it gently with a paper towel before spreading.
Cheese temperature is crucial. Cold string cheese won’t pull apart properly, creating thick, unnatural-looking strips instead of delicate bandage-like strands. Room temperature cheese pulls beautifully into those wispy, irregular pieces that make authentic-looking mummy wrappings.
Avoid overcrowding the baking sheet. Give each mummy pizza space to breathe this ensures even cooking and prevents cheese from welding them together into one giant mummy monster.
Essential Tool Recommendations for Mini Mummy Pizzas
Parchment paper is your best friend for easy cleanup and preventing sticking. It also makes transferring your finished mummies to serving plates effortless and keeps those carefully arranged bandages intact.
Small offset spatula or butter knife helps spread sauce evenly and can also assist in arranging cheese strips precisely where you want them. This level of control makes the difference between amateur and professional-looking results.
Timer and oven light are essential for monitoring the melting process. Cheese can go from perfectly bubbly to overcooked quickly, so keep a close eye on your mummies during those final minutes.
Storage & Serving Success
Serve immediately for best texture, but if you need to hold them briefly, keep warm in a low oven (around 150°C/300°F) for up to 30 minutes. Cover loosely with foil to prevent further browning while maintaining warmth.
Reheating leftover mummies works best in a toaster oven or regular oven rather than microwave, which can make the muffin bases soggy and the cheese rubbery.
Flavor Variations for Mini Mummy Pizzas
Transform your Mini Mummy Pizzas into a diverse Halloween spread with these creative variations that cater to different tastes and dietary needs.
Spooky Spice Upgrades
Add heat with jalapeño slices hidden under the cheese bandages for a surprising spicy kick that adults will love. The peppers create little “scars” in your mummy’s bandages while adding fantastic flavor complexity.
Garlic herb transformation: Mix dried Italian herbs, garlic powder, and a pinch of red pepper flakes into your pizza sauce before spreading. This elevates the basic pizza flavor into something more sophisticated while maintaining kid-friendly appeal.
Smoky paprika dust: Lightly sprinkle smoked paprika over the cheese before baking for an otherworldly, slightly smoky flavor that adds depth without overwhelming the familiar pizza taste.
Dietary-Friendly Adaptations
Gluten-free mummy base: Substitute gluten-free English muffins or use large portobello mushroom caps for a low-carb option. The mushrooms create deliciously savory “dirt-covered” mummies that are surprisingly satisfying.
Dairy-free alternatives: Use plant-based mozzarella shreds that melt well, such as Violife or Miyoko’s. Pull them apart while slightly warm for the best bandage effect. Nutritional yeast sprinkled over dairy-free cheese adds extra cheesy flavor.
Protein-packed versions: Add a thin layer of cooked ground turkey or chicken between the sauce and cheese for heartier mummies that work as a light meal rather than just a snack.
Global Flavor Adventures
Mediterranean mummies feature olive tapenade mixed into the pizza sauce, feta cheese crumbles scattered under the mozzarella bandages, and sun-dried tomato pieces for extra “decay” effects.
Mexican-inspired versions use salsa instead of pizza sauce, pepper jack cheese for the bandages, and black bean “eyes” with a tiny dot of sour cream in the center for an eerie effect.
Asian fusion twist: Replace pizza sauce with a thin layer of hoisin sauce mixed with sriracha, use regular mozzarella for bandages, and create “eyes” with nori (seaweed) pieces for a uniquely spooky international flavor.
Creative Presentation Variations
| Variation | Base Change | Sauce Twist | Cheese Style | Eye Options | Theme |
|---|---|---|---|---|---|
| Zombie Mummies | Add green food coloring to sauce | Pesto mixed with marinara | Regular mozzarella | Green olive slices | Undead theme |
| Bloody Mummies | English muffins | Extra chunky marinara | Mozzarella with red pepper flakes | Black olives with red pepper dots | Vampire theme |
| Ghost Mummies | White cheddar on top | Alfredo sauce base | All white cheeses | Capers for tiny eyes | Classic ghost |
| Mummy Lords | Garlic bread spread first | Truffle-infused sauce | Aged white cheddar strips | Sun-dried tomatoes | Gourmet spooky |
| Mini Mummy Bites | Mini bagels | Concentrated tomato paste | String cheese | Pearl onions, halved | Bite-sized party |
Serving Suggestions for Mini Mummy Pizzas
Present your Mini Mummy Pizzas as the centerpiece of a memorable Halloween spread with these creative serving and pairing ideas that enhance both flavor and spooky atmosphere.
Perfect Halloween Sides
Complement your mummies with “graveyard dirt” a bowl of black bean hummus served with orange and black tortilla chips creates an interactive dipping station that plays into your Halloween theme while providing hearty, healthy options.
“Witch’s brew” soup pairs beautifully with these bite-sized pizzas. A vibrant orange butternut squash soup or classic tomato bisque served in small cups allows guests to warm up between mummy bites, especially perfect for chilly October evenings.
Spooky salad accompaniments like mixed greens with orange cherry tomatoes, black olives, and pumpkin seeds add color contrast and fresh elements that balance the rich, cheesy mummies while maintaining your Halloween color scheme.
Beverage Pairings
For adult Halloween parties, serve alongside “Blood Orange Sangria” or dark stouts that complement the pizza flavors while adding to the spooky ambiance. The citrus notes in sangria cut through the richness of melted cheese beautifully.
Kid-friendly drink options include “witch’s brew” (purple grape juice with dry ice for effect), orange soda served in Halloween cups, or “poison” apple juice in small bottles with spooky labels that match your mummy theme.
Hot beverage stations with spiced cider or hot chocolate topped with orange and black sprinkles create a cozy gathering spot and help warm up guests who’ve been trick-or-treating in cool weather.
Presentation and Serving Tips
Create a “mummy tomb” serving platter by arranging your pizzas on a dark wooden board or black slate, surrounded by dry ice (in safe containers) for that authentic graveyard fog effect that’ll have guests talking long after Halloween ends.
Individual serving idea: Place each mummy pizza on small black paper plates with Halloween-themed napkins, making it easy for guests to grab and go while mingling, perfect for both kids’ parties and adult Halloween gatherings.
FAQs About Mini Mummy Pizzas
Get answers to the most common questions about making Mini Mummy Pizzas so you can create perfect spooky snacks with confidence every time.
Can I use frozen English muffins for Mini Mummy Pizzas? Absolutely! Frozen English muffins work perfectly just thaw them completely and pat dry before using. Frozen muffins often hold their shape better during baking, though they may need an extra minute or two in the oven to achieve the same golden bottom as fresh ones.
How far ahead can I make Mini Mummy Pizzas? You can assemble these mummies up to 4 hours in advance and store them covered in the refrigerator. Add an extra 1-2 minutes to the baking time if cooking from cold. For best results, add the olive eyes just before baking to prevent them from drying out.
What if my string cheese won’t pull apart properly? This usually happens when the cheese is too cold. Let it sit at room temperature for 15-20 minutes, or gently warm it in your hands. If it’s still stubborn, try making small cuts with a knife to start the separation, then pull by hand for that natural, tattered bandage look.
Can I make these dairy-free for Mini Mummy Pizzas? Yes! Use dairy-free mozzarella shreds or strips brands like Violife and Miyoko’s melt well and can be manipulated into bandage-like strips when slightly warm. You might need to work more quickly as some dairy-free cheeses firm up faster than regular cheese.
Are Mini Mummy Pizzas safe for pregnant women? These are completely safe for pregnant women when made with pasteurized cheeses (which most commercial string cheese and pizza sauce are). All ingredients are fully cooked, and there are no raw or high-risk ingredients involved.
How do I prevent the cheese from sliding off during baking? Make sure your pizza sauce isn’t too thick or too thin it should spread easily but not be watery. Also, don’t overload with cheese, and press the strips gently into the sauce before baking. A light sprinkle of dried herbs can help the cheese adhere better.
Can I use different types of olives for the eyes? Definitely! Black olives create the most dramatic contrast, but green olives, kalamata olives, or even capers work wonderfully. For variety, try mixing different types on the same platter for mummies with different “eye colors.”
Conclusion
Your Mini Mummy Pizzas are ready to become the star of your Halloween celebration! These delightfully spooky snacks prove that the most memorable party foods combine familiar flavors with creative presentation, turning simple ingredients into pure Halloween magic that both kids and adults absolutely love.
Fire up your oven and create some mummy magic tonight! There’s something truly special about watching faces light up when people see these adorable wrapped creatures emerge from your kitchen. The combination of melty cheese, tangy pizza sauce, and those perfectly placed olive eyes creates not just a snack, but a Halloween memory that’ll have your guests asking for the recipe.
Join thousands of home cooks who’ve made these Mini Mummy Pizzas their go-to Halloween treat! From last-minute party saves to planned spooky spreads, these versatile little mummies have earned their place in Halloween tradition. Share your creations on social media and tag uswe love seeing your unique mummy personalities and creative variations.
If you enjoyed this recipe, be sure to share it with your friends or save it for later!
I’d love to see your unique twist feel free to post your photos on Pinterest!
Print
Mini Mummy Pizzas
- Total Time: 15 minutes
- Yield: 4 mini pizzas
- Diet: Vegetarian
Description
These adorable mini mummy pizzas are a fun and healthy Halloween snack that takes just 15 minutes to make! With only 4 ingredients, they’re perfect for Halloween parties and kids love helping make them.
Ingredients
2 English muffins split in half (4 pieces total)
¼ cup pizza sauce
2-3 string cheese sticks
8 olive slices for the eyes
Instructions
Preheat your oven to 220°C/430°F/200°C fan-forced.
Slice the English muffins in half and lightly toast them. This is optional but helps give better flavor.
Spread the cut side of the muffins with pizza sauce.
Pull apart your string cheese to form long cheese strips.
Lay the cheese across the pizza sauce to form the mummy wrappings and pinch off the overhang, leaving a gap at the top for the eyes.
Place two olive slices in the gap for the mummy eyes.
Cook in the oven for 5 to 10 minutes or until the cheese is melted.
Put onto a plate and enjoy! Mind your fingers – the cheese will be hot!
Notes
English muffins keep things nice and simple for the pizza base. You could also use mini pizza bases, crumpets or mini pita bread.For dairy free try vegan cheese, strips of peeled zucchini, sliced chicken or turkey.
- Prep Time: 10 minutes
- Cook Time: 5 minutes
- Category: Dinner
- Method: Baked
- Cuisine: American
Nutrition
- Calories: 185kcal
- Sugar: 3g
- Sodium: 450mg
- Fat: 6g
- Saturated Fat: 3g
- Carbohydrates: 25g
- Fiber: 2g
- Protein: 10g
- Cholesterol: 15mg
Keywords: Mini Mummy Pizzas