
Red Velvet Brownies were the dessert that changed everything for me. I’ll never forget the first time I made them it was for a friend’s birthday gathering, and I wanted something that looked impressive but wouldn’t keep me in the kitchen all day. The moment I pulled that pan from the oven, with its deep crimson color and rich chocolate aroma, I knew I’d found something special. When my friends took their first bite, the room went silent that’s when you know you’ve created magic. As someone who’s spent years perfecting desserts in professional kitchens and home baking experiments, I can tell you that these brownies hit that sweet spot between stunning presentation and foolproof execution. In this guide, I’ll walk you through choosing the right ingredients, mastering the perfect fudgy texture, avoiding common pitfalls, and customizing this recipe to make it your own.
Why This Red Velvet Brownies Recipe Works
There’s a reason Red Velvet Brownies have become my go-to dessert for both last-minute gatherings and planned celebrations. They deliver on every level flavor, texture, and visual impact without requiring advanced baking skills or exotic ingredients.
- Uses affordable, easy-to-find ingredients: Everything you need is probably already in your pantry, from basic cocoa powder to standard all-purpose flour
- Comes together in 15 minutes of active prep time: Perfect for those moments when you want homemade dessert without the all-day commitment
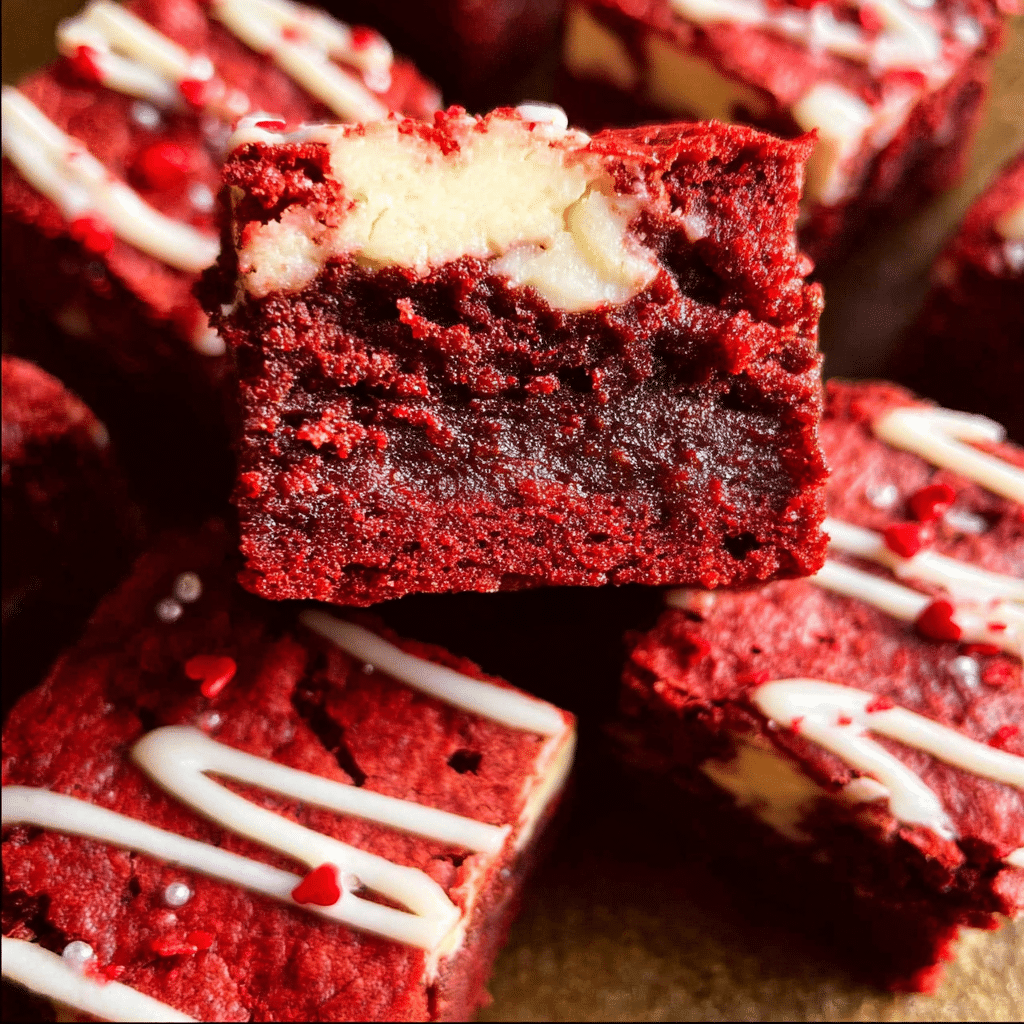
- Delivers that signature fudgy texture: The combination of melted butter and precise ratios creates brownies that are dense and moist, never cakey
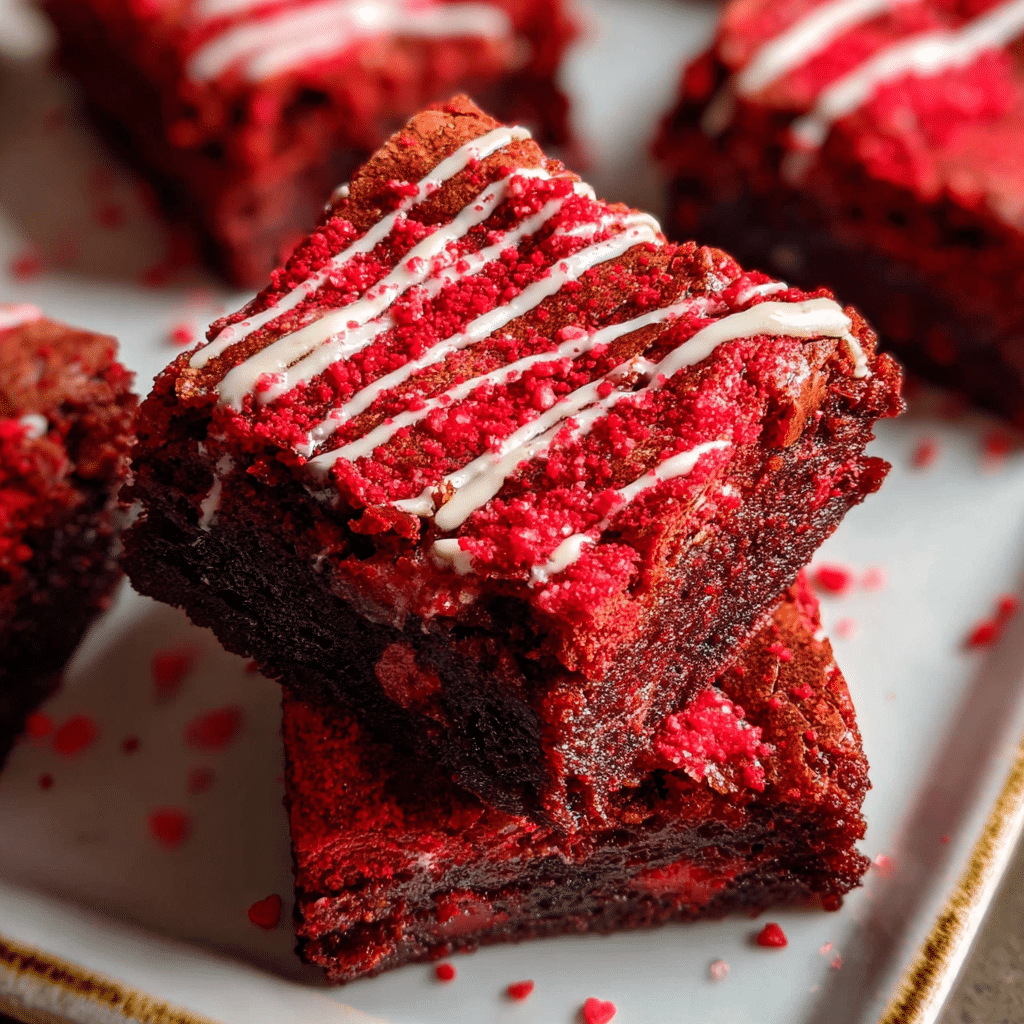
- Creates an Instagram-worthy result every time: That vibrant red color with optional cream cheese swirl turns a simple brownie into a showstopper
Choosing the Right Ingredients for Red Velvet Brownies
The magic of Red Velvet Brownies lies in the quality and balance of your ingredients. Since this recipe relies on simple components, each one plays a crucial role in the final result.
Best Ingredients for This Recipe
Unsalted Butter: Using melted butter rather than oil gives these brownies a richer, more complex flavor. Unsalted butter allows you to control the salt level precisely, which is essential for balancing the sweetness. Make sure it’s fully melted but not scorching hot when you add it to the sugar.
Cocoa Powder: Don’t skip the cocoa just because red velvet is known for its color. The subtle chocolate flavor is what distinguishes these from regular colored brownies. Natural unsweetened cocoa powder works best here Dutch-processed cocoa will alter the chemistry with the vinegar.
Red Food Coloring: This is where your brownies get their signature look. Gel food coloring gives more vibrant results with less liquid, but standard liquid coloring works perfectly fine. You’ll need about 1 tablespoon for that classic deep red hue.
White Vinegar: This might seem like an odd addition, but it’s a traditional red velvet ingredient that reacts with the cocoa powder to enhance the reddish tint and adds a subtle tang that balances the sweetness.
Buying Tips
When shopping for Red Velvet Brownies ingredients, focus on freshness and quality where it matters most. Check the expiration date on your cocoa powder old cocoa loses its depth of flavor and can taste flat. For eggs, room temperature works best for even mixing, so if you store them in the fridge, let them sit out for about 30 minutes before baking. Your vanilla extract should be pure, not imitation, as it provides a warm background note that supports all the other flavors.
Substitutions
The beauty of Red Velvet Brownies is their adaptability. If you’re out of white vinegar, apple cider vinegar works just as well. For a richer variation, swap half the butter for melted dark chocolate. If you want to make these gluten-free, use a 1:1 gluten-free flour blend in place of all-purpose flour. For a dairy-free version, substitute the butter with coconut oil and skip the cream cheese swirl, or use dairy-free cream cheese alternatives.
Ingredients & Prep for Red Velvet Brownies
Getting your ingredients and equipment ready before you start mixing is the secret to stress-free baking. This is what we call “mise en place” in professional kitchens, and it makes all the difference.
Brownie Prep Essentials
Before you touch a single ingredient, set yourself up for success. Preheat your oven to 350°F (175°C) this ensures even baking from the moment your pan goes in. Line your 8×8-inch baking pan with parchment paper, leaving some overhang on two sides. This creates handles that make lifting the cooled brownies out effortless. Lightly grease the parchment and the exposed sides of the pan with butter or non-stick spray to prevent any sticking.
Measure out all your dry ingredients the ¾ cup all-purpose flour, ¼ cup unsweetened cocoa powder, and ¼ teaspoon salt and set them aside. Having them ready means you can work quickly once you start mixing the wet ingredients.
Complete Ingredient List for Red Velvet Brownies
- ½ cup unsalted butter, melted and slightly cooled
- 1 cup granulated sugar
- 2 large eggs, at room temperature
- 1 teaspoon vanilla extract
- 1 tablespoon red food coloring
- 1 teaspoon white vinegar
- ¾ cup all-purpose flour
- ¼ cup unsweetened cocoa powder
- ¼ teaspoon salt
- Optional: ½ cup cream cheese, softened at room temperature for swirl topping
The Cream Cheese Swirl (Optional but Recommended)
If you’re adding the cream cheese swirl and I highly recommend you do beat the softened cream cheese with 2 tablespoons of sugar and 1 egg yolk until smooth and creamy. This creates beautiful marbled patterns and adds a tangy contrast to the sweet brownie base. The key is making sure your cream cheese is truly soft; cold cream cheese will create lumps that won’t swirl properly.
Step-by-Step Cooking Instructions for Red Velvet Brownies
Making Red Velvet Brownies is a straightforward process, but attention to detail at each stage ensures that perfect fudgy texture we’re after. Let’s walk through each step together.
Pre-Cooking Prep for Red Velvet Brownies
Start by whisking together your melted butter and granulated sugar in a large mixing bowl. Use a whisk and mix vigorously for about 1 minute until the mixture is smooth and the sugar begins to dissolve into the butter. This creates the base that gives your brownies structure.
Next, add your eggs one at a time, whisking well after each addition. This ensures they’re fully incorporated and creates a smooth, emulsified batter. Now add the vanilla extract, white vinegar, and red food coloring. Whisk everything together until you have a vibrant, uniform red mixture. The color might seem intense, but it will mellow slightly during baking.
Baking the Perfect Red Velvet Brownies
In a separate bowl, whisk together your dry ingredients the flour, cocoa powder, and salt. This step is crucial because it ensures the cocoa powder doesn’t clump and the salt distributes evenly throughout.
Gently fold the dry ingredients into your wet mixture using a rubber spatula. Here’s where many people go wrong: mix only until you no longer see dry flour streaks. Overmixing develops the gluten in the flour, which will give you cakey brownies instead of fudgy ones. The batter should be thick and glossy.
Pour the batter into your prepared pan and use your spatula to smooth the top into an even layer. This ensures uniform baking and a level surface for slicing later.
If you’re adding the cream cheese swirl, drop spoonfuls of the cream cheese mixture randomly across the top of the brownie batter. Use a butter knife or skewer to gently swirl it through the batter in a figure-eight pattern. Don’t overdo it three or four swirls create beautiful marbling without mixing the cream cheese completely into the batter.
Doneness Check for Red Velvet Brownies
Slide your pan into the preheated oven and bake for 25 to 28 minutes. Here’s the critical part: Red Velvet Brownies are best when slightly underbaked. At the 25-minute mark, insert a toothpick into the center of the pan, avoiding any cream cheese swirl areas. You want it to come out with moist crumbs clinging to it, not clean and not with wet batter. If it’s too wet, give it another 2-3 minutes and check again.
The edges should look set and may pull away slightly from the sides of the pan, while the center should still have a slight jiggle when you gently shake the pan. Remember, these brownies will continue to cook from residual heat after you remove them from the oven.
Resting Your Red Velvet Brownies
This is the hardest part the waiting. Let your brownies cool in the pan for 15 to 20 minutes. This resting period is essential because it allows the structure to set properly. If you try to cut them too early, they’ll fall apart and you’ll lose that perfect fudgy texture.
After the initial cooling, use the parchment paper handles to lift the entire brownie block out of the pan and transfer it to a cutting board. Let it cool for another 10 minutes before slicing. For clean cuts, use a sharp knife wiped clean between each slice. This gives you those bakery-perfect edges.
Pro Tips for Perfect Red Velvet Brownies
After years of making these brownies in various kitchens under different conditions, I’ve learned the tricks that separate good brownies from extraordinary ones.
Avoiding Dry or Cakey Red Velvet Brownies
The most common mistake is overbaking. Set a timer for 25 minutes and check early every oven is different, and yours might run hot. Remember that fudgy, slightly gooey center we’re after. Another culprit is overmixing the batter once you add the flour. Use a gentle folding motion and stop as soon as the flour disappears.
Measuring flour correctly makes a huge difference too. Spoon flour into your measuring cup and level it off with a knife rather than scooping directly from the bag, which compacts the flour and gives you too much. Too much flour equals dry, cakey brownies.
Basting isn’t necessary for brownies, but if you want an extra rich result, brush the top with melted butter immediately after they come out of the oven. This creates a shiny, tender crust.
Tool Recommendations for Red Velvet Brownies
You don’t need fancy equipment, but a few key tools make the process smoother. An 8×8-inch metal baking pan distributes heat more evenly than glass. Parchment paper is non-negotiable for easy removal. A good whisk helps create that smooth batter, while a rubber spatula is perfect for folding and scraping the bowl clean.
If you want to take the guesswork out of doneness, an instant-read thermometer is invaluable. The center of perfectly baked brownies should reach about 190-200°F. This might seem scientific for such a simple recipe, but once you nail the exact temperature your oven needs, you’ll get perfect results every single time.
Storage & Reheating Red Velvet Brownies
Red Velvet Brownies stay fresh at room temperature for up to 3 days when stored in an airtight container. If your kitchen is warm or you added the cream cheese swirl, refrigerate them instead they’ll keep for up to a week.
For longer storage, these brownies freeze beautifully. Wrap individual brownies in plastic wrap, then place them in a freezer-safe container or bag. They’ll keep for up to 3 months. To enjoy, let them thaw at room temperature for about an hour, or warm them in the microwave for 15-20 seconds for that fresh-baked texture.
Pro tip: Frozen brownies are incredible. Seriously, try eating one straight from the freezer it’s like a fudgy brownie ice cream bar.
Flavor Variations for Red Velvet Brownies
Once you’ve mastered the basic recipe, Red Velvet Brownies become a canvas for creativity. I love adapting this recipe based on seasons, occasions, or whatever I’m craving.
Spicy Twist on Red Velvet Brownies
Add ½ teaspoon of cayenne pepper or 1 teaspoon of chipotle chili powder to your dry ingredients for a subtle heat that complements the chocolate beautifully. The combination of sweet, tangy, and spicy creates a sophisticated dessert that adults especially love. For an extra kick, fold in ½ cup of chopped dark chocolate with chili.
Keto and Paleo Red Velvet Brownies
For a keto-friendly version, replace the granulated sugar with erythritol or monk fruit sweetener (use the same amount), and substitute the all-purpose flour with almond flour. Keep in mind that almond flour creates a slightly denser, more tender texture. Skip the cream cheese swirl or use full-fat cream cheese with keto-approved sweetener.
For paleo Red Velvet Brownies, use coconut sugar instead of granulated sugar, replace the butter with coconut oil, and use almond or coconut flour. The flavor will be slightly different more caramel-like from the coconut sugar but equally delicious.
Global Flavors in Red Velvet Brownies
I love bringing international influences to classic recipes. For a Mexican-inspired version, add 1 teaspoon of cinnamon and ½ teaspoon of espresso powder to enhance the chocolate notes. For an Italian twist, fold in ½ cup of chopped hazelnuts and add ½ teaspoon of almond extract alongside the vanilla.
One of my favorite variations is adding ½ cup of dulce de leche swirled through the batter along with (or instead of) the cream cheese. It creates this incredible caramel-chocolate-cream cheese combination that tastes like a fancy European pastry.
| Variation | Key Ingredients | Flavor Profile | Best For |
|---|---|---|---|
| Classic Red Velvet Brownies | Cocoa, vinegar, red coloring | Subtle chocolate, tangy | Traditional dessert lovers |
| Spicy Red Velvet Brownies | Add cayenne or chipotle | Sweet heat, complex | Adult gatherings, winter |
| Cream Cheese Swirl | Add cream cheese topping | Rich, tangy, indulgent | Special occasions |
| Keto Red Velvet Brownies | Erythritol, almond flour | Lower carb, nutty | Low-carb diets |
| Nutty Red Velvet Brownies | Add pecans or walnuts | Crunchy, textured | Texture lovers |
| Espresso Red Velvet Brownies | Add espresso powder | Deep chocolate, sophisticated | Coffee enthusiasts |
| White Chocolate Red Velvet | Fold in white chocolate chips | Sweet, creamy | Kids, celebrations |
Serving Suggestions for Red Velvet Brownies
The way you serve Red Velvet Brownies can transform them from a simple dessert to a memorable experience. I’ve served these in countless ways depending on the occasion.
For casual gatherings, cut them into squares and dust with powdered sugar for a simple, elegant presentation. Stack them on a rustic wooden board alongside fresh berries the red of the brownies against the red of strawberries or raspberries creates a stunning visual.
For a decadent dessert, serve warm brownies with a scoop of vanilla ice cream or whipped cream. The contrast of temperatures and textures is irresistible. Drizzle with chocolate ganache or caramel sauce for an over-the-top treat.
Pair Red Velvet Brownies with coffee for an afternoon treat the slight bitterness of coffee cuts through the sweetness beautifully. For evening dessert, try them with a glass of sweet dessert wine like Port or a rich Cabernet Sauvignon that can stand up to the chocolate notes.
During holidays, cut them into festive shapes using cookie cutters (hearts for Valentine’s Day, stars for Christmas), or top with seasonal decorations like crushed candy canes or edible gold leaf for New Year’s celebrations.
FAQs About Red Velvet Brownies
After sharing this recipe with friends, family, and readers, I’ve heard every question imaginable about Red Velvet Brownies. Here are the most common ones.
Can I use frozen butter? You’ll need to fully melt and cool the butter anyway, so yes frozen butter works fine. Just allow extra time for melting, and make sure it’s not too hot when you add it to the sugar or it will cook the eggs.
How do I fix overcooked Red Velvet Brownies? If they’re slightly dry, brush the top with simple syrup (equal parts sugar and water, heated until sugar dissolves) or melted butter while still warm. For serving, pair with ice cream or whipped cream to add moisture. Next time, reduce baking time by 3-5 minutes.
Is this recipe safe for pregnant women? The eggs are fully cooked through baking, so yes, these brownies are safe during pregnancy. If you’re concerned about the food coloring, you can use natural alternatives like beet juice, though it won’t give quite the same vibrant red color.
Can I make these without food coloring? Absolutely. You’ll end up with delicious chocolate brownies that have a slight reddish tint from the vinegar-cocoa reaction. They won’t be bright red, but they’ll taste just as good.
Why are my Red Velvet Brownies cakey instead of fudgy? This usually happens from overmixing the batter after adding flour, using too much flour, or overbaking. Make sure you’re measuring flour correctly (spoon and level), mixing just until combined, and checking for doneness at 25 minutes.
Can I double this recipe? Yes, double all ingredients and bake in a 9×13-inch pan. The baking time will increase to 30-35 minutes. Check with the toothpick test to ensure they’re done.
What’s the difference between red velvet cake and Red Velvet Brownies? Red velvet cake uses buttermilk and more flour, creating a lighter, airier texture. Red Velvet Brownies have a higher butter-to-flour ratio and no leavening agent beyond the eggs, resulting in that dense, fudgy texture characteristic of brownies.
Conclusion
Red Velvet Brownies hold a special place in my kitchen repertoire because they represent everything I love about baking they’re approachable yet impressive, traditional yet adaptable, and they bring people together over something undeniably delicious. That first pan I made for my friend’s birthday was just the beginning. Since then, I’ve made these brownies for potlucks, holidays, quiet Sunday afternoons, and moments when I just needed something sweet to brighten the day.
Fire up your oven and try these Red Velvet Brownies tonight! Whether you stick with the classic version or experiment with one of the variations, I promise you’ll have a dessert that looks as good as it tastes. The best part? You’ll have it ready in under 45 minutes from start to finish.
These brownies have become a favorite among the FoodFansy community, joining the thousands of home cooks who’ve discovered that impressive desserts don’t require professional skills just good ingredients, clear instructions, and a little love. Join our community of passionate bakers who’ve fallen for this recipe!
If you enjoyed this recipe, be sure to share it with your friends or save it for later! I’d love to see your unique twist feel free to post your photos on Pinterest!

Red Velvet Brownies – Fudgy, Moist & Irresistibly Delicious
- Total Time: 43 minutes
- Yield: 9 brownies 1x
- Diet: Vegetarian
Description
These Red Velvet Brownies are rich, fudgy, and full of that classic red velvet charm. Perfect for any celebration or sweet craving!
Ingredients
1/2 cup unsalted butter, melted
1 cup granulated sugar
2 large eggs
1 tsp vanilla extract
1 tbsp red food coloring
1 tsp white vinegar
3/4 cup all-purpose flour
1/4 cup cocoa powder
1/4 tsp salt
Optional: 1/2 cup cream cheese for swirl
Instructions
1. Preheat oven to 350°F (175°C).
2. Line an 8×8-inch pan with parchment paper.
3. Whisk melted butter and sugar together.
4. Add eggs, vanilla, vinegar, and red coloring.
5. Mix dry ingredients and fold into wet mix.
6. Pour into pan and swirl cream cheese if using.
7. Bake 25–28 minutes or until just set.
8. Cool for 15–20 minutes before slicing.
Notes
For extra fudgy brownies, slightly underbake them.
Store at room temperature up to 4 days or freeze up to 2 months.
- Prep Time: 15 minutes
- Cook Time: 28 minutes
- Category: Dessert
- Method: Baking
- Cuisine: American
Nutrition
- Serving Size: 1 brownie
- Calories: 220
- Sugar: 18g
- Sodium: 95mg
- Fat: 10g
- Saturated Fat: 6g
- Unsaturated Fat: 4g
- Trans Fat: 0g
- Carbohydrates: 28g
- Fiber: 1g
- Protein: 3g
- Cholesterol: 55mg
Keywords: Red Velvet Brownies, Fudgy Brownies, Easy Dessert