
Red velvet marble waffles transformed my Sunday mornings forever, and I’m about to share the secret that’ll make your breakfast table the talk of the neighborhood. Tired of serving the same boring waffles that leave everyone reaching for endless syrup just to add some excitement?
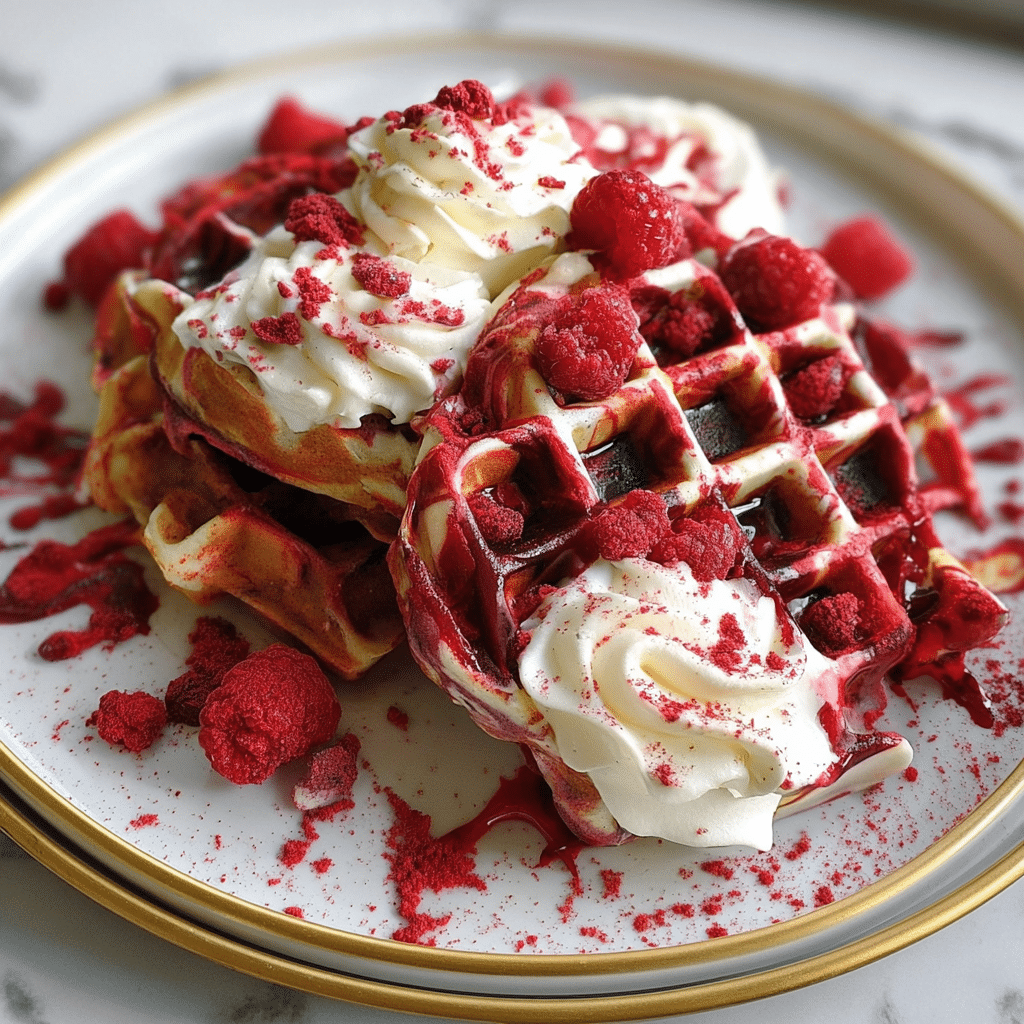
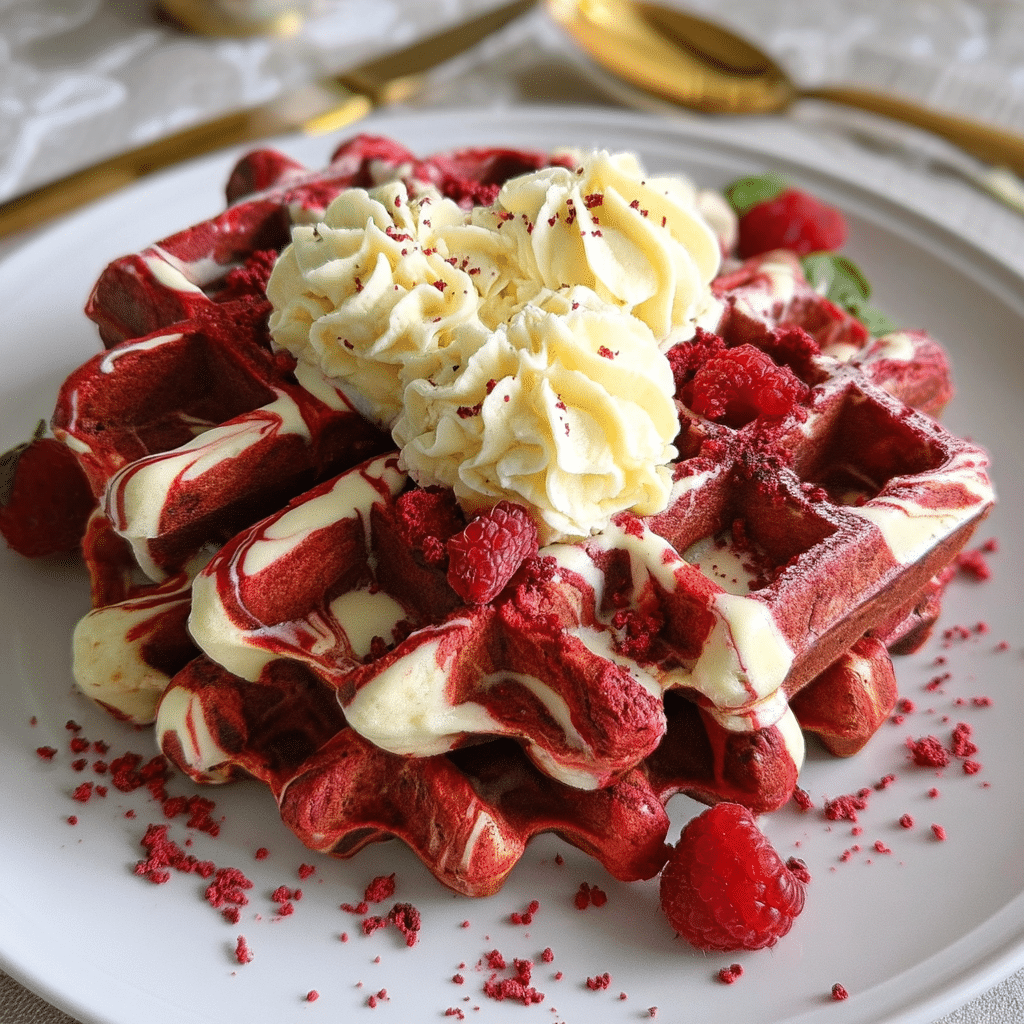
This red velvet marble waffle recipe creates stunning, Instagram-worthy waffles with rich cocoa notes, tangy cream cheese glaze, and that gorgeous marbled pattern that looks like edible art. As someone who’s spent years perfecting breakfast recipes in professional kitchens and home settings alike, I can promise you these waffles deliver both visual impact and incredible flavor.
The story behind these waffles takes me back to my grandmother’s kitchen, where she taught me that “good batters need a moment to think about what they want to become.” Her wisdom about patience and the magic of marbling two batters together inspired this recipe that combines classic red velvet cake flavors with the crispy-outside, fluffy-inside perfection of homemade waffles. We’ll cover everything from batter preparation secrets to achieving that perfect marble swirl, plus troubleshooting tips for waffle iron success.
Why This Red Velvet Marble Waffle Recipe Works
This red velvet marble waffle recipe succeeds where others fail because it balances flavor, visual appeal, and practical home cooking needs perfectly.
• Uses pantry-friendly ingredients – No specialty items required, just common baking staples you likely already have • Two complementary batters – Vanilla and red velvet create stunning contrast without overwhelming complexity
• 15-minute active prep time – Perfect for weekend mornings when you want something special without all-day commitment • Foolproof marbling technique – Simple swirling method that works every time, no artistic skills required • Make-ahead friendly – Batters can be prepped the night before for even easier morning assembly
The magic happens in the contrast between the sweet vanilla base and the slightly tangy, cocoa-rich red velvet swirl, all brought together with a luxurious cream cheese glaze that ties the flavors into breakfast perfection.
Choosing the Right Ingredients for Red Velvet Marble Waffles
Success with red velvet marble waffles starts with selecting quality ingredients that work together harmoniously.
Essential Batter Components for Red Velvet Marble Waffles
Flour Foundation: All-purpose flour provides the perfect structure for both batters. Avoid cake flour (too delicate) or bread flour (too tough) – all-purpose gives you that ideal waffle texture with crispy edges and tender centers.
Cocoa Power: Unsweetened cocoa powder creates the signature red velvet flavor. Dutch-processed cocoa works beautifully, but natural cocoa powder is perfectly fine too.
Food Coloring: Red gel food coloring delivers vibrant color without thinning your batter. Liquid food coloring requires more volume and can affect texture.
Key Technique Ingredients for Red Velvet Marble Waffles
Room Temperature Elements: Milk, eggs, and softened cream cheese blend more easily when at room temperature, creating smoother batters and glaze.
White Vinegar: This secret ingredient reacts with the cocoa to enhance the red color and adds that distinctive tangy note that makes red velvet special.
Vanilla Bean Paste: While vanilla extract works fine, vanilla bean paste adds those gorgeous black specks and more intense flavor to the vanilla batter.
Smart Substitutions for Red Velvet Marble Waffles
Swap buttermilk for regular milk (reduce baking powder by half), use coconut oil instead of butter for dairy-free needs, or replace eggs with flax eggs for vegan versions – though texture will differ slightly.
Ingredients & Prep for Red Velvet Marble Waffles
Getting your ingredients properly prepped ensures smooth batter mixing and perfect marbling results.
Vanilla Batter Prep for Red Velvet Marble Waffles
Measure dry ingredients (flour, sugar, baking powder, salt) into one large bowl and whisk thoroughly to eliminate lumps. In a separate bowl, combine room temperature milk, slightly cooled melted butter, egg, and vanilla bean paste. The key is having everything at similar temperatures so they combine smoothly without scrambling the egg.
Red Velvet Batter Essentials for Red Velvet Marble Waffles
Whisk together flour, sugar, cocoa powder, baking powder, and salt in a dedicated bowl. The cocoa can be lumpy, so take extra care with whisking. For the wet ingredients, combine milk, melted butter, egg, vanilla extract, red gel food coloring, and white vinegar. Start with 1 tablespoon of food coloring and add more if needed – you want a rich, vibrant red that will show beautifully against the vanilla batter.
Make-Ahead Prep Tips for Red Velvet Marble Waffles
Both wet ingredient mixtures can be prepared the night before and stored in the refrigerator. Bring to room temperature before combining with dry ingredients. The cream cheese for the glaze should be softened at room temperature for at least 30 minutes before mixing.
Step-by-Step Cooking Instructions for Red Velvet Marble Waffles
Follow these detailed steps for consistent, beautiful red velvet marble waffle results every time.
Pre-Cooking Prep for Red Velvet Marble Waffles
Preheat your waffle iron according to manufacturer instructions – this usually takes 3-5 minutes. Lightly grease with cooking spray or butter, ensuring even coverage. Set your oven to 200°F to keep finished waffles warm and crispy. Combine your wet and dry ingredients for each batter separately, stirring just until combined. Lumps are perfectly fine and actually preferred for tender waffles.
Cooking Method for Red Velvet Marble Waffles
Allow both batters to rest for 2-3 minutes – this crucial step lets the flour hydrate properly. Pour approximately 1/3 cup vanilla batter onto the center of your waffle iron, then immediately add 1/3 cup red velvet batter on top. Using a knife or toothpick, create 3 gentle swirls to marble the batters together. Don’t over-mix – you want distinct color ribbons, not a muddy blend.
Doneness Check for Red Velvet Marble Waffles
Close the waffle iron and cook for 3-5 minutes until steam stops escaping and the waffle releases easily when you gently lift the lid. Cooking time varies by waffle iron, but the cessation of steam is your best indicator. The finished waffle should be crispy on the outside with a tender interior.
Resting and Serving Red Velvet Marble Waffles
Transfer completed waffles to a wire rack in your 200°F oven to maintain crispiness while you cook remaining batters. Never stack them directly – they need air circulation to stay crispy. Serve immediately with warm cream cheese glaze drizzled generously over the top.
Pro Tips for Perfect Red Velvet Marble Waffles
Master these professional techniques to elevate your red velvet marble waffle game.
Avoiding Common Red Velvet Marble Waffle Mistakes
Don’t Overmix: Stir each batter just until ingredients are barely combined. Lumpy batter creates tender waffles, while overmixed batter becomes tough and dense.
Temperature Control: Ensure your waffle iron is properly preheated and your ingredients are at room temperature for even cooking and smooth mixing.
Marbling Technique: Resist the urge to create elaborate swirls. Three gentle motions with a knife create beautiful marble patterns without muddying the colors.
Essential Tool Recommendations for Red Velvet Marble Waffles
Invest in a quality waffle iron with adjustable temperature settings for consistent results. A large whisk makes batter preparation easier, while a ladle or large spoon ensures consistent batter portions. Wire cooling racks are essential for maintaining crispiness.
Storage & Reheating Red Velvet Marble Waffles
Cool waffles completely before storing in airtight containers for up to 3 days, or freeze for up to 3 months. Reheat in a toaster or 350°F oven for 2-3 minutes to restore crispiness. Never microwave – it makes them soggy.
Flavor Variations for Red Velvet Marble Waffles
Transform your basic red velvet marble waffle recipe with these creative adaptations.
Chocolate Lover’s Red Velvet Marble Waffles
Add 2 tablespoons mini chocolate chips to the red velvet batter for extra chocolate intensity. For an adult twist, substitute 1 tablespoon of the milk with coffee or espresso for mocha marble waffles.
Seasonal Red Velvet Marble Waffle Variations
Holiday Spice: Add 1/2 teaspoon cinnamon and 1/4 teaspoon nutmeg to the red velvet batter for warm winter flavors.
Citrus Twist: Replace vanilla extract with lemon or orange extract in the vanilla batter for bright, fresh notes that complement the rich red velvet.
Dietary-Friendly Red Velvet Marble Waffle Options
| Dietary Need | Substitution | Notes |
|---|---|---|
| Gluten-Free | 1:1 gluten-free flour blend | May need extra 1-2 tbsp milk |
| Dairy-Free | Coconut milk + coconut oil | Use vegan cream cheese for glaze |
| Lower Sugar | Reduce sugar by half, add stevia | Adjust glaze sweetness accordingly |
| Egg-Free | 2 flax eggs (2 tbsp ground flaxseed + 6 tbsp water) | Texture will be slightly denser |
Serving Suggestions for Red Velvet Marble Waffles
Elevate your red velvet marble waffle presentation with these complementary accompaniments.
Fresh Berry Medley: Strawberries, raspberries, and blackberries add natural sweetness and beautiful color contrast against the red and white marbled pattern.
Whipped Cream Variations: Classic vanilla whipped cream, cream cheese whipped cream, or even chocolate whipped cream all pair beautifully with these rich waffles.
Beverage Pairings: Strong coffee or espresso balances the sweetness, while champagne or prosecco makes these perfect for special occasion brunches. For non-alcoholic options, try fresh orange juice or vanilla-flavored milk.
FAQs About Red Velvet Marble Waffles
Can I make red velvet marble waffle batter ahead of time? Yes, but combine wet and dry ingredients just before cooking for best results. You can prep wet and dry ingredients separately up to 24 hours ahead.
Why aren’t my red velvet marble waffles crispy? Ensure your waffle iron is fully preheated, don’t overcrowd with batter, and keep finished waffles on a wire rack in a warm oven rather than stacking them.
Can I freeze red velvet marble waffle batter? While you can freeze the batter, fresh batters produce better texture and rise. Instead, make extra waffles and freeze those for quick reheating.
How do I fix red velvet marble waffles that turned out too dense? This usually indicates overmixing. Next time, stir just until ingredients are barely combined and let the batter rest before cooking.
Is this red velvet marble waffle recipe safe during pregnancy? Yes, all ingredients are pregnancy-safe when using pasteurized dairy products and cooking waffles to proper doneness.
Conclusion
These red velvet marble waffles bring restaurant-quality breakfast magic to your home kitchen with surprisingly simple techniques and everyday ingredients. The gorgeous marbled pattern, rich flavors, and creamy glaze create a memorable meal that’s perfect for special occasions or whenever you want to treat yourself and your loved ones to something extraordinary.
Fire up your waffle iron this weekend and create these stunning red velvet marble waffles – your family will be asking for them every Sunday morning! Join the thousands of home cooks who’ve already fallen in love with this recipe by sharing your results on social media.
Ready for more show-stopping breakfast recipes? Try our [Cinnamon Roll French Toast Bake] or explore our [Ultimate Pancake Guide] for more weekend morning inspiration that’ll make your kitchen the heart of every gathering!
If you enjoyed this recipe, be sure to share it with your friends or save it for later!
I’d love to see your unique twist—feel free to post your photos on Pinterest!
Print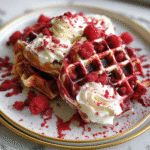
Red Velvet Marble Waffles: 5 Secrets for Perfect Breakfast Magic
- Total Time: 20 min
Description
Red Velvet Marble Waffles create stunning swirled patterns perfect for birthday breakfasts or Valentine’s Day. Ready in just 20 minutes with a delicious cream cheese glaze!
Ingredients
Vanilla Batter:
1 cup All-purpose flour
2 tablespoons Sugar
2 teaspoons Baking powder
1/2 teaspoon Salt
1 cup Milk Room temperature
1/4 cup Melted butter Cooled slightly
1 large Egg Room temperature
1 teaspoon Vanilla bean paste Or vanilla extract
Red Velvet Batter:
1 cup All-purpose flour
2 tablespoons Sugar
2 tablespoons Cocoa powder Unsweetened
2 teaspoons Baking powder
1/2 teaspoon Salt
1 cup Milk Room temperature
1/4 cup Melted butter Cooled slightly
1 large Egg Room temperature
1 teaspoon Vanilla extract
1–2 tablespoons Red gel food coloring Gel works best
1 teaspoon White vinegar For tang
Cream Cheese Glaze:
4 ounces Cream cheese Softened
1/4 cup Powdered sugar Sifted
2–3 tablespoons Milk Adjust for consistency
1/2 teaspoon Vanilla extract
Instructions
Preheat your [waffle iron] according to manufacturer’s instructions and lightly grease with cooking spray or [butter]. Grandma always said “A hot iron makes crispy waffles – patience is the secret ingredient!” She’d test it with a drop of water that should sizzle immediately.
In a large bowl, whisk together [flour], [sugar], [baking powder], and [salt] for the vanilla batter. In another bowl, combine [milk], [melted butter], [egg], and [vanilla bean paste]. Pour wet ingredients into dry and stir until just combined. Grandma’s rule: “Lumps are your friends – they make tender waffles!”
For the red velvet batter, whisk [flour], [sugar], [cocoa powder], [baking powder], and [salt] in a separate bowl. Mix [milk], [melted butter], [egg], [vanilla extract], [red gel food coloring], and [vinegar] in another bowl. The vinegar is Grandma’s secret – “It makes the red pop and adds that special tang!” Combine wet and dry until just mixed.
Let both batters rest for 2-3 minutes. Grandma taught me this crucial step: “Good batters need a moment to think about what they want to become. This makes them tender and perfect.” She’d use this time to reheat her coffee and share a story.
Pour about 1/3 cup [vanilla batter] onto the waffle iron, then add 1/3 cup [red velvet batter] on top. Use a knife or toothpick to gently swirl the batters together – just 3 swirls! Grandma’s wisdom: “Think watercolor painting, not mixing paint. Too much swirling makes muddy colors.”
Close the waffle iron and cook for 3-5 minutes until steam stops escaping. Don’t peek! Grandma would tap my hand if I tried: “Patience makes perfection, Jazzy. Let the steam do its magic.” The waffles should release easily when done.
Place finished waffles on a wire rack in a 200°F oven to stay crispy while you cook remaining batters. Never stack them! “They need to breathe,” Grandma would say, “just like good bread.”
While waffles cook, beat [softened cream cheese], [powdered sugar], [milk], and [vanilla extract] until smooth and drizzly. Grandma always added a tiny pinch of salt: “It makes the sweet sing louder!” Adjust milk for perfect drizzling consistency.
Drizzle warm waffles with [cream cheese glaze] and serve immediately. Grandma’s presentation tip: “Food tastes better when it looks like love. A few berries on top never hurt either!” These are best enjoyed with someone special.
Notes
- Gel Food Coloring is Key: Liquid food coloring will thin the batter and create pink instead of red. Gel gives vibrant color without affecting texture.
- Room Temperature Ingredients: Let eggs and milk sit out for 30 minutes before starting. This helps create a smoother batter and better marble effect.
- Prep Time: 10 minutes
- Cook Time: 10 minutes
- Category: Desssert
- Cuisine: American
Nutrition
- Serving Size: 8 waffles
- Calories: 425 kcal
Keywords: Red Velvet Marble Waffles